Deepmosaic

Documentation

A guide to Deepmosaic Desktop (Windows). For the browser version, see the Web app guide

Screenshots show the English version of the app. Text typed into the sample project stays in Japanese. Tutorial videos have Japanese subtitles only. Button and menu names in this guide match the English version.

Contents

Getting startedIntroduction

Deepmosaic is a Windows desktop application that automates adding mosaic to videos with AI (deep learning) object detection. Everything from loading a video to AI detection, editing the detection results, and exporting a video with the mosaic burned in happens inside the app. This software is for applying (adding) mosaic. It has no feature for taking off mosaic from footage that already has mosaic applied, or for restoring the original footage.

This page is the guide to the Windows app (Deepmosaic Desktop). For the Web app, which runs in your browser with no installation, see the Web app guide (the differences from the Desktop app are also summarized at the end of this page).

Video guides to the basics

Desktop app (1) Detection: from loading a video to AI detection (Japanese subtitles only, about 1.5 min)
Desktop app (2) Editing: adding, correcting, and tracking mosaic (Japanese subtitles only, about 2.5 min)
Desktop app (3) Export and subscription: exporting and plans (Japanese subtitles only, about 1 min)
Desktop app (4) Mosaic detection: finding existing mosaic and reapplying it (Japanese subtitles only, about 1 min)
Web app: the basic flow in your browser, from loading a video to AI detection, editing, and export (Japanese subtitles only, about 3 to 4 min)

Workflow

  1. Load videos: from a file, a folder, or by drag and drop. Loaded videos appear on the home screen as "projects"
  2. Detect with AI: choose the detection range and targets (body areas / male faces / female faces / existing mosaic) and start. Processing runs in the background, and the queue lets you process multiple videos one after another
  3. Review and correct on the edit page: add or delete detection boxes, adjust how the mosaic looks, and check for missed detections
  4. Export: export a video with the mosaic burned in. You can also hand the detection results over to Premiere Pro

Getting startedInstallation

Get it from Microsoft Store. The button below opens the Microsoft Store listing page; select "Get" (or "Install"). You can also find it by searching for "Deepmosaic" in the Microsoft Store app (to open it directly in the Microsoft Store app, click here). Administrator rights aren't required.

Supported OS
Windows 10 (version 2004 or later) / 11 (64-bit). A macOS version is in development (System requirements)
App language
The app's screens are available in Japanese, English, and Traditional Chinese. On first launch, the language is chosen to match the Windows display language (English for any language other than Japanese, English, or Chinese), and you can switch it in the language row of the profile menu (top right) (Screen layout)
Install location
An app folder managed by Windows (can't be changed). "Deepmosaic" is added to the Start menu
Updates
New versions are delivered by Microsoft Store and installed automatically (Updates). Your settings and detection results are kept. Projects detected with versions earlier than 2.8.0 are automatically converted to the new save format (project.db in the project folder) when the app starts. During the conversion, the home screen shows "Converting detection results to the new save format (n / N)"
End User License Agreement
You review and accept it in "Before you start" when you first launch the app (Initial setup)
Get it from Microsoft Store

Windows 10 (version 2004 or later) / 11 (64-bit). Try it right after installing, with no sign-in required

End of the installer edition and switching to the Microsoft Store edition

The installer edition downloaded from our website (shown as the "installer (exe) version" in the app) will stop working after December 31, 2026. You can keep using it until then. Please switch to the Microsoft Store edition soon. Pricing, terms of use, and features stay the same.

  • What carries over: The Microsoft Store edition uses your existing project folders, settings and sign-in information, and AI models and other data as is. Your plan is tied to your account, so you can keep using it
  • From version 2.18 of the installer edition, a notice about switching appears when the app starts (if you close it with "Later", it doesn't appear again until the next launch). If you start it on or after January 1, 2027, a "discontinued" screen appears and you can't use the app
  • Until December 31, 2026, the installer edition still receives in-app updates
  1. Install the Microsoft Store edition (with the button above, or "Download from Microsoft Store" in the app's notice)
  2. Quit the installer edition, then start the Microsoft Store edition and check that your settings and projects have carried over
  3. Once it works properly, uninstall the installer edition (Uninstall). From version 2.18, the installer edition doesn't delete the settings, sign-in information, and AI models and other data shared with the Microsoft Store edition on a PC where the Microsoft Store edition is installed (the check box for deleting data isn't shown either)

If you uninstall an installer edition older than 2.18, do not select the "アプリのデータとプロジェクトフォルダを削除する" (Delete app data and project folders. This item appears in Japanese) check box on the confirmation screen (doing so also deletes the settings, detection results, and project folders shared with the Microsoft Store edition). The AI models and other data are deleted, and the Microsoft Store edition downloads them again the next time it starts. If you first update to 2.18 or later with the in-app update, they aren't deleted.

Differences between the Microsoft Store edition and the installer edition

The available features, accounts, and plans in the Microsoft Store edition are the same as in the installer edition (including subscribing to a plan, changing it, and canceling your subscription from the app). Only the following points are different.

  • Updates: The in-app update dialog and "File ▸ Check for updates" aren't available in the Microsoft Store edition (Updates)
  • Bundled third-party software: In the Microsoft Store edition, the package contents are read-only and signed, so you can't replace the bundled FFmpeg in place (you can still use FFmpeg that you obtained or modified separately under the terms of the GPL; see Bundled third-party software and licenses)
  • Premiere Pro integration: To use Premiere Pro integration with the Microsoft Store edition, you need to update the plug-in to version 0.1.21 or later. Select "Import into Premiere Pro" and follow the on-screen instructions to update it (Premiere Pro integration)
  • Uninstall: The confirmation screen has no check box. Your settings and sign-in information (%USERPROFILE%\.deepmosaic) and your project folders are left on your PC. After uninstalling, delete any folders you no longer need in File Explorer (note that deleting a project folder also deletes any exported videos saved in it)

Getting startedInitial setup

Agreeing to the End User License Agreement

On first launch, the "Before you start" dialog appears before the initial setup. Review the End User License Agreement and the Terms of Service (you can read the full text from the links in the dialog), select the "I agree to the End User License Agreement and the Terms of Service" check box, and press "Agree and continue" to start the setup. If you choose "Decline (quit)", the app quits. When the End User License Agreement or the Terms of Service is revised, "The End User License Agreement and Terms of Service have been updated" appears when the app starts, so agree to them again.

Downloading data

The detection engine and the lightweight detection model are included in the app. On first launch, the model data needed for AI detection is downloaded automatically (About 10 GB for AI models and other data during initial setup). During the download, the overall progress (%) and the time remaining are shown, and you can't do anything else until it finishes. Depending on your connection speed, it can take anywhere from a few minutes to more than ten minutes.

Some data, such as the high-accuracy model, is fetched in the background after you reach the home screen. Until that finishes, detection uses the lightweight model, and the detection options screen shows "Preparing the high-accuracy model (about N MB left) — the lightweight model will be used for detection this time."

When the download finishes, a test run of detection and export ("Test run in progress…") starts automatically. If a problem is found, only the affected data is downloaded again automatically. When it is done, the app moves to the home screen on its own and shows "Installation complete" (you don't need to press "Continue").

What you can't do during setup

Until the download and the test run finish, all menu items except "File ▸ Quit" and "Help" (other than "Tutorials") are disabled, and closing the window or reloading the screen is also blocked. If you quit partway through, the app fetches only the missing data and resumes the next time it starts.

If an error appears

Integrity check failed
A downloaded file is corrupted. Press "Download again" to fetch only the affected file again (the app retries automatically up to 2 times)
Missing runtime dependency
A Windows component that the detection engine needs was not found. Contact us through "Open support form", and include details of your environment (such as the OS version)
Self-test failed
The download finished, but the test run of the detection engine failed. Contact us through "Open support form", and include the message that was shown and details of your environment (such as the OS version)
Download is stuck
Check your connection and press "Retry", or restart the app. Files that were already downloaded are used as they are, and only the missing ones are downloaded again

Preparing GPU acceleration (PCs with an NVIDIA GPU only)

On PCs with an NVIDIA GPU, the acceleration components (from NVIDIA; about 1.7 GB to download, about 2.4 GB after extraction) are fetched automatically the first time. They are not fetched on PCs without an NVIDIA GPU. Until they are fetched, the app runs on the CPU (the features are the same, but processing is slower). While they are being fetched, the progress appears in "GPU acceleration" at the bottom right of the screen, and once they are fetched, later detections run on the GPU.

If fetching fails, the indicator at the bottom right shows 'Failed to get the files. Press "Retry", or they will be fetched again the next time the app starts'. Check your connection and press "Retry", or restart the app (the files are fetched again automatically the next time it starts). For how these are handled as third-party software, see Bundled third-party software and licenses.

Getting startedScreen layout

From top to bottom, the window consists of the menu bar, the screens (Home / Detection options / Detection / Edit), and the footer.

Menu bar: "File"

Select a video file
Selects one video and loads it (Loading videos)
Select a video folder
Loads all the videos directly inside a folder at once. Use this when you want to detect multiple videos together
Select a project folder
Changes the save location for detection results and edit data (Project folder)
Import project
Imports an exported project (.zip) (Exporting and importing projects)
Check for updates
Checks for updates to the app, the engine, and the models and assets (Updates). Available only in the installer edition
Quit
Quits the app. Any detection in progress is interrupted, and the next time the app starts, you can resume it from "Interrupted detections" on the home screen (AI detection). For exports, see Queue

Menu bar: "Queue"

Lets you check and manage the waiting list of detection and export jobs in one place. A badge shows the number of running and waiting jobs (Queue).
Menu bar: "Help"

Licenses
Shows the licenses of the bundled third-party software and the third-party software downloaded on first launch. The list shows only the software names; press a row to open its details (Bundled third-party software and licenses). You can also check your version and its distribution type here
Documentation
Opens this page in your default browser
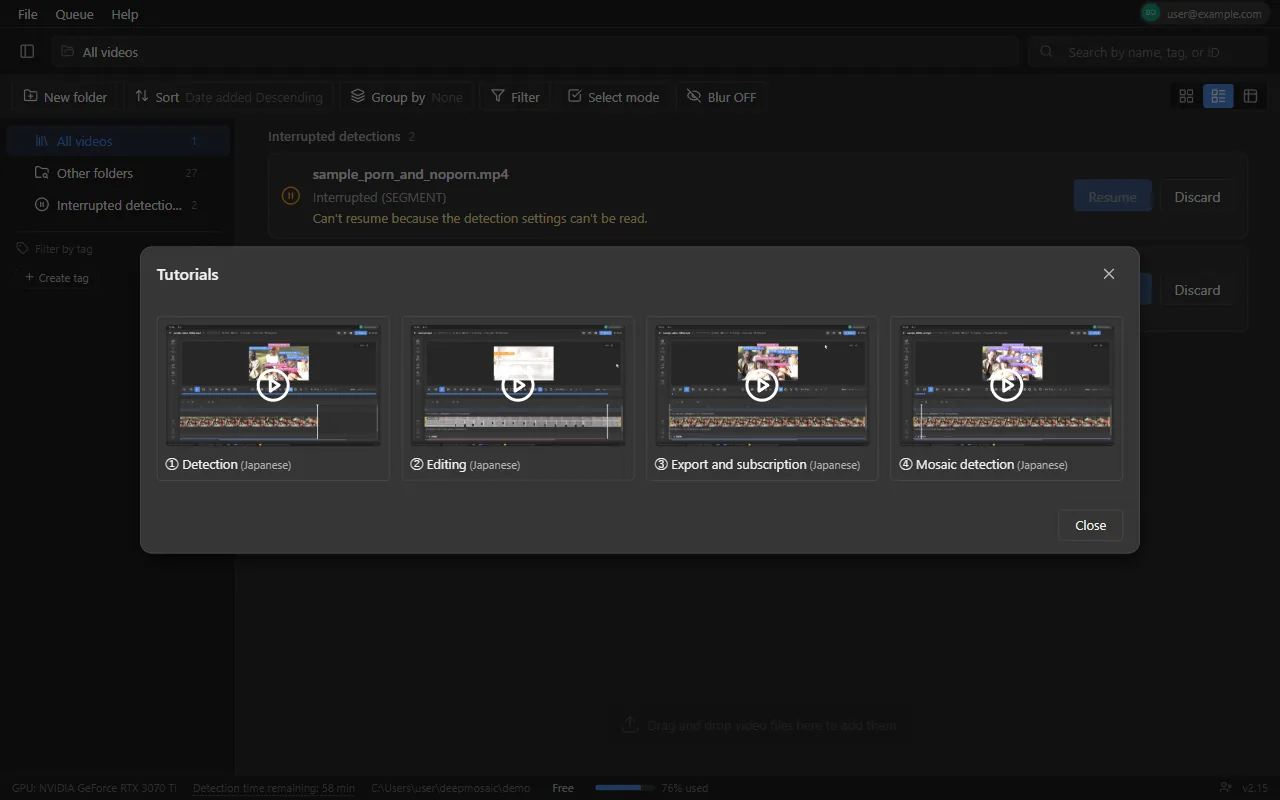
Tutorials
Opens the list of tutorial videos. Select a card to play that video in the app, and select "Back to list" to go back to the list. You can use it on paid plans too (videos that can't be loaded aren't listed). Not available during the initial setup
The list of videos opened from Help ▸ Tutorials in the menu bar
The list of tutorial videos. Select a card to play it

"Licenses" and "Documentation" in "Help" are available even during the initial setup. In versions before 2.13 and in 2.14, these two items were also in the profile menu.

Display language

Just below the "Theme" row in the profile menu (top right), there are 3 buttons: Japanese, English, and Traditional Chinese, each written in its own language. When you press one, the screen language switches immediately, and the app also uses the selected language the next time it starts.

Profile menu (top right)

Click your avatar (or user name) to open it. It shows your sign-in status and plan, and has items to sign in, open your organization (when you belong to an organization on a business plan), manage your plan subscription (the plan selection screen opens on the Free plan, and the payment portal opens on a paid plan), contact us, sign out, switch the theme, and switch the display language. "Licenses" and "Documentation" are in "Help" on the menu bar.
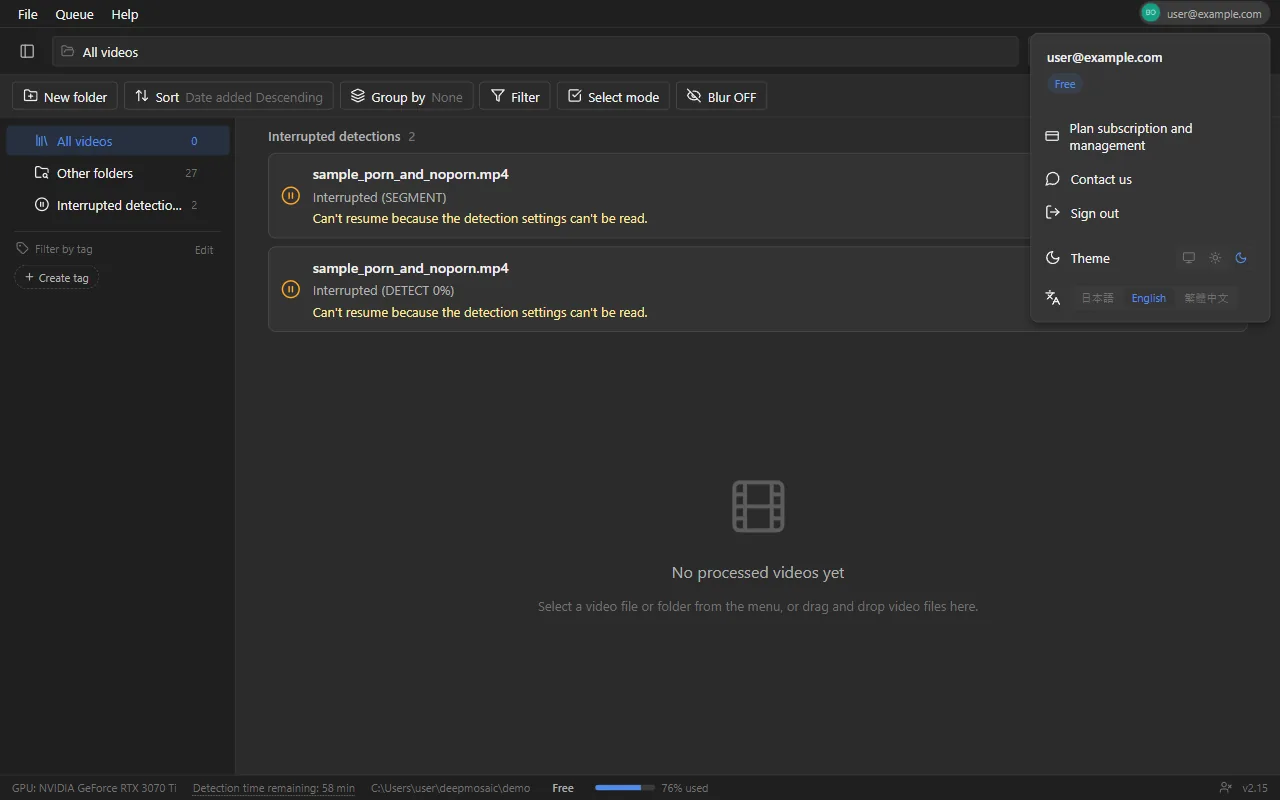
The profile menu opened at the top right of the home screen
The profile menu. Change your plan, contact us, and switch the theme from here

Footer

GPU
The name of the GPU used for detection. If no GPU is recognized, "None" is shown and processing runs on the CPU
Plan
Paid (on a paid plan) / Free / Not signed in / Limit reached (you have reached your limit)
Time remaining
"Remaining this month" (paid plan) or "Detection time remaining" (free), with a bar showing the percentage used. For an account with an unlimited free allowance, "Detection time remaining: unlimited" is shown. On the Free plan, the number of days left is also shown (for example, "Detection time remaining: 1 h 30 min · 5 days left"). On the Free plan, this works as a button: it opens the plan selection screen when you're signed in, and the sign-in screen when you're not. See How usage time is measured
Sign in to get 2 h
A button shown when you're not signed in. Signing in (free) raises the limit on available detection time from 30 min to 2 hours
Project folder
The path of the current save location
Delete account
An icon shown on the home screen when you're signed in (Deleting your account)
Version
The version of Deepmosaic you're using (include it when you contact us)

Getting startedTheme (light / dark)

Use "Theme" in the profile menu to switch between "Use OS setting", "Light mode", and "Dark mode". By default, the app follows the OS setting. Your choice is saved, and the app uses the same theme the next time it starts. The video preview and the detection box colors stay the same regardless of the theme.
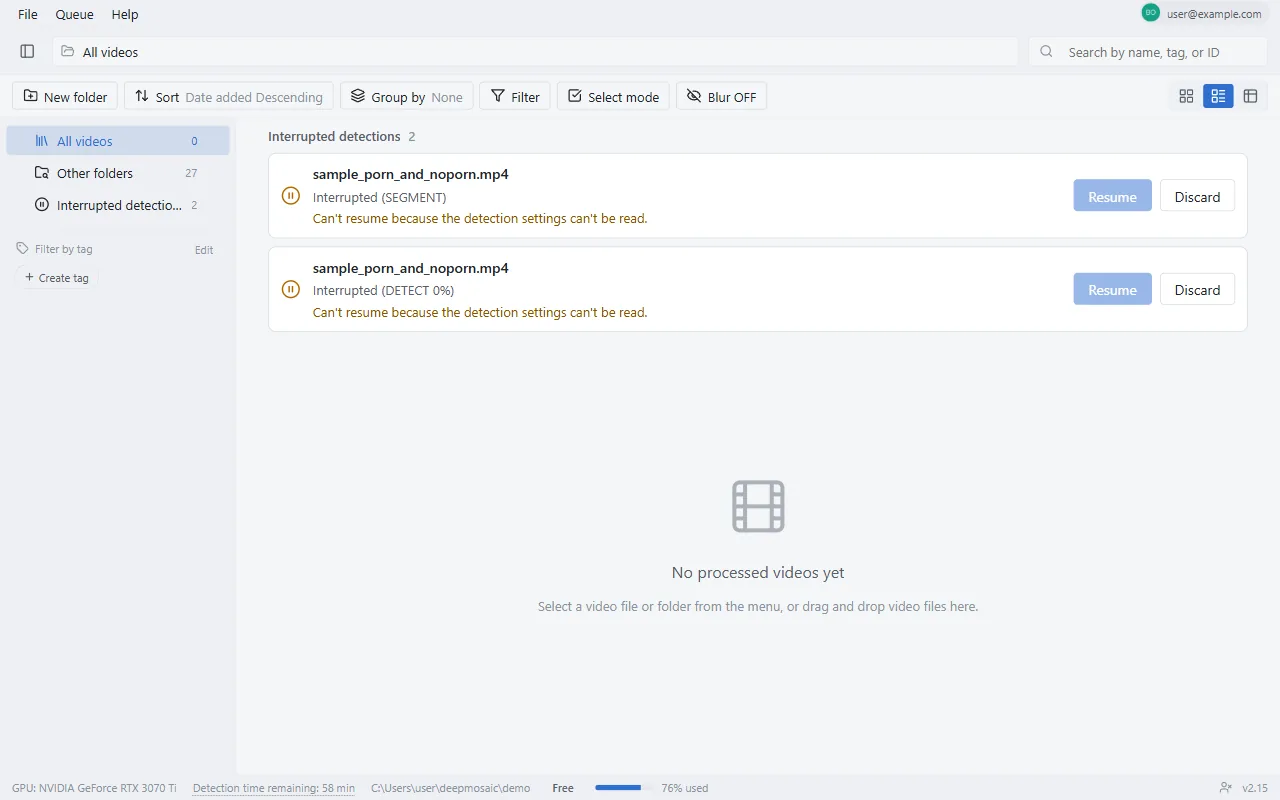
The home screen in light mode

AccountSign-in and license

You can use the app for free for 7 days from the day you first launch it. Right after downloading, you can try it for up to 30 minutes in total without signing in. Creating a free account raises this to up to 2 hours in total. On a single PC, the free allowance is capped at 2 hours in total, even if you sign up again with a different account. The free period ends after 7 days or when you reach the total limit, whichever comes first. No credit card is required. The individual plan (Hobby) is paid by credit card (Enterprise is paid by bank transfer against an invoice; see Organization management).

Signing in increases your available detection time even on the Free plan, and on PCs with an NVIDIA GPU, it lets you detect with the high-accuracy model (when you're not signed in, detection uses the lightweight model).

  • Free: Import up to 2 hours of video in total for 7 days from the day you first launch it (30 minutes without signing up; no credit card required)
  • Paid plans: See the pricing page for the included hours of each plan

There are no overage charges. If you use up the included hours, your allowance is restored on the next renewal date. If you need more than that, please ask us about Enterprise, our plan for businesses (custom quote).

Signing in

  1. Press "Sign in" in the profile menu (top right), or "Sign in to get 2 h" in the footer.
  2. Press "Sign in" on the sign-in screen. The authentication screen opens in your browser.
  3. On the authentication screen, enter your email address, then enter the 6-digit confirmation code sent to your email (no password is needed).
  4. Once authentication is complete, you return to the app automatically and are signed in.
Sign in
Sign in by entering the 6-digit confirmation code sent to your email address on the authentication screen. No password is needed. If you're new, a free account is created automatically the first time you sign in
Have an organization code? (business)
Press this to switch to the "Organization sign-in" screen. Enter the organization code you received from your admin in the "Organization code" field and press "Sign in" to sign in and join the organization at the same time (Organization management). Press "Back" to return to the previous screen

Starting with 2.13, the sign-in screen has these two entry points. You enter your email address on the authentication screen in your browser. If you have been signing in with a password, you can still sign in to the same account as before by selecting "Sign in" and entering a confirmation code with the same email address (your plan and usage time carry over unchanged).

Your sign-in information is encrypted and stored on your PC, and you're signed in automatically from then on. To sign out, use "Sign out" in the profile menu. To switch to a different account, sign out and then sign in again.

One device at a time

You can run the app on only one device at a time with the same account. If you sign in on another PC, "Your account is currently signed in on another device" appears. If you select "Continue", the previous device is signed out the next time the app starts on it. When you replace your PC, just sign in on the new one to switch over (to move your projects, see Exporting and importing projects).

When you're offline

Your sign-in and plan are checked over the internet when the app starts. Detection, editing, and export work without a connection. If the app can't connect to the authentication server at startup, a banner such as "Can't connect to the network (you can keep using local features)." appears at the top of the screen, but you can keep using the app with your most recent sign-in status and plan. If the banner says "Sign in again.", sign in again from the profile menu.

AccountChanging your plan

You can subscribe to a paid plan from the profile menu in the Windows app, or on the Subscribe to a paid plan page with your Web app account. Either way, the subscription applies to both the Desktop app and the Web app for the same account.

To subscribe or change your plan in the app, use the profile menu at the top right of the screen.

  1. Sign in to the app and click the profile icon at the top right of the screen.
  2. Select "Plan subscription and management". On the Free plan, the plan selection screen opens; on a paid plan, the payment portal opens in your browser.
  3. In the portal, you can subscribe to a paid plan, change your payment method (credit card), or cancel your subscription.
  4. When you return to the app after completing the process, your license status is updated automatically.

To subscribe in the Web app, choose a plan on the Subscribe to a paid plan page, press "Subscribe", and sign in with the same account as the app to go to the credit card payment screen. You can also change your payment method, change your plan, or cancel your subscription from "Plan subscription and management" in the profile menu at the top right of the Web app screen.

You can cancel your subscription at any time, with no cancellation fee or other penalty. After you cancel, you can keep using the app within the free allowance.

Pro is no longer accepting new subscriptions. If you're currently subscribed, you can keep using it. To change your plan or cancel your subscription, follow the paid plan steps above.

Choose a plan

The Hobby card shows the monthly price (excluding and including tax), the included hours, and the one-device-at-a-time limit. Each account can have only one subscription to the same plan. Press "Choose this plan" to open the payment screen in your browser; when payment is complete, "Payment complete" appears in the app. For Enterprise, contact us from "Ask about deployment" (pricing is by quote).
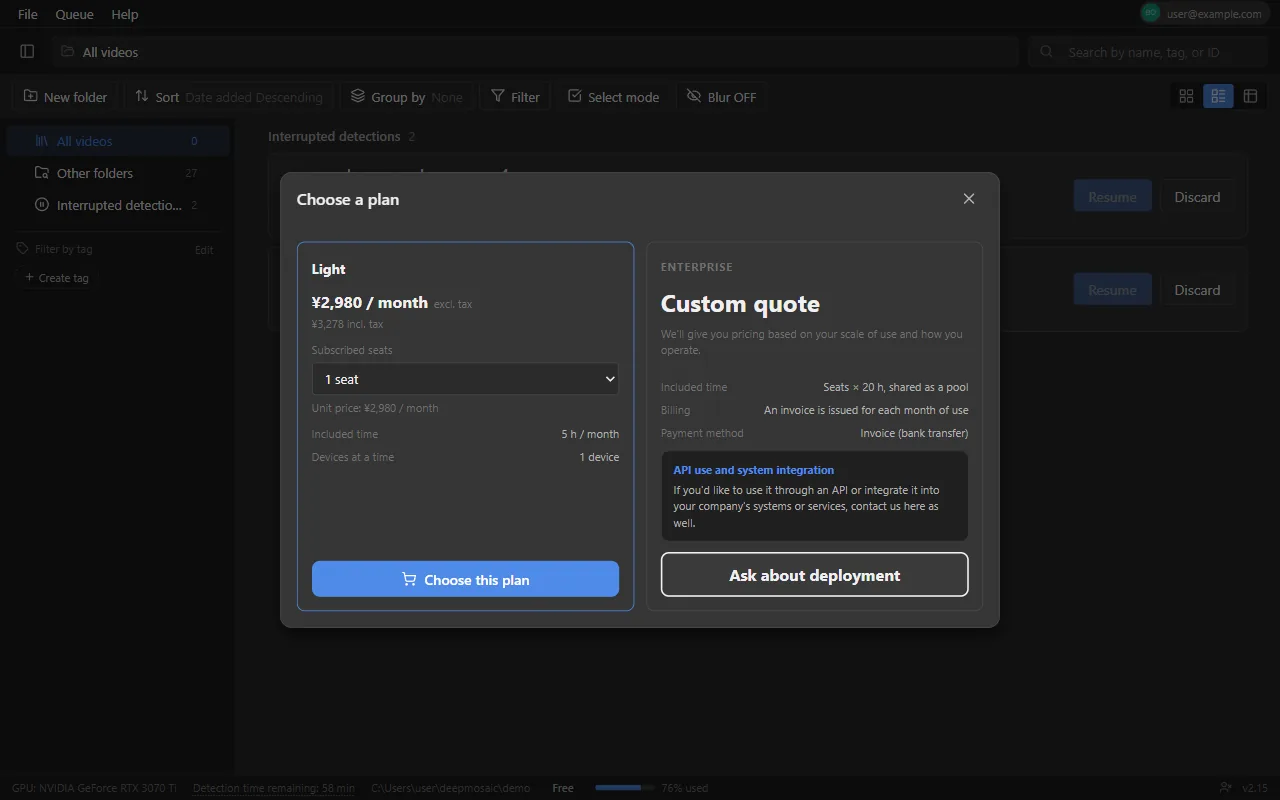
The "Choose a plan" dialog, showing the monthly price, included hours, and subscribed seats for each plan
The plan selection screen. Prices and included hours are the same as on the pricing page

When changes and cancellations take effect

Plan change
When you return to the app from the portal, "Changed your plan to X." appears. If it takes a while to apply, wait while "Applying your changes…" is shown, or close it for now and you'll be notified later
Scheduled cancellation
"Your subscription cancellation has been received" appears, and the expiration date ("Valid until X") is shown in the profile menu. You can keep using your paid plan until that date, and you can also withdraw the cancellation from the portal
Expiration
If you launch the app after the expiration date, "Your plan has expired" appears and you're switched to the Free plan. If you subscribe again, your plan is restored
When you're running low
When you have used 80% of your free available detection time, the app notifies you once per launch with "You have used N% of your free available detection time (… left)." (followed by "You can check plans from the time remaining at the bottom of the screen." if you're signed in, or by the time you gain by signing in if you're not). Pressing the time remaining at the bottom of the screen opens the plan selection screen if you're signed in, or the sign-in screen if you're not. On the Free plan while signed in, "… remaining · View plans" also appears on the detection complete screen and in the confirmation before export
When you reach the limit
When you reach the total limit or the free period ends, a dialog prompting you to change your plan (or to sign in, if you're not signed in) appears when you try to start detection. Detection or export already in progress doesn't stop
Free period display
The time remaining at the bottom of the screen also shows the number of days left in the free period

AccountDeleting your account

When you're signed in, you can delete your account from the icon shown on the right side of the footer on the home screen. This action can't be undone.
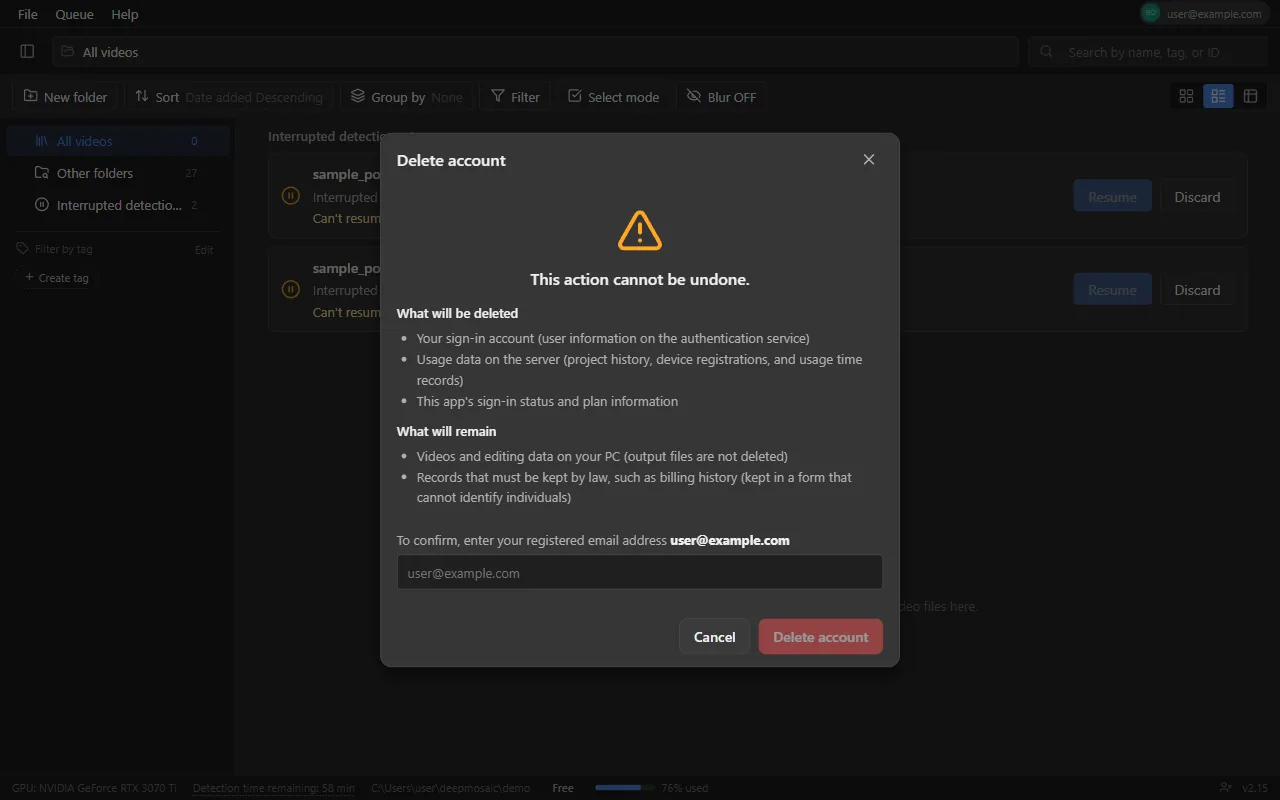
  1. If you're subscribed to a paid plan, first cancel your subscription from "Plan subscription and management" (if a subscription remains, "You still have an active plan subscription." appears and you can't delete your account).
  2. Press the "Delete account" icon in the footer, and enter your registered email address on the confirmation screen.
  3. "Account deleted" appears, and a confirmation email is sent to you. The app returns to the signed-out state.
What is deleted
The account you use to sign in (your user information in the authentication service) / usage data on the server (project history, device registrations, and your account's usage time records) / this app's sign-in status and plan information
What remains
Videos and edit data on your PC (output files are not deleted) / records we are required by law to keep, such as billing history (kept in a form that can't identify individuals) / anonymous per-device usage time (used to manage the free allowance; the link between your account and the devices you signed in on is removed, and only the device records remain after you close your account; Privacy Policy, Section 10)
The account deletion confirmation dialog, with lists of what is deleted and what remains, and an email address field
Account deletion confirmation screen

AccountContact us

To report a problem or ask a question, use "Contact us" in the profile menu (sign-in required). The email address you're signed in with is filled in automatically. Enter your message and press "Send", and "We've received your inquiry. It may take a little while for us to reply." appears. Replies are sent to your registered email address.

When you report a problem, include the version shown in the footer, what you were doing, and the message that appeared. This helps us investigate faster. If you can't sign in, use the contact form.
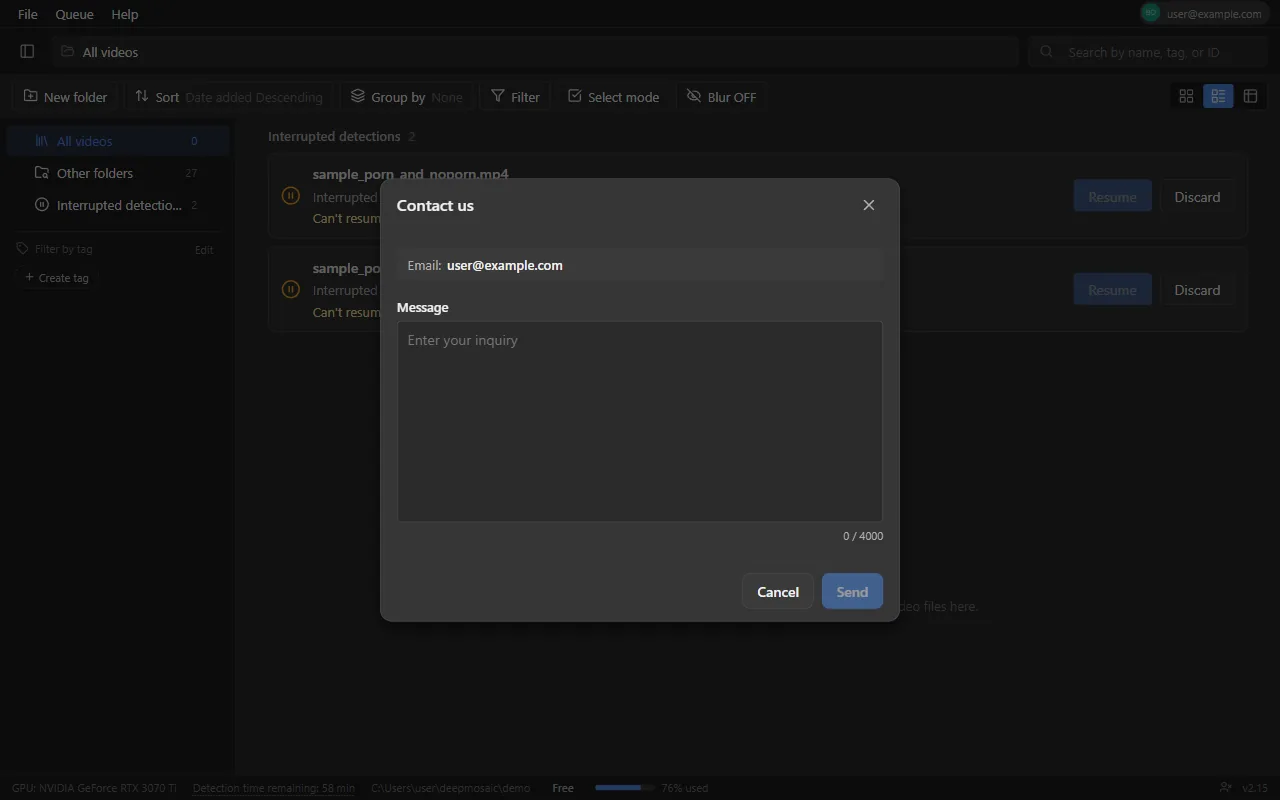
The Contact us dialog, with the signed-in email address and a message field
Contact us dialog

Loading and detectionLoading videos

There are 3 ways to load videos. Whichever you use, the detection options screen opens right after loading.

Select a video file
From the "File" menu. Select one video in the dialog
Select a video folder
Loads the videos in a folder all at once. Only files directly in the selected folder are included (subfolders are not), up to 100 files in ascending order of file name. If there are more than 100, only the first 100 are loaded and you are notified
Drag and drop
Drop video files directly onto the home screen. You can drop several at once, and files that aren't videos are ignored automatically

If you haven't loaded any videos other than the sample yet, an "Add a video to get started" box appears below the list. Drag and drop a video file, or choose one with "Select video" (the same as "Select a video file" in the menu).
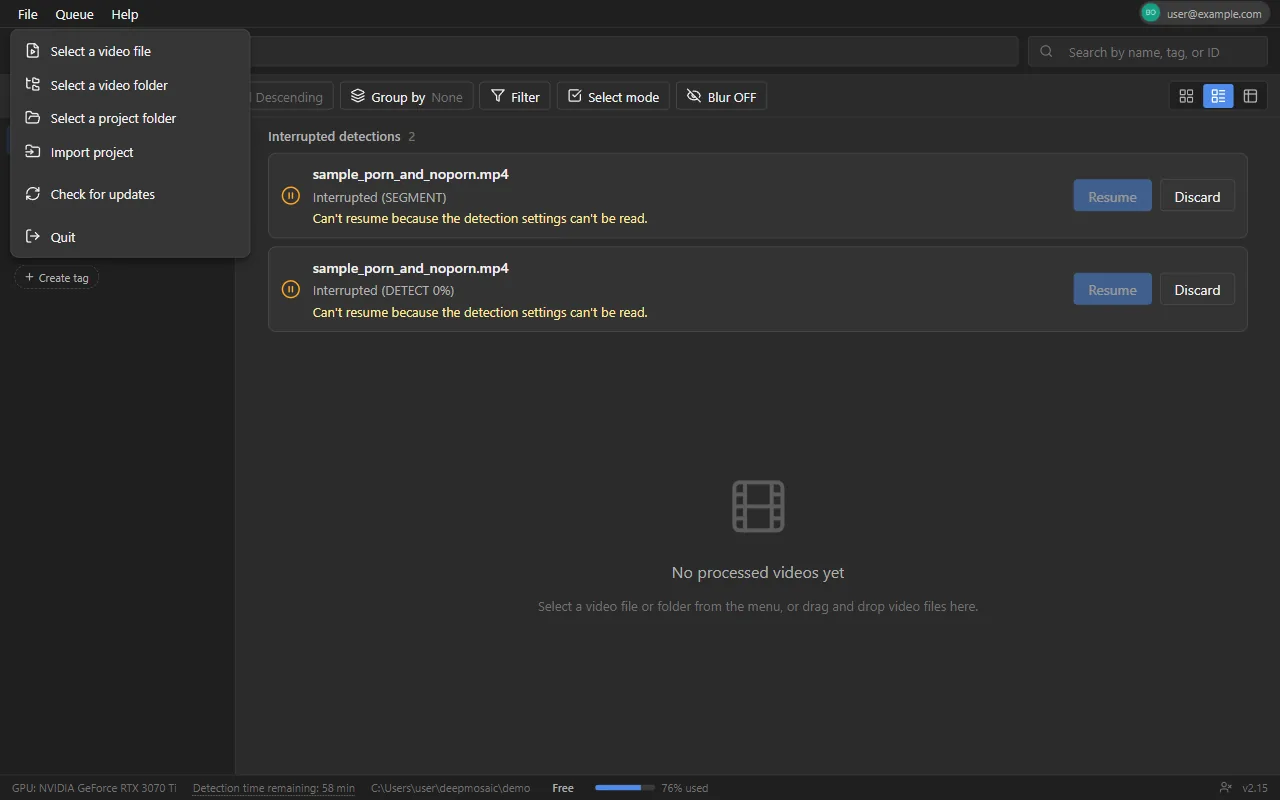
The home screen with the "File" menu open
The "File" menu. You can also load videos by dragging and dropping them onto the screen. To change where processing results are saved, use "Select a project folder"

Supported formats: mp4 / avi / mkv / mov / wmv / flv / webm / ts / m2ts / m4v / mpg / mpeg (file extensions aren't case-sensitive). When loading from a folder, files that can't be read as video are excluded even if their extension matches, and you are notified of how many were excluded.

When you load several videos at once, the first one appears on the detection options screen. When you press "Start", those settings are applied to all the rest, and the videos are processed in order. However, the detection range applies only to the first video; from the second video on, the whole video is processed. If you load videos while detection is already running, they are also added to the waiting list and start automatically as soon as the current processing finishes (Queue).

Project folder

Each video you load is managed as a project, and its detection results, edit data, and thumbnails are saved in a project folder for that video. By default, project folders are placed in C:\Users\<user name>\deepmosaic. The folder is created automatically if it doesn't exist. You can change this to another location (such as an external drive) with "File ▸ Select a project folder" in the menu, and videos loaded after the change are saved in the new location.

"All videos" on the home screen lists the projects in the current project folder that were created with the account you're signed in with. If there are projects saved in another project folder, an "Other folders" row with a count appears in the left sidebar (it doesn't appear when the count is 0). Select it to see those projects in the same list.

Videos in "Other folders" belong to a different project folder, so folders and tags aren't available for them (you also can't drag them to folders in the sidebar). To organize them, select "Switch to this project folder" from the video card menu (it also opens with a right-click). The folder where that video is saved then becomes the current project folder.
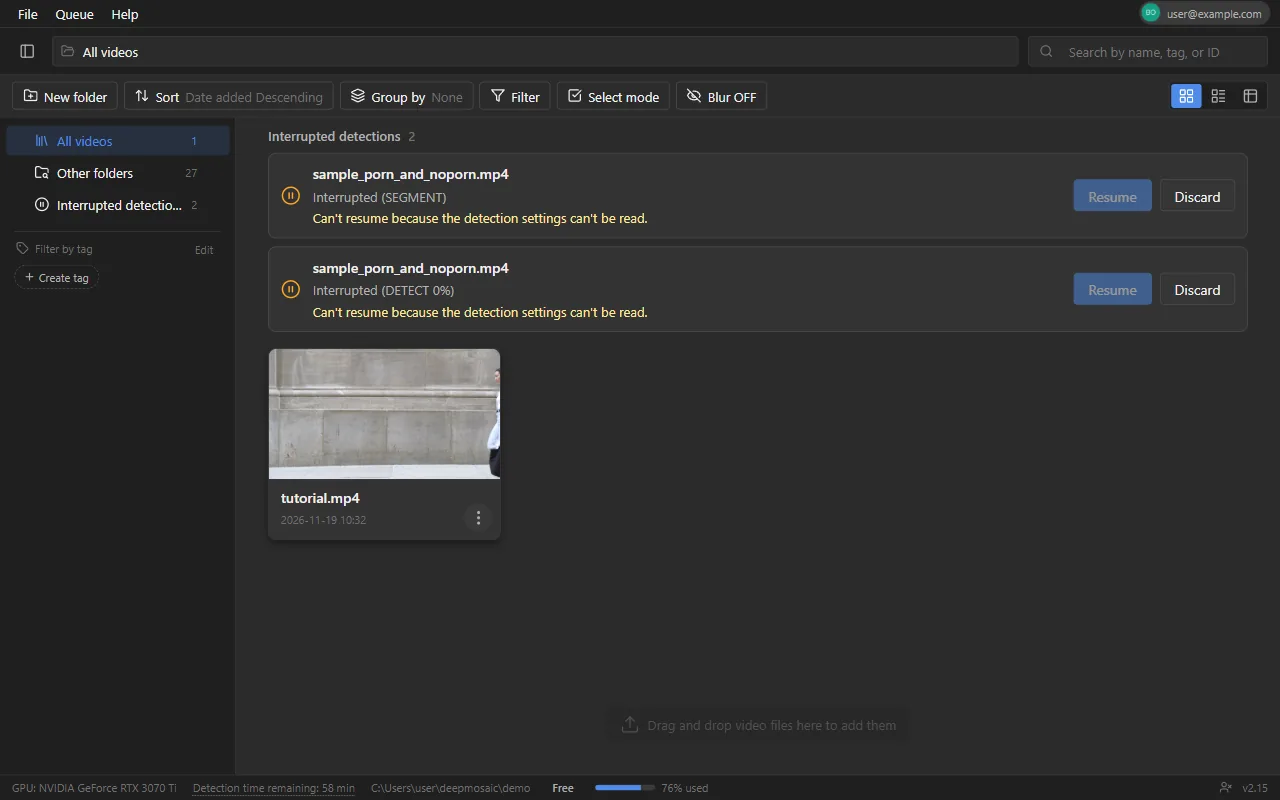
The home screen (list of processed videos)
The home screen (list of processed videos). This is the screen that accepts drag and drop

Sample project

On the Free plan (including when you're not signed in), if there are no videos on the home screen, a sample video is added automatically and appears as a card with a "Sample" badge ("Sample video added" appears). The sample contains face detection results only, so you can try editing and exporting it right away. The edit page shows "This sample uses face detection. Try body area detection with your own videos." Detecting the sample again doesn't use up your available detection time. Once you delete it, it isn't added again. It isn't added on paid plans.

The "Getting started" card

On the Free plan, a "Getting started (3 min)" card appears at the top of "All videos" (in the "Large icons" view, it takes the first cell of the list, and the sample and other videos follow to its right). Click it to play the video in the app (press Esc to close it). Select "Don't show" on the card to hide it. After that, you can play the video from "Help" ▸ "Tutorials" on the menu bar. The card doesn't appear on paid plans.

Display format

Choose from 3 display formats at the top right of the list. The format you choose is kept for next time.
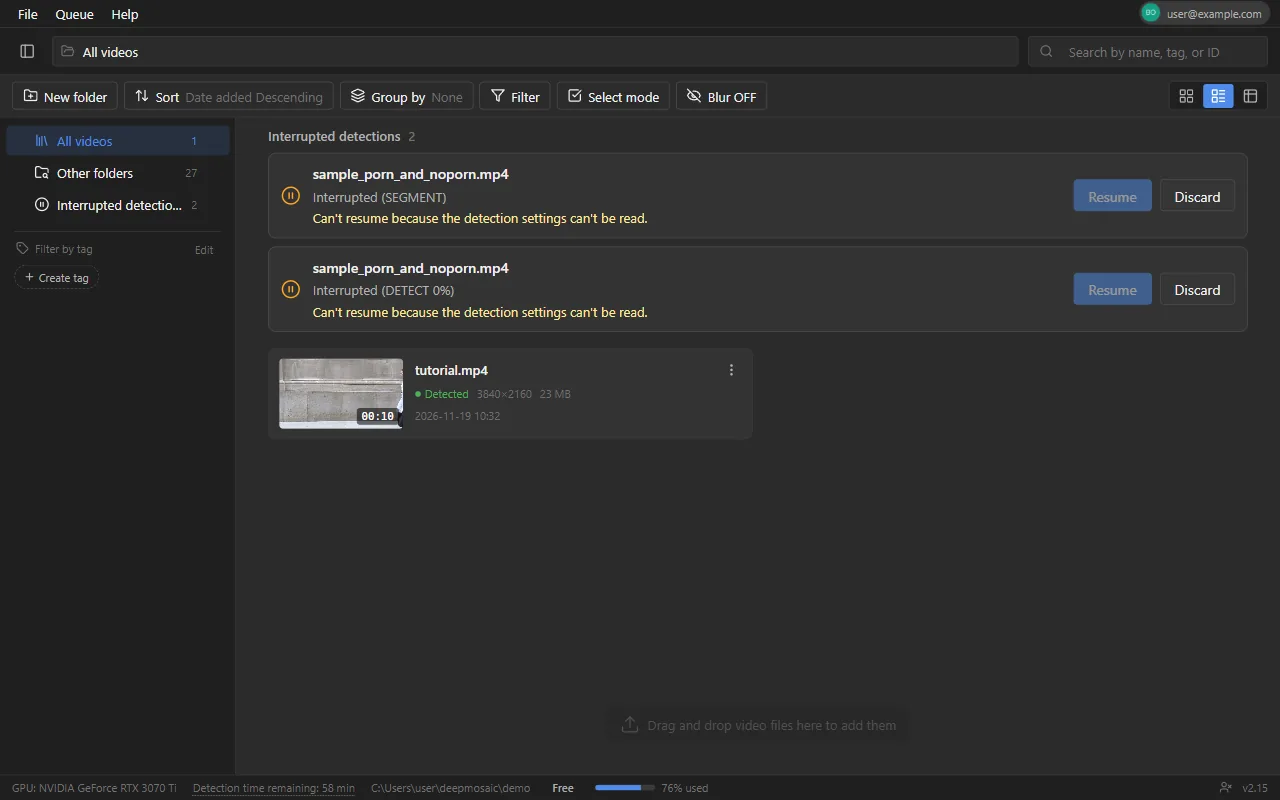
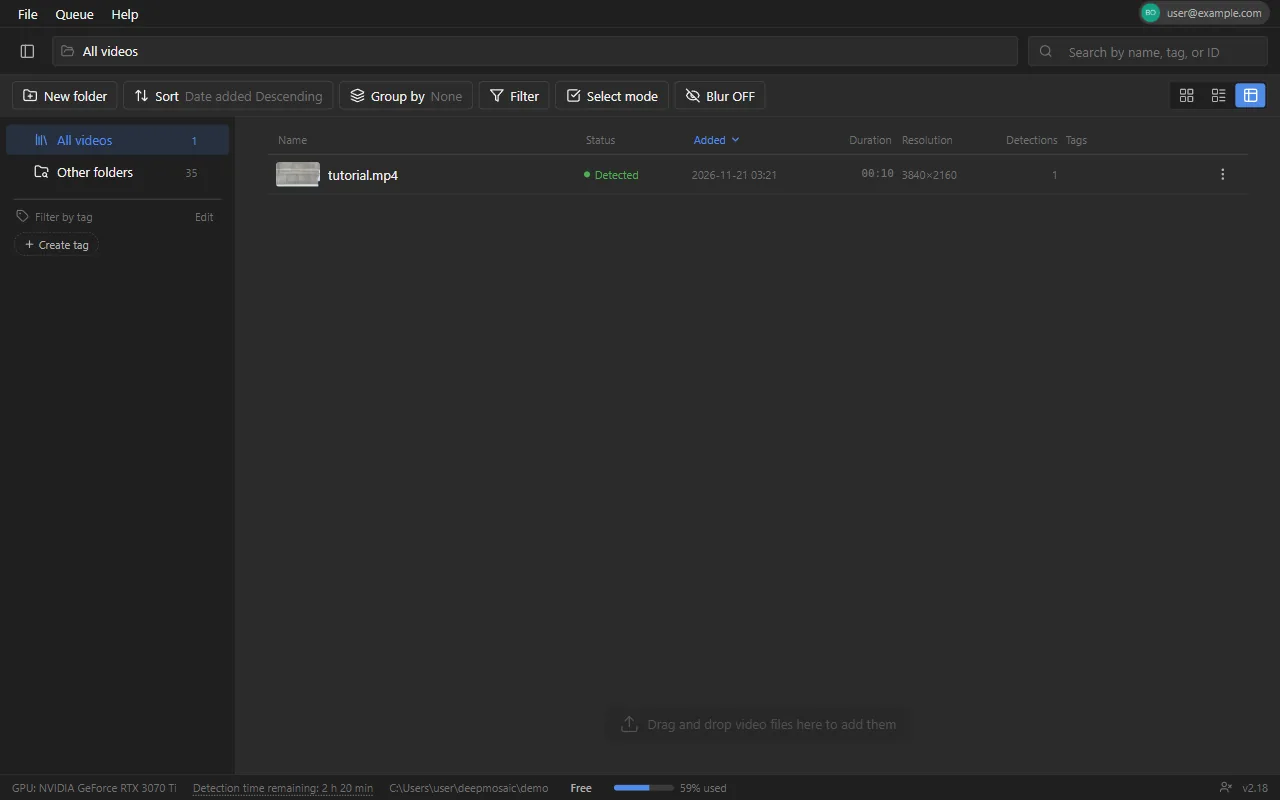
Large icons
The default view, with large thumbnails. Useful when you want to tell videos apart by their images
Tiles
Shows each video as a wide row, with its status, resolution, file size, and date added
Details
A table view. Name, status, date added, length, resolution, detection count, and tags appear as columns, and you can sort by clicking a column header (to get the project ID, use "Copy project ID" in the card menu). The resolution column shows the size of the original video (for projects registered in an earlier version, it changes to the size of the original video once you open the project on the edit page, if the original video is found)
The home screen in the "Tiles" view
Tiles. Each video has its own row, so you can check its status and resolution
The home screen in the "Details" view
Details. Click a column header to sort

Video card actions

Click a card to open the edit page. The menu at the top right of the card has the following items.
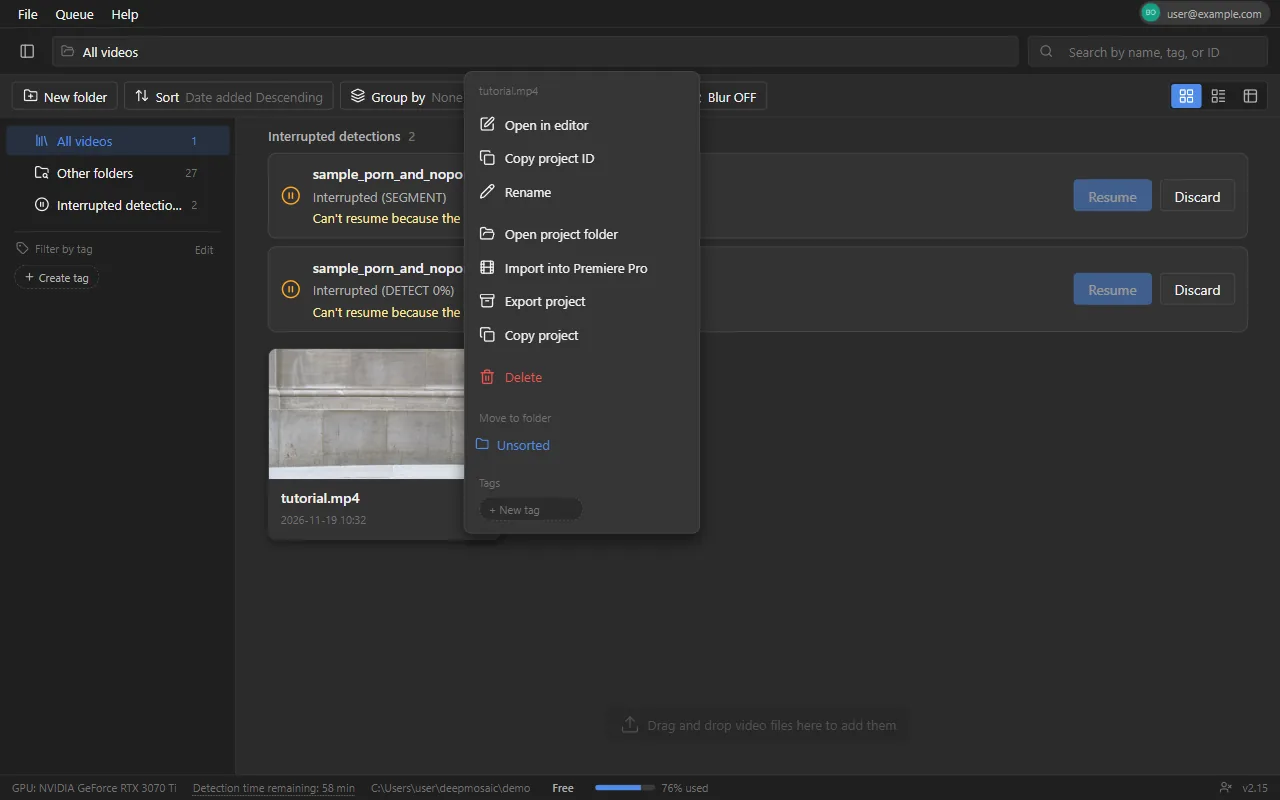
Open in editor
Opens the edit page
Copy project ID
Copies the project ID to the clipboard (you use it when contacting us, for example)
Rename
Changes the name shown in the list and on the edit page (the file name of the original video doesn't change, and the file isn't moved)
Open project folder
Opens this video's project folder in File Explorer
Import into Premiere Pro
Sends the detection results to Adobe Premiere Pro (Premiere Pro integration)
Export project
Packs the project into a single zip file (Exporting and importing projects)
Copy project
Duplicates the project, including its detection results, edit data, and timeline media, and gives it a new project ID. If the original video is outside the project, the copy refers to the same file (the video isn't copied)
Delete
Deletes the project along with its project folder (you're asked to confirm, and this can't be undone). Deleting a project that is being exported also stops that export. If a folder can't be deleted because another app is using it, "N folders are in use and will be deleted the next time the app starts." appears, and the folder is deleted the next time the app starts
Move to folder / Tags
Move the video to a folder in the sidebar, or add and remove tags (not available for videos in "Other folders")
The home screen with a video card menu open
The video card menu

To delete several projects at once, press "Select mode" at the top of the list, click cards to select them (you can also use "Select all"), and press "Delete selected". After a confirmation dialog, the selected projects are deleted along with their folders.
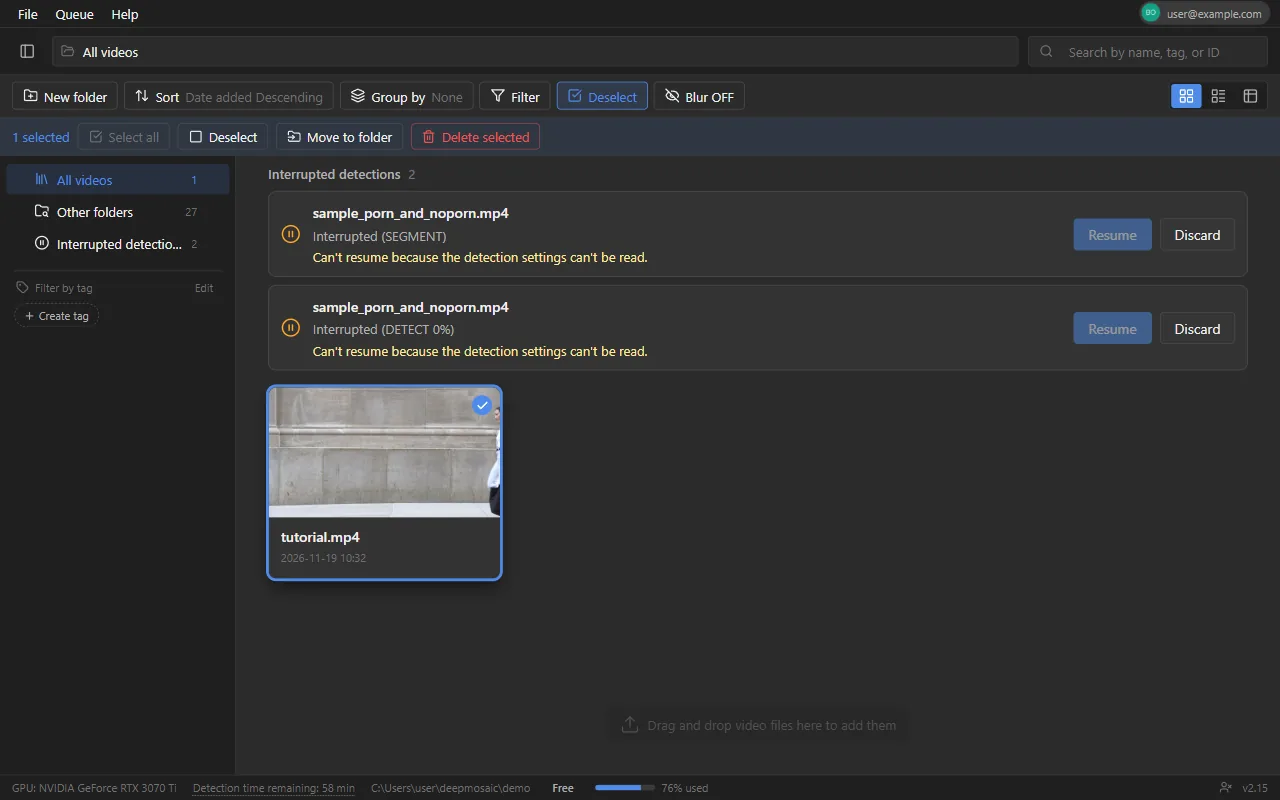
The home screen in select mode with one card selected
Select mode. You can delete several projects at once

Notices on the home screen

The following notices appear above the list on the home screen, only when needed.

  • "Converting detection results to the new save format (n / N)": Projects detected with an earlier version are being converted to the new save format (project.db). If conversion fails, "N projects failed to convert" appears. Press "Retry"
  • "N unused project folders (X GB)": These are folders left behind when detection was stopped or failed (they aren't shown on the home screen). Press "View list" to open the list, with checkmarks already on only the folders that have no detection results (a folder with detection results may be a completed project whose registration was lost, so check only the ones you need to delete yourself). "Check all" selects every folder, including those with detection results, and "Uncheck all" clears all selections. The checked folders are deleted with "Delete" ("Cancel" deletes nothing). Press "Close" to hide the notice
  • "This project caused a problem the last time the app was launched": Projects where the app crashed during the last session, or whose data was corrupted, are set aside without being opened. "Check" puts the project back if no problems are found, and "Repair" tries to restore it from the last saved state

Loading and detectionDetection options

When you load a video, the detection options screen opens. Here you decide which part of the video to detect and what to detect, then press "Start".
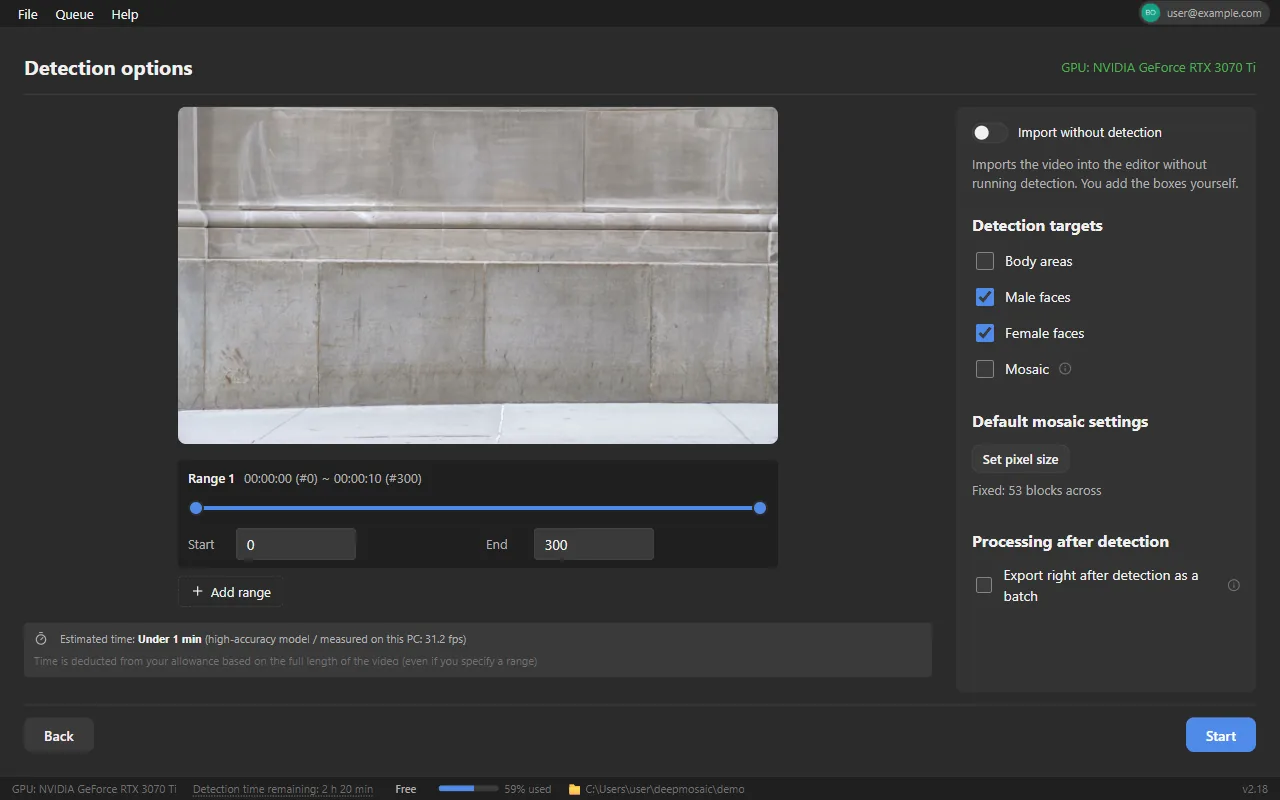
The detection options screen
The detection options screen (preview, detection range, detection targets)
Preview
A still image of the currently specified frame. When you move the slider or change a number input, the image at that position appears, so you can get a rough idea of the range
Detection range
The default is the whole video. You can specify it frame by frame with either end of the slider or with the "Start" and "End" number inputs. The heading shows times and frame numbers, such as 00:00:00 (#0) ~ 00:00:10 (#300)
Add range
Lets you specify several separate segments. Overlapping or adjacent ranges are merged into one automatically, and if the start and end are reversed, they are swapped. When there are 2 or more ranges, you can delete each one with . Deleting all of them returns to the whole video
Estimated time
"Estimated time: about N min (high-accuracy model / measured on this PC: N fps)" appears below the detection range ("(Mosaic scan / about N fps)" when you detect with "Mosaic" only). It is calculated from the test run on this PC and from measurements of past detections. If there are no measurements yet, "The estimated time appears after a test run or the first detection finishes" appears, and if detection is likely to take a long time, "This may take a while — narrowing the detection range will shorten it" appears. On a PC without a GPU, processing runs on the CPU, so it can take 10 times real time or more. On plans with a limit on available detection time, "Time is deducted from your allowance based on the full length of the video (even if you specify a range)" is also shown
Detection targets
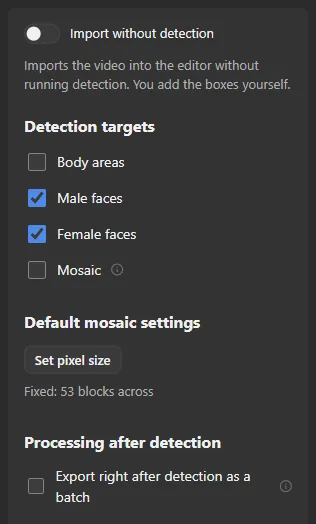
Choose from "Body areas", "Male faces", "Female faces", and "Mosaic" (by default, the 3 other than "Mosaic" are ON and "Mosaic" is OFF). Your selection is saved and carried over the next time you load videos. In the Desktop app, turning on "Mosaic" disables the body area and face check boxes and the default mosaic settings, and "Only the boxes around mosaic areas are detected. Body area detection, face detection, and the default mosaic settings are not used." appears (in the Web app, you can use it together with body areas and faces. See Differences from the Desktop app)
Pixel size
Press the "Set pixel size" button to open the settings screen and choose the size of the mosaic blocks (for how to read the screen, see Mosaic settings). The current setting (for example, Fixed: 53 blocks across) appears below the button. Block size is expressed as the number of blocks across the width of the frame, so the mosaic looks the same even if the video resolution differs. The default is Fixed (53 blocks across), which applies blocks of the same size to every frame and every target. Settings you confirm with "Apply" are saved and become the default for future detections too. After detection, you can change them anytime in Mosaic settings on the edit page
Processing after detection
Turn on "Export right after detection as a batch" to go straight through to export without confirmation after detection finishes (Batch run)
GPU display (top right)
The name of the GPU used for detection. If a CUDA-capable GPU is recognized and you're signed in, the high-accuracy model is chosen; otherwise, the lightweight model is chosen. The choice is made automatically (there is no manual selection). Even on a PC with a GPU, "Preparing the high-accuracy model — the lightweight model will be used for detection this time." appears above "Start" while the high-accuracy model is being downloaded, and "Sign in to use the high-accuracy model — the lightweight model will be used for detection this time." (with a "Sign in" button) appears when you aren't signed in. In those cases, that detection runs with the lightweight model. On a PC whose GPU has less than 4 GB of memory, detection uses the lightweight model, and mosaic refinement (mosaic that follows the shape of the object) is not used ("This GPU does not have enough memory, so the lightweight model is used." appears)
Model check
When the screen opens, it checks whether the model files are present and automatically downloads any that are missing. You can't press "Start" until the check finishes. If it fails, press "Retry" to download them again
Mosaic refinement
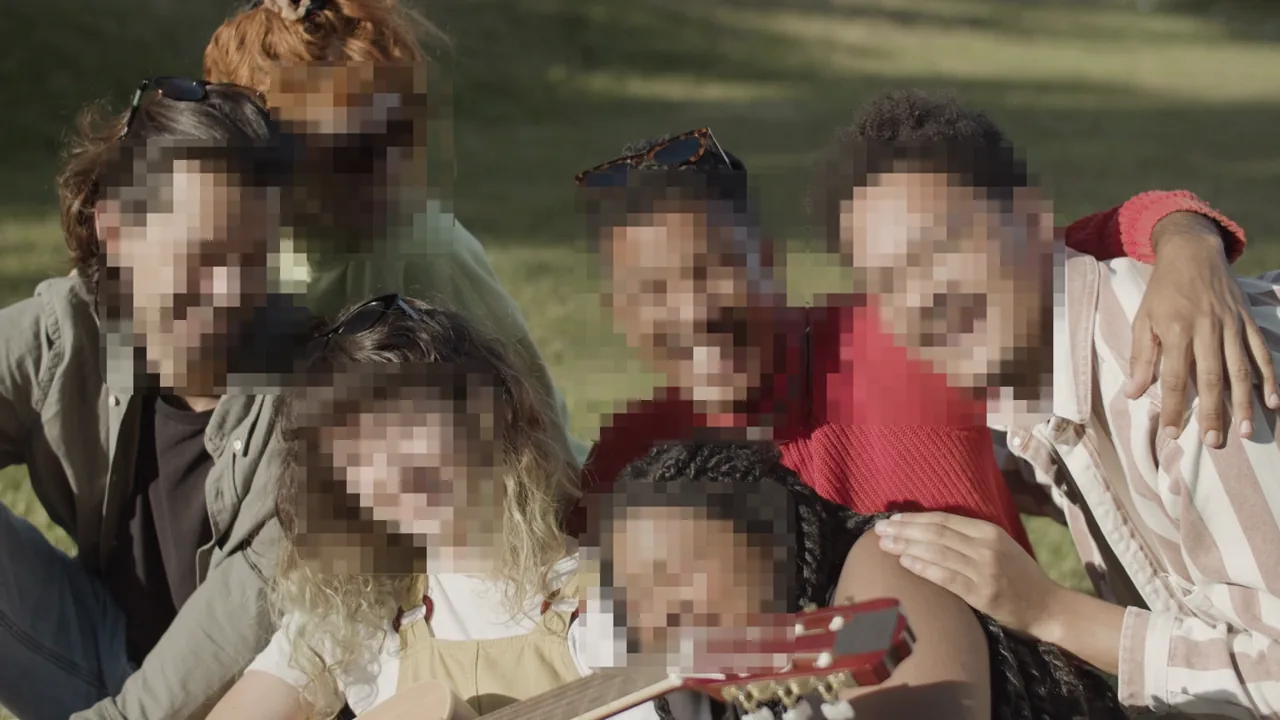
Inside each detected box, AI creates an outline that follows the shape of the object, and mosaic is applied in that shape instead of the rectangular box. It is on by default in environments with a CUDA-capable NVIDIA GPU, and no setting or notice for it appears on this screen. Separate parts get separate outlines, and you can work with them in that shape on the edit page (to go back to a rectangle, right-click on the edit page and select "Change shape"). Detection takes longer (as a guide, about +107 seconds per minute of video on a PC with a GPU). It isn't available in environments without a CUDA-capable NVIDIA GPU, and mosaic is applied with rectangular boxes instead
Mosaic
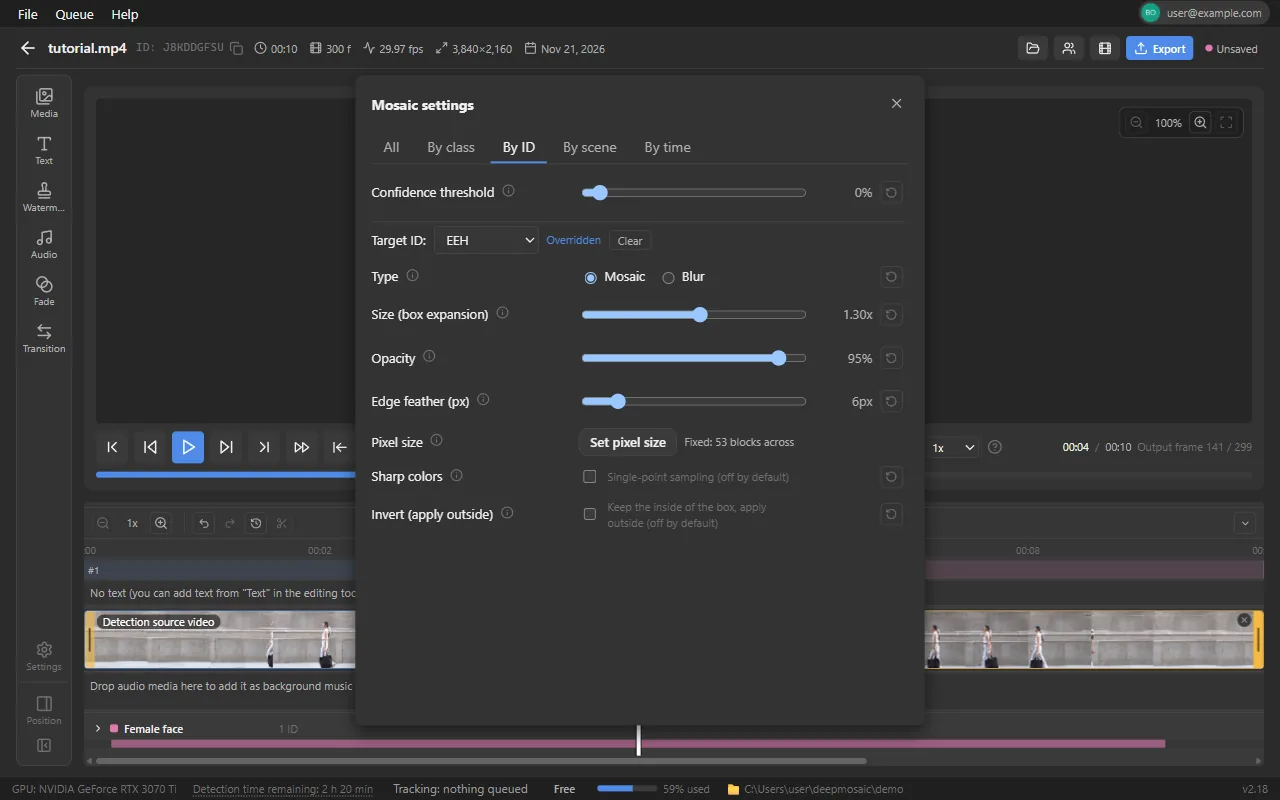
When turned on, it finds the areas of block mosaic already in your footage and shows them on the edit page as polygon boxes (label "Mosaic", purple). On export, Deepmosaic applies its own mosaic over those areas again, with a block size estimated from the blocks of the mosaic it found. The estimated blocks go into that target's per-ID mosaic settings (the number of blocks across the width for the pixel size "Fixed"), so you can change them on the "By ID" tab in Mosaic settings. Settings you change yourself aren't overwritten even if you detect again. The minimum block size for the export resolution (self-regulation standard) takes priority, just as with regular mosaic. Detection takes longer, and the extra time is included in "Estimated time" below the detection range. If the detection engine doesn't support this, the detection log shows "This detection engine doesn't support detecting existing mosaic, so this option is skipped and detection continues", and only the remaining targets are detected. For details, see Finding existing mosaic and reapplying it
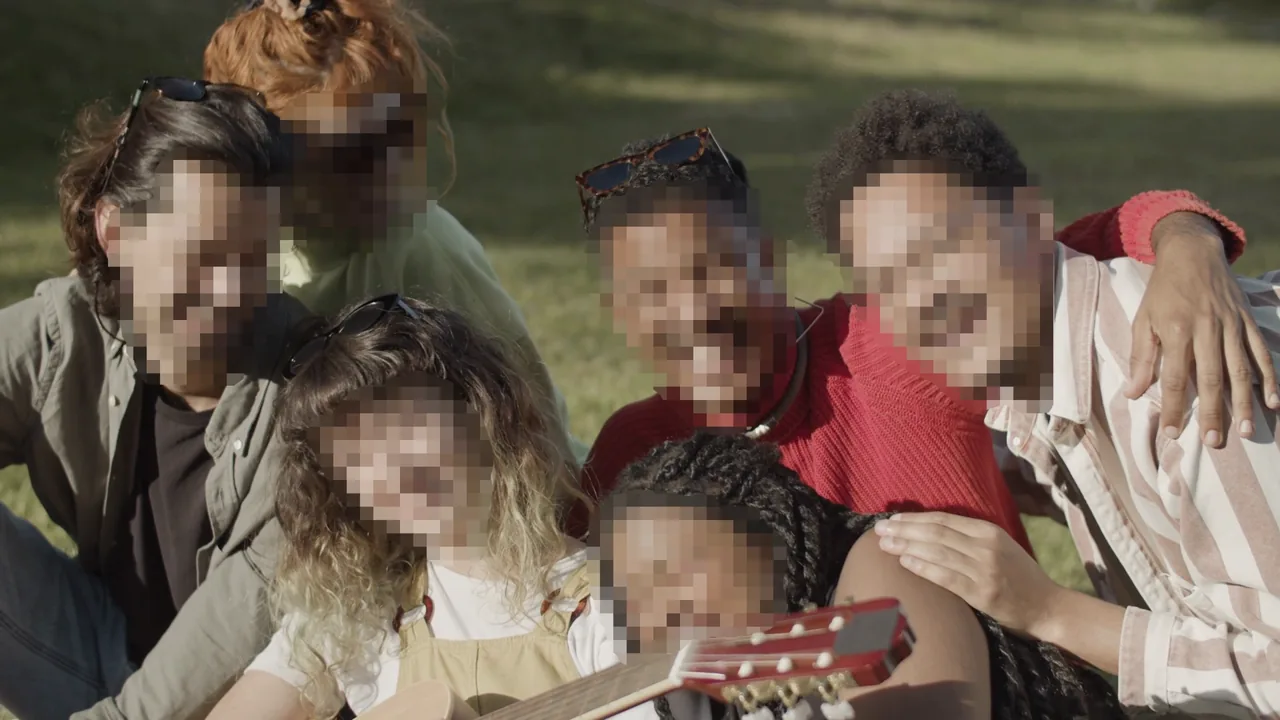
A frame with mosaic applied to the faces of 6 people using the rectangular boxes as is The same frame after refinement, with mosaic applied along the shape of each face
Left: rectangular boxes as is / Right: mosaic that follows the shape of the object. The same frame of the same video, exported with only the settings changed (footage: Pexels)
Detection targets and default mosaic settings

Detection time is roughly proportional to the number of frames processed. If you want to process only part of a long video, narrowing the detection range shortens the wait. Note that your available detection time (allowance) is counted based on the full length of the video even if you narrow the range. Detecting the same video again isn't counted twice.

Detection is also stopped before it starts if your remaining available detection time is shorter than the full length of the video. A message such as "Your remaining detection time (1 h 30 min) is not enough to detect a 120-minute video. Check your plan." appears above the "Start" button, and you can't press "Start". Because the full length of the video is counted even if you narrow the detection range, specifying a range doesn't let you start. You can check your remaining time in the footer (How usage time is measured).

If your license has expired, you've exceeded the usage limit, or your free period has ended, a dialog prompting you to change your plan appears on this screen, and you can't start detection (see Changing your plan).

When the detection options screen opens (and also when you choose a different save location on this screen), the app checks whether it can write to the save location for detection results (the project folder). If it can't, you can't press "Start", and the reason appears: "Can't start because the save location (project folder) can't be written to". Use the buttons shown with it, "Choose the project folder again", "Use the default location" (shown when the current save location isn't the default location), and "Check again", to change the save location, or fix the cause and check again. Where the video itself is stored doesn't matter. If you change the save location with "Select a project folder" in the menu, the check runs the next time you open the detection options screen (Project folder).

Import without detection

When you turn on "Import without detection" with the switch at the top of the right panel, detection isn't run and the video is imported into the edit page as it is. You add the boxes yourself on the edit page (Adding detection boxes). The "Start" button changes to "Import", and "Importing" is shown while it runs and "Import complete" when it finishes. It doesn't use detection time (you can import videos longer than your remaining detection time). However, as with detection, you can't start it when your license has expired, you've exceeded the usage limit, or your free period has ended. While it's on, the detection targets, detection range, and batch run after detection can't be used, and automatic scene detection isn't done (the edit page starts with a single scene). The initial mosaic settings (pixel size) are used for the boxes you add. This switch isn't saved and goes back to off each time you open the screen.

Loading and detectionFinding existing mosaic and reapplying it

This feature finds the position and extent of block mosaic already in your footage and, on export, applies Deepmosaic mosaic over it again. Use it when the mosaic in your footage varies in block size and coverage, and you want to redo it to your own standard. This feature doesn't take existing mosaic off. It can't restore the original footage.

Steps

  1. In detection options, turn on "Mosaic" under "Detection targets". In the Desktop app, the body area and face check boxes and the default mosaic settings are disabled, and only mosaic boxes are detected (in the Web app, you can detect it together with body areas and faces)
  2. Press "Start". A "Detect existing mosaic" stage is added to the AI detection progress
  3. When detection finishes, open the edit page and check the areas found, shown as purple polygon boxes (label "Mosaic")
  4. Correct the boxes if needed. You can move the points of the polygons (Player and timeline). To change the block size, select the target on the "By ID" tab in Mosaic settings and change it there
  5. When you export, mosaic is applied over the box areas again, with a block size estimated from the blocks of the mosaic that was found

Reading the results

  • A "Mosaic" row appears on the timeline (after the face rows). Expand it to see the areas found, split into rows by ID
  • In the toolbar labels (C), "Mosaic" appears in both the upper and lower rows. If you clear "Mosaic" in the upper row, it no longer appears in either the preview or the export (Edit toolbar)
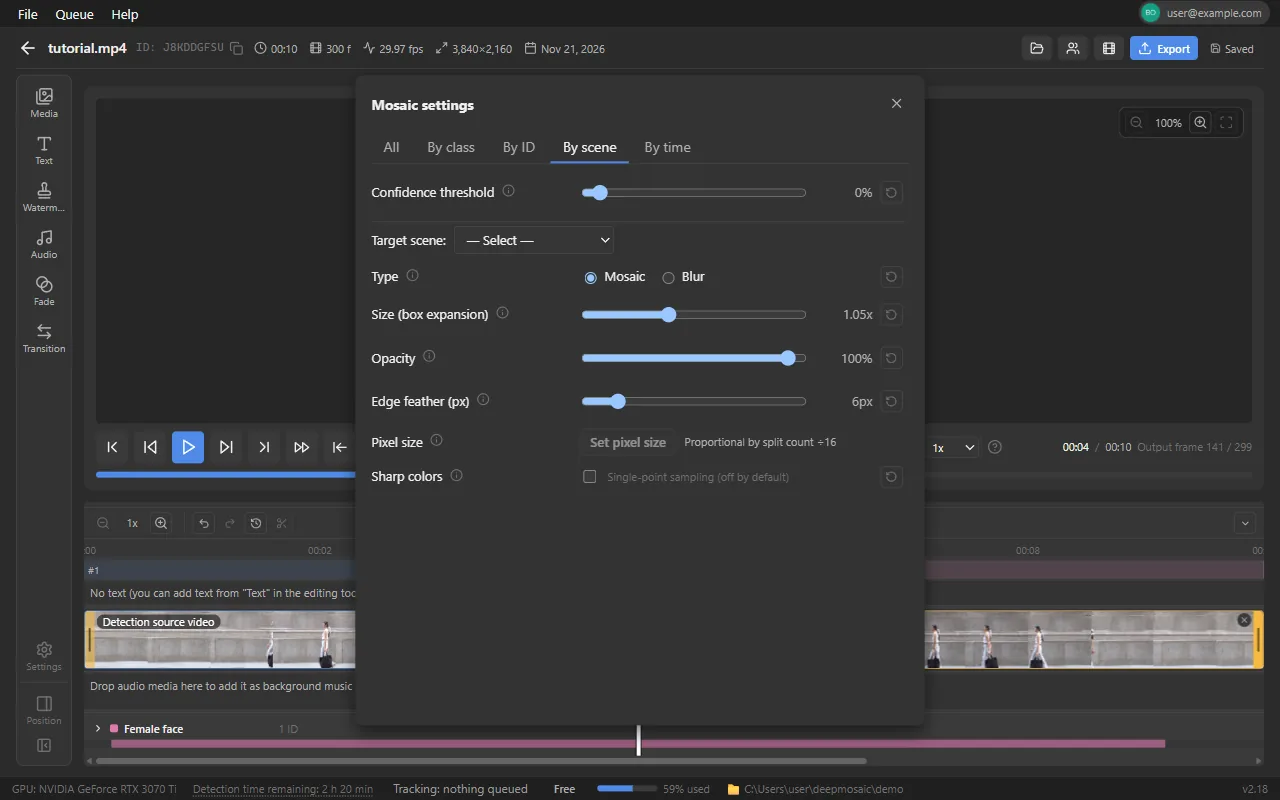
  • "Mosaic" also appears on the "By class" tab of the mosaic settings, so you can change the look of all the areas found at once. The estimated blocks go into the per-ID settings, and settings you change yourself aren't overwritten even if you detect again
  • Tracks excluded from mosaic get "[mosaic excluded]" in their box labels
  • If the same mosaic splits into a different ID partway through, merge them into one with "Merge IDs…" in the box's right-click menu. Fill in frames or areas that weren't found by drawing more boxes or by using tracking (Edit page, Edit toolbar)

Limitations

  • Mosaic with blocks that are too small isn't found. Especially in 4K footage, fine mosaic on targets that appear small is easy to miss
  • Blur, black-out, and solid fills aren't covered (only block mosaic is found)
  • Blocks the same color as the background and semi-transparent mosaic overlays are harder to find
  • Areas that appear for only 1 to 2 frames are dropped because they can't be confirmed. Mosaic that is cut off at the edge of the frame, or that is still entering the frame, is also harder to find
  • On a PC without a GPU, the downscaled video used for detection is made differently, so the results may differ slightly

Automatic detection isn't 100% accurate. Before exporting, review the entire video on the edit page (Checking for missed detections).

Estimated time

  • When detecting together with body areas and faces, detection takes about 1.1 to 1.2 times as long on a GPU and about 1.5 to 1.6 times as long on a CPU, compared with having "Mosaic" turned off
  • When detecting with "Mosaic" only, a 1-hour 1080p video takes about 9 minutes on a GPU and about 31 minutes on a CPU, as a guide

Both vary with your PC's performance and the footage. The extra time is also included in "Estimated time" below the detection range.

Loading and detectionBatch run from detection to export

If you turn on "Export right after detection as a batch" in detection options and press "Start", the app automatically continues after detection finishes and exports a video with the mosaic burned in, without opening the edit page. When you load several videos at once, this applies to all of them.

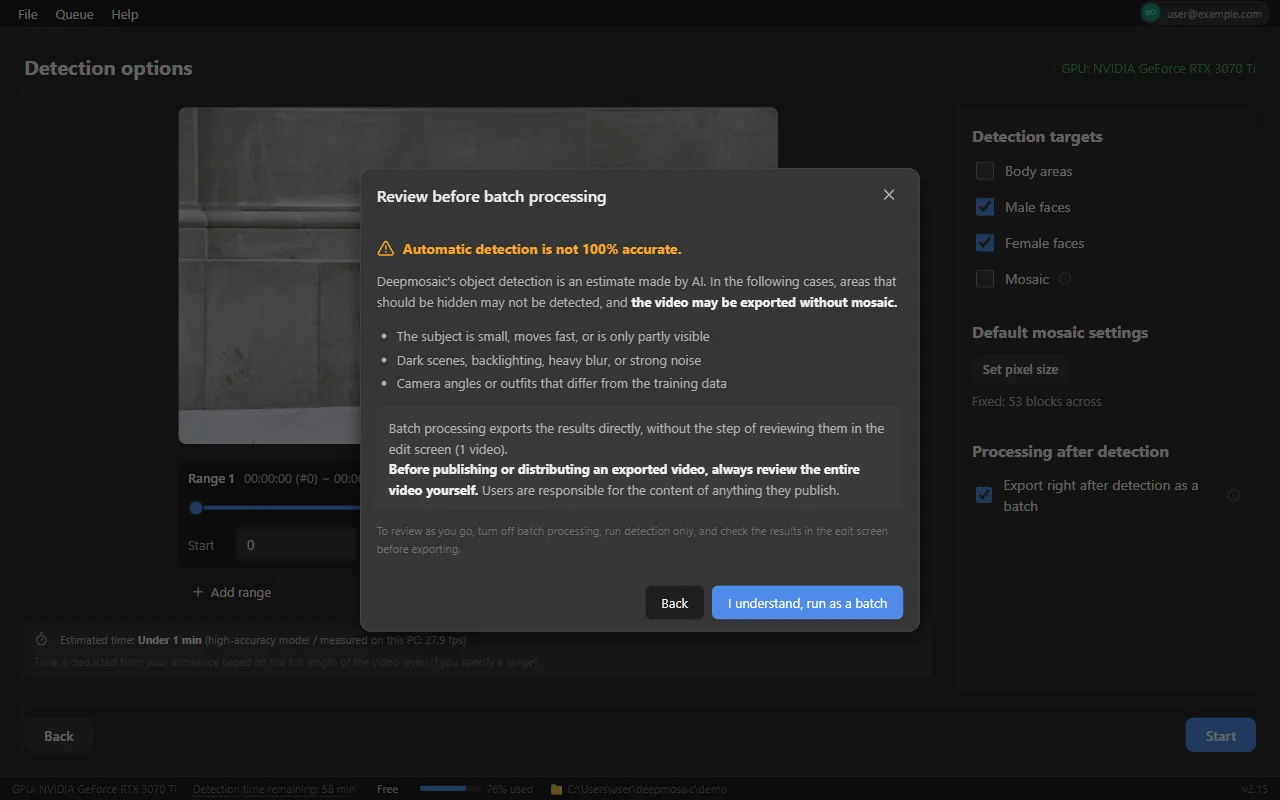
  1. When you press "Start", "Review before batch processing" appears. Confirm that automatic detection isn't 100% accurate (targets may not be detected when they are small, move fast, or are only partly visible, in dark scenes, with backlighting or heavy blur, or at angles unlike those in the training data), then press "I understand, run as a batch"
  2. Export settings opens next. When you choose the folder to save to, file names are assigned automatically from the original video names, and if a file with the same name already exists, _2, _3, and so on are added to the end. Press "Start" to begin detection
  3. When detection finishes, the export goes straight into the queue, and videos are exported in order. You can check progress from "Queue" in the menu bar

A batch run skips the step of reviewing the results on the edit page, so always review the entire output video yourself before publishing or distributing it. For the default mosaic settings, the batch run uses what you applied with "Set pixel size" and what you saved with "Make these settings the default" in the mosaic settings panel.
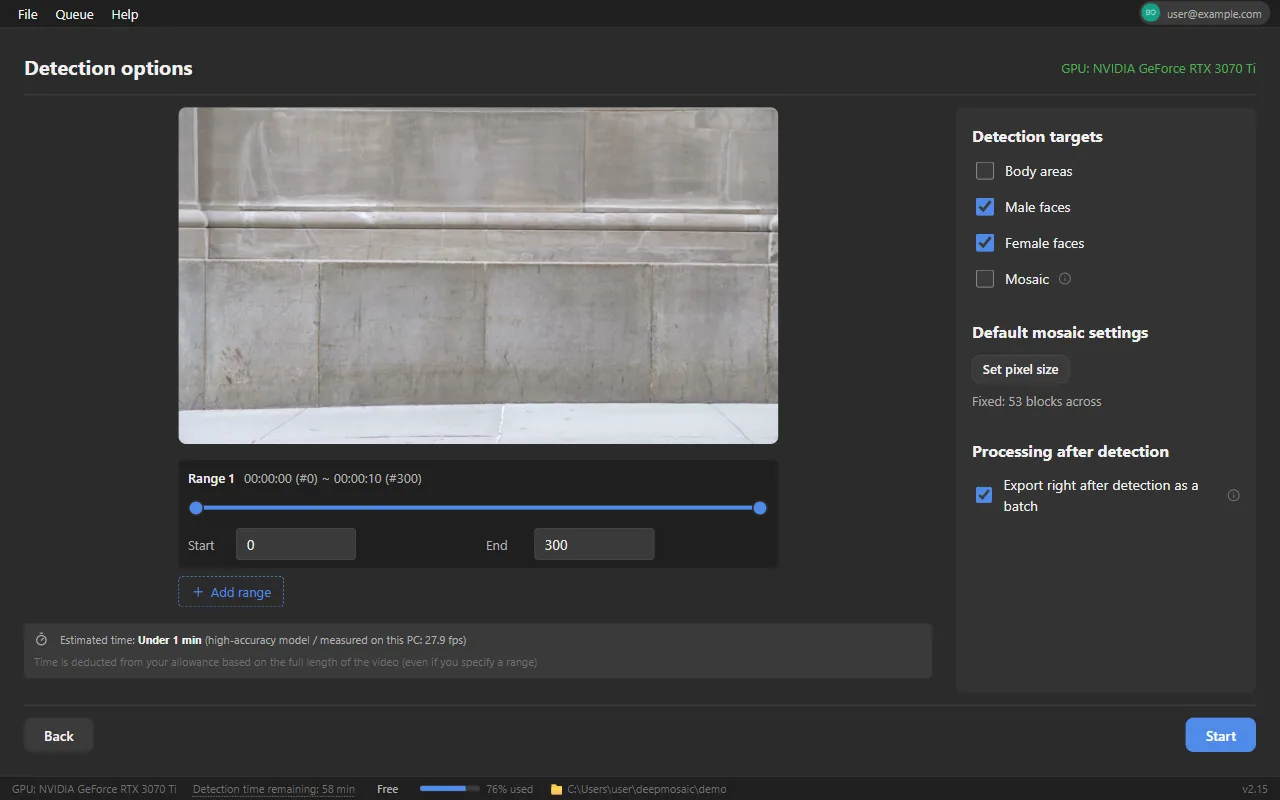
The detection options screen with "Export right after detection as a batch" turned on
The detection options screen with batch run turned on
The "Review before batch processing" confirmation dialog
The confirmation shown before a batch run

Loading and detectionAI detection

When you press "Start" in detection options, AI automatically detects the target objects in the video. Processing goes through 5 stages, "Prepare", "Preprocess", "Detect", "Analyze", and "Refine mosaic", in that order (4 stages when mosaic refinement isn't used). When "Mosaic" is turned on in detection options, a "Detect existing mosaic" stage, which looks for mosaic already in the video, is added (Finding existing mosaic and reapplying it). Overall progress, processing speed (fps), and time remaining are shown. All the stages that will be used are shown from the moment detection starts. You can pause, resume, and cancel processing. When you load several videos, you can check the waiting list in "Queue" in the menu bar.
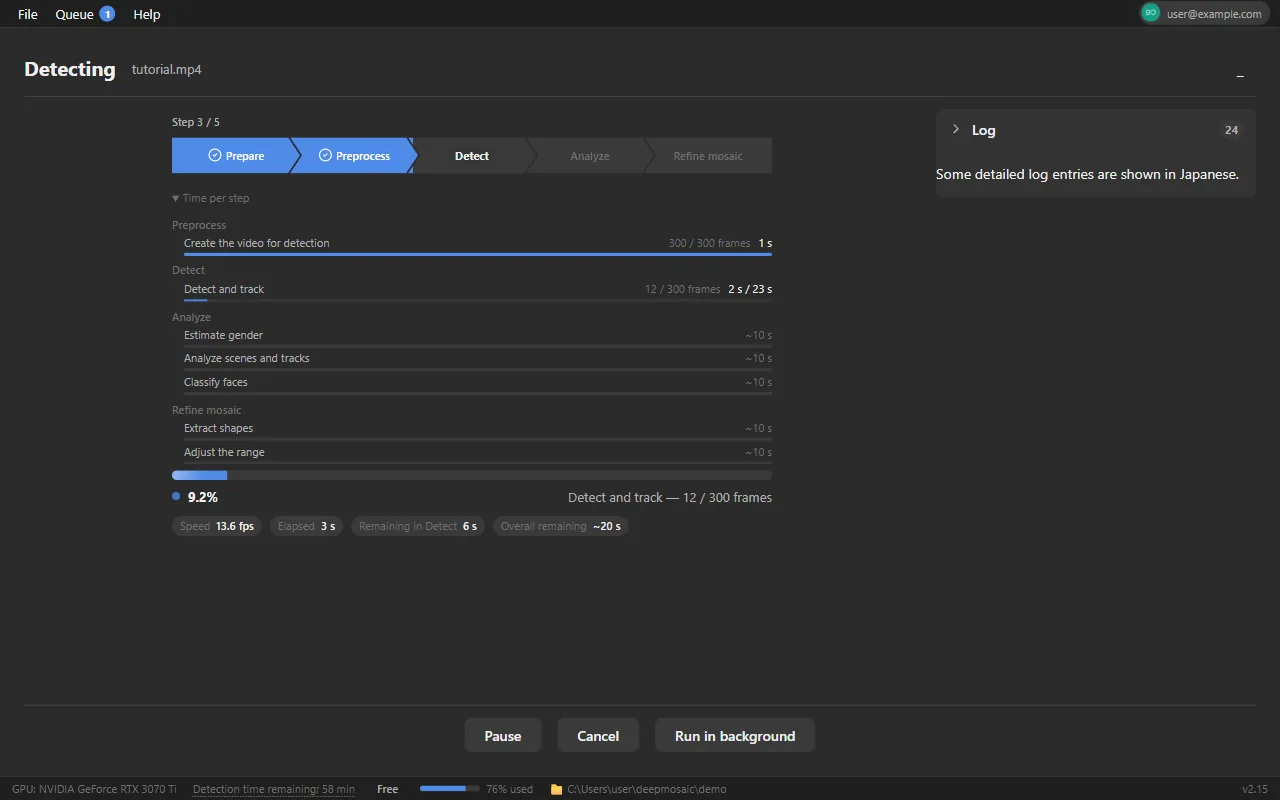
The detection progress screen (5-stage stepper + time per step + progress bar)
The detection progress screen (stepper + time per step + progress bar. 5 stages when mosaic refinement is used. Turning on "Mosaic" adds a "Detect existing mosaic" stage)
Reading the progress
In the step display at the top, completed stages are fully colored, and the running stage is colored up to how far it has progressed. The progress bar shows the proportion of the whole detection. Below it are the current step name, the number of frames being processed, the speed (fps), "Elapsed" (time since detection started), "Remaining in X" (estimated time remaining for that step), and "Overall remaining". Some steps don't show a time remaining. The "Refine mosaic" stage counts only frames that have target boxes and shows "n / N target frames". Overall progress also assigns a large share to this stage, so it advances at a pace close to the actual time it takes
Pause / Resume
Pauses processing. When you resume, processing continues from where it left off
Cancel
Stops detection after the "Stop detection?" confirmation. The progress is lost, and the project folder created for that detection is also deleted (you can't resume it later. If you want to stop partway and continue later, use "Pause"). When videos are waiting, you can choose "Stop this video only" (moves on to the next video) or "Stop all"
Run in background
Closes the screen and returns to the home screen. Detection keeps running, and you can check progress in "Queue" in the menu bar. If you press "_" (Minimize) at the top right of the screen instead, a small progress display (mini player) stays at the bottom right of the screen. Click it to return to the detection screen. You can also pause and cancel from the mini player
Completion
"Processing complete" appears, and a card is added to the home screen. "Back to home" returns you to the list. If you're signed in on the Free plan, "… remaining · View plans" also appears. For a batch run, "Detection complete" appears, and the export is added to the queue (you can check it with "View export progress")
Log
The detection log appears on the right side of the screen (collapsed by default). You can filter it by level and step (text search, "Copy visible lines", and "Open log folder" are for development and don't appear in the release version). If updates stop, "No response for N seconds" appears. After completion or when an error occurs, a "Time by step" table appears. When the app's display language is English or Traditional Chinese, log lines are also shown in that language (some lines may still be shown in Japanese). Logs sent with an inquiry stay in the original Japanese, regardless of the display language. When you contact us about a problem, attaching this log helps us investigate faster

Resuming or discarding an interrupted detection

If detection stops partway, for example because the app was closed or the PC shut down, the next time the app starts, it appears under "Interrupted detections" above "All videos" on the home screen, and an "Interrupted detections" row with a count also appears in the left sidebar. The card shows the stage where it stopped and how far it got, such as "Interrupted (DETECT 42%)". Press "Resume" to continue detection from near where it stopped, not from the beginning. Press "Discard" and confirm to delete the detection's intermediate progress and proxy video (the original video isn't deleted). If it can't be resumed, for example because the original video is missing or has changed, the project has been edited, or it was created by a newer version of the app, the card shows the reason and you can't press "Resume" (if "Update the engine to resume." appears, apply the update).

During processing, the progress and estimated time for each step are shown.
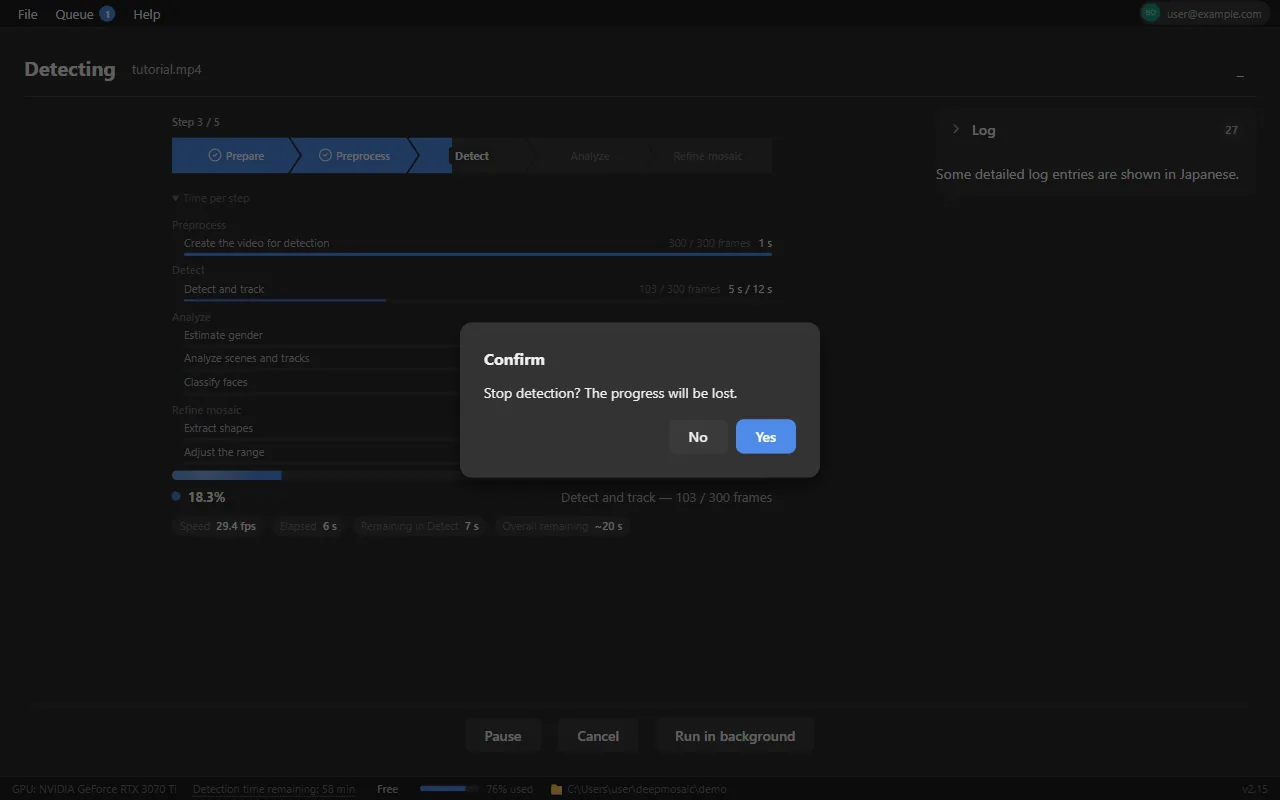
The confirmation dialog shown when you press "Cancel" during detection
The cancel confirmation. "No" continues processing

For a target that is cut off at the edge of the frame, detection extends the detection box beyond the edge of the frame and records it. On export, mosaic is drawn only inside the frame, so the mosaic shape doesn't get squashed at the edge of the frame, even for targets moving out of frame (Player and timeline).

In the Desktop app, detection automatically smooths the motion (trajectory) of the detected boxes. Small frame-to-frame jitter and boxes that jump for just 1 frame are suppressed, so the mosaic flickers less. No settings are needed. Box edges that touch the edge of the frame are kept as they are, so this doesn't affect the extension of boxes beyond the edge of the frame described above. This smoothing applies to videos detected with a version that supports it (videos detected before that don't change).

View supported detection targets
Objects it can help detect: male body areas, female body areas, male faces, female faces, and existing mosaic Objects it can help detect Male body areas Female body areas Male & female faces Existing mosaic

There are 3 detection targets, "Body areas", "Male faces", and "Female faces", plus "Mosaic" (mosaic already in your footage). You can turn each one ON / OFF in detection options.

Loading and detectionQueue (waiting list for detection and export)

Detection and export are managed in a single waiting list (the queue), which you can view and operate from "Queue" in the menu bar. The badge on the button shows the total number of running and queued jobs. Detection processes one video at a time, as does export, and when a job finishes, the next one starts automatically. Jobs for Import without detection have an "Import" badge.

Detection (running)
Shows the step, overall progress, speed, time remaining, and frame count. From here you can also go to the detection screen with "Open details", pause / resume, and cancel
Detection (queued)
Change the order by dragging or with "Move up" and "Move down". Use "Remove from queue" to take a job off the list
Export
The running row shows speed, time remaining, and frame count. You can reorder jobs, use "Open progress in a separate window", pause / resume, cancel, and remove completed jobs (Progress window)
Using the Web app at the same time
When the Web app is processing with the same account, "Processing is running in the web version, so new jobs will start after it finishes." appears, and jobs in the Desktop app wait

The queue remains even if you close the window. When you quit the app, running detection is interrupted, and you can resume it from "Interrupted detections" on the home screen the next time the app starts (AI detection). Exports left in the queue can't be resumed the next time the app starts (start them again from the edit page).
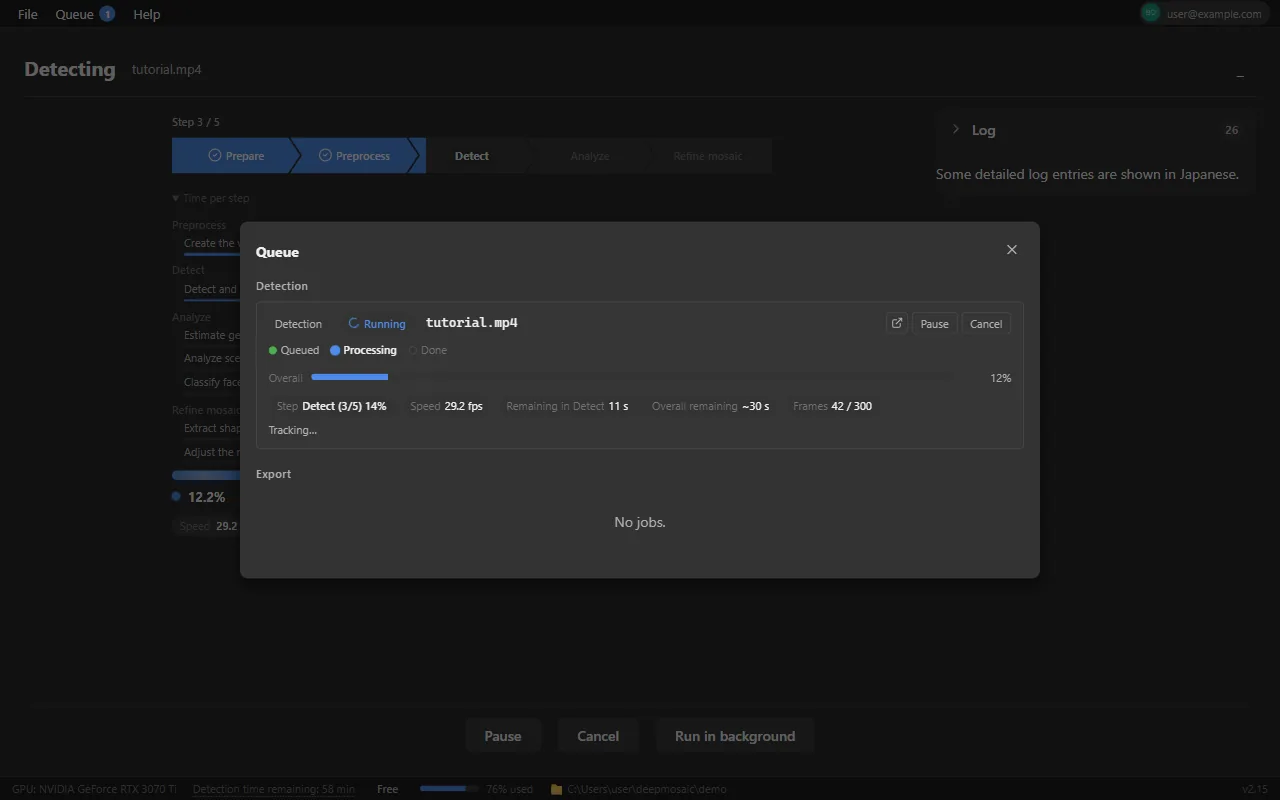
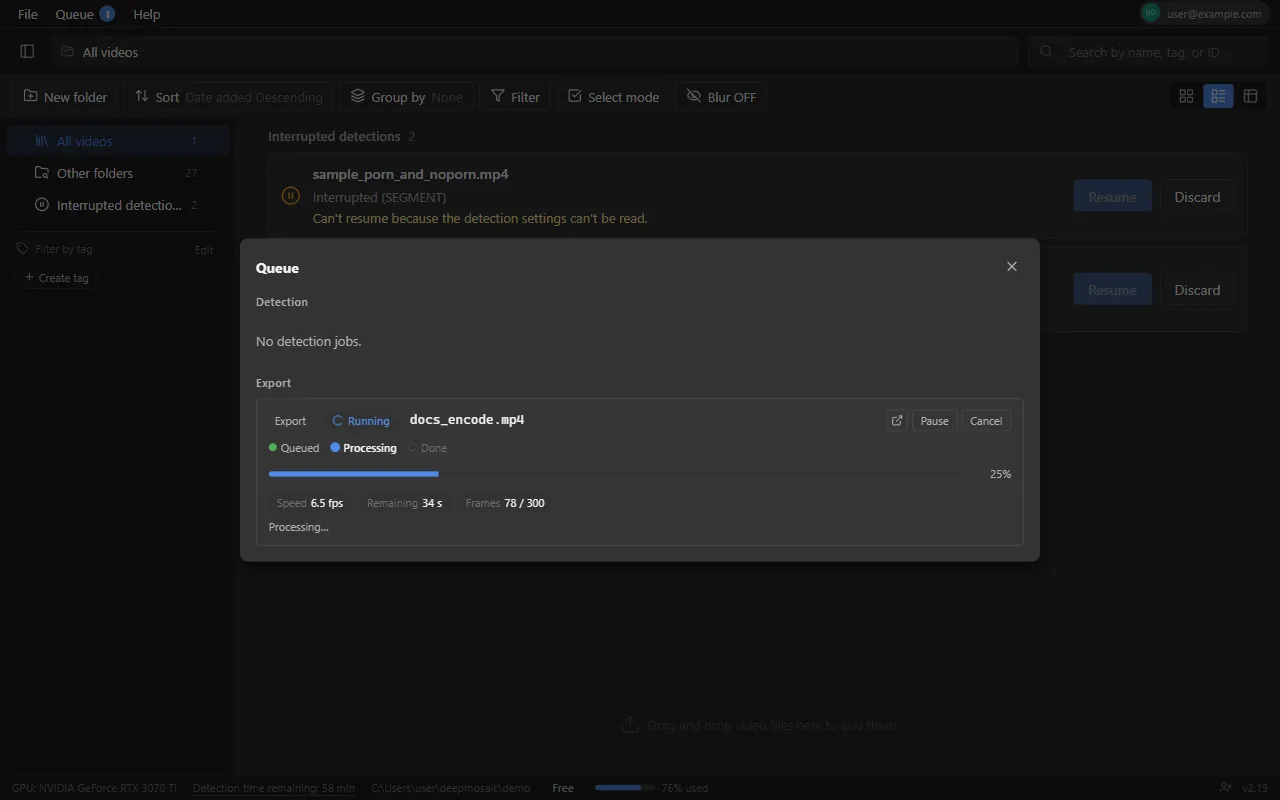
The queue modal. The row for the running detection shows the step and progress
Queue (detection running)
The queue modal, listing export jobs
Queue (export jobs)

EditingEdit page

Click a video card on the home screen to open the edit page. The screen consists of the header at the top, the sidebar running vertically along the edge (and the drawer that opens next to it), the video player (with the built-in edit toolbar) in the center, and the timeline at the bottom.
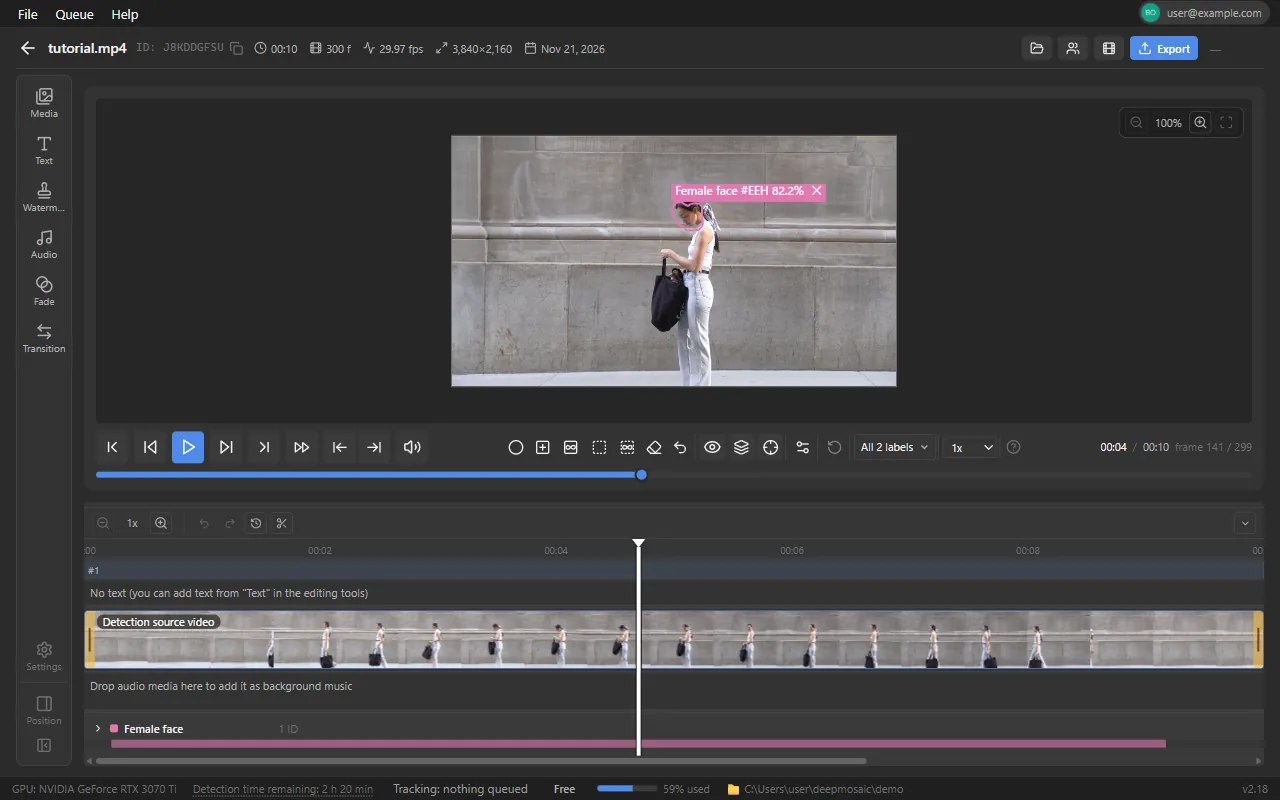
Header (left)
Back button, video title, and 9-digit project ID badge (click to copy)
Metadata
Video length / total frames / fps / resolution / date added
Header (right)
The Open folder / Person gallery / Import into Premiere Pro / Export buttons and the save status. Check the export queue under "Queue" in the menu bar
Save status
Edits are saved automatically about 1 second after each action. "Saving…", "Unsaved", and "Saved" appear in real time, and "Save failed" appears if saving fails. Unsaved changes are also saved when you start an export, leave the edit page, or close the app
Sidebar
Six items: Media / Text / Watermark / Audio / Fade / Transition. Press one to open a drawer next to it, where you can import media and set up text, background music, and more (Sidebar and drawer)
Timeline
Shows the scene strip, the text, clip, and audio lanes, and a row for each detection class. Press the scissors at a join between clips to choose a fade or a transition (Player and timeline / Editing clips / Fade)
Tooltips
Hover over a button, and a tooltip with a description of the function and its shortcut key appears right away (in about 0.15 seconds)
While loading
When you open the edit page, "Loading detection results" appears with the progress until the detection results are ready, and then the player appears with boxes already drawn from the first frame. The first time you open a project detected with an earlier version, "Converting detection results to the new save format" appears (the conversion happens only once)
No detail data
Appears when the detection results file can't be found (for example, because the project folder was moved or deleted). Use "Delete project" on this screen to remove the project from the list
The whole edit page (header, player, and timeline)
The whole edit page

EditingPlayer and timeline

The player overlays detection boxes (BBoxes) in a different color for each class. Drag a box to edit its position and size directly. The player supports stepping frame by frame and seeking. The timeline at the bottom shows the distribution of detections and the scene (cut) strip, and you can click it to jump to any frame.

Detection classes are color-coded: body areas (red) / male face (blue) / female face (pink) / user-created (yellow) / exclusion mask (teal) / mosaic (purple: mosaic already in your footage, only in projects detected with "Mosaic" turned on in the detection options). The label (chip) above each box shows "class name #ID (3-character code) confidence%". Boxes you added manually are labeled "User", exclusion masks are labeled "Exclude", and tracks excluded from mosaic get "[mosaic excluded]". To hide the chips, turn off "Show BBox labels (name, ID, probability)" in "Settings" in the sidebar (the boxes stay visible. Sidebar and drawers).

Mosaic (purple) boxes are polygons (up to 255 points), and as with other polygon boxes, you can move their points to fix the shape ("Range-selecting and bending points" below, Finding existing mosaic and reapplying it).
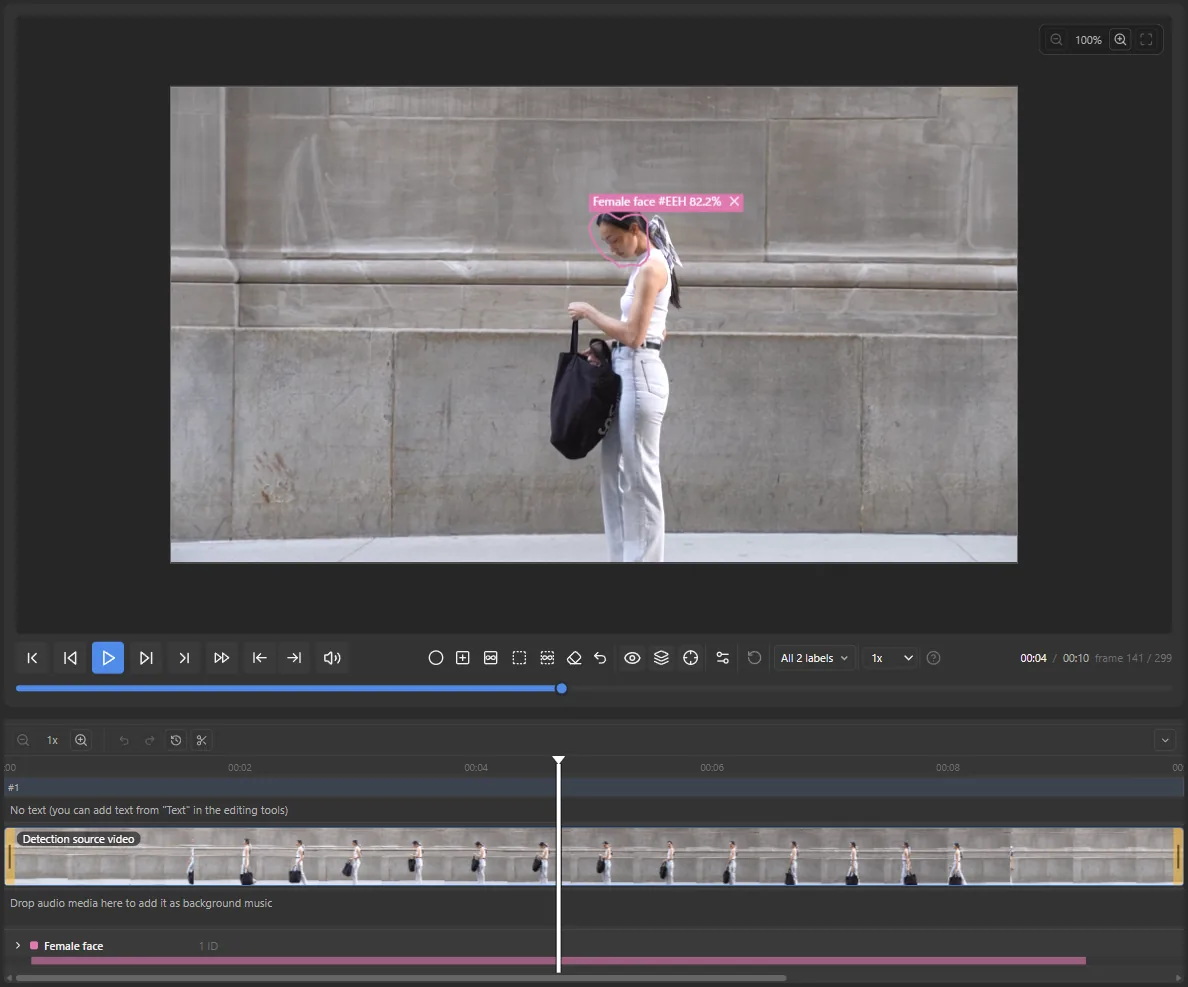
The player with detection box overlays and the timeline. The area inside each box is where mosaic is applied
Player with BBox overlays and timeline

Playback controls

Play / step frames
Go to start (Home) / Back 1 frame (←) / Play/pause (Space) / Forward 1 frame (→) / Go to end (End). PageUp / PageDown move 10 frames. You can also step frames with the mouse wheel, and Shift+wheel moves 10 frames. If you move forward with Shift+→ (or Shift+wheel up) while a BBox is selected, you advance one frame at a time while keeping that box's shape ("Step frames while carrying over the shape" under "Working with detection boxes" below)
Seek
Drag the slider, or click / drag the timeline. The time and frame number (frame N / M) are shown
Mute (V)
Mutes the preview audio. Doesn't affect export
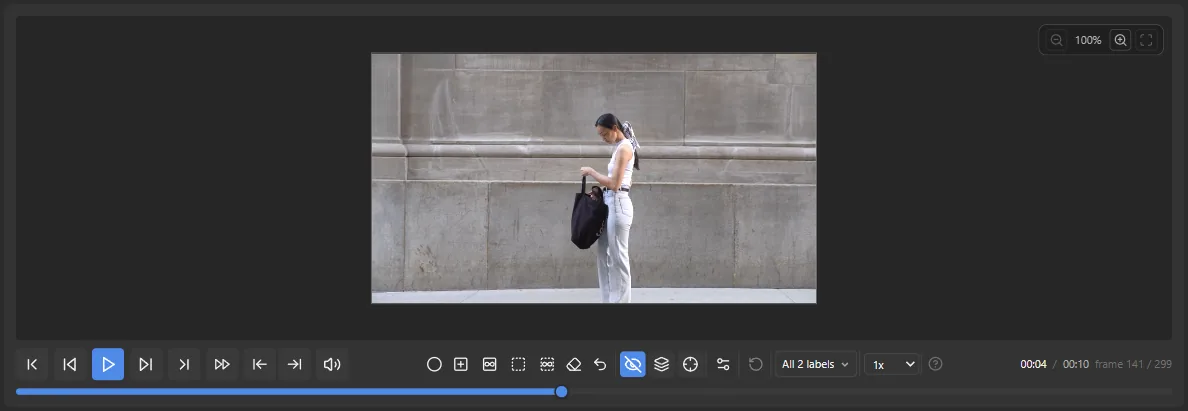
Toggle overlay (H)
Hides all detection boxes, labels, IDs, and confidence scores so you can check only the video. Your edits don't change
Playback speed
Choose from 0.25x / 0.5x / 1x / 1.5x / 2x / 4x in the toolbar (, to slow down, . to speed up)
The player with the detection overlay hidden
Overlay hidden (H). Useful when you want to check only the video

Working with detection boxes

Select
Click a box to show a thick border and 8 handles. A dotted line outside the box also shows how far the edge feather reaches (as with mask feather in Premiere Pro, half the setting's width outside the outline. It isn't shown when edge feather is 0, for tracks excluded from mosaic, or when the overlay is hidden (H))
Move / resize
Drag inside a box to move it, or drag a handle to resize it. You can drag even during playback
Delete
Select a box and press Delete, double-click the box, or choose "Delete this BBox" from the right-click menu. Deletion applies only to the box in that frame (boxes with the same ID in other frames remain)
Continuous delete (eraser)
Hold down E and drag on the video with the right mouse button to use the eraser. By default, it deletes the boxes the circle touches from that frame. With the eraser button in the toolbar, you can choose how to erase (Delete touched BBoxes / Delete only touched parts), the shape (Circle / Rounded rectangle), and the size (8-120px). With "Delete only touched parts", the erased area stays cut out of the box's shape (as a polygon), and if a manually added box is split in two, each piece becomes a separate box. If you play or step frames with the wheel while holding the button, you can keep erasing boxes in the frames as they go by (a right-drag without E, or releasing the right button without moving it, opens the usual right-click menu)
Delete by ID (X on the chip)
Press the X at the right end of a detected box's chip to delete that ID's boxes from all frames at once. A confirmation shows the number of frames to be deleted. Chips of manually added boxes don't have an X, but "Delete all of this ID" in the right-click menu does the same thing
Right-click menu
For face boxes, "Change to male face" and "Change to female face" (to correct the detected gender). For all boxes, "Exclude from mosaic" and "Include in mosaic again" (excludes the whole track from mosaic, or includes it again), followed by "Invert (mosaic outside)" and "Invert (blur outside)" ("Invert" below), "Make exclusion mask" ("Change back to mosaic" for an exclusion mask. Changing existing boxes into exclusion masks), "Delete this BBox", and "Delete all of this ID" (for detected boxes, the same as the X on the chip. For manually added continuous BBoxes, single-frame boxes, and exclusion masks, it deletes that box from all frames at once. Any continuous BBoxes merged into a detected ID are deleted along with it, and the confirmation shows how many. Either way, one Ctrl+Z undoes it). When a continuous BBox has a motion path, "Clear motion path". When there are IDs that can be merged, "Merge IDs…", and for merged IDs, "Unmerge" ("Merging IDs" below). With "Change shape", choose a scope (this BBox / all of this ID / all) and change the shape to rectangle / ellipse / polygon. "Reset shape to default" restores the original shape. "Connect from here", and when a connection source is chosen, "Add as waypoint" and "Connect to here". For keyframes and connecting boxes, see Tracking and keyframes
Invert (apply outside)
Right-click a box and choose "Invert (mosaic outside)" or "Invert (blur outside)" to turn on invert for that ID. For an inverted box, the menu item changes to "Turn off invert (apply inside)", which restores it. Not available for exclusion masks. For where it applies and how to switch it on the "By ID" tab, see "Invert (apply outside)" in the Mosaic settings panel
Merging IDs
If the same subject has been split into different IDs, right-click the box you want to keep and choose "Merge IDs…". A list of IDs that can be merged ("IDs to merge into #XXX") opens, nearest first. Select the ID you want to combine, and it is merged into the ID you right-clicked. Each row in the list shows the #ID and class name, the segment (frames and time), and how many frames later or earlier it is (or "Adjacent"), and the selected box appears at the top marked "Selected". You can also select with ↑ / ↓ and Enter, and close the list with Esc. When there are more than 8, use "N more IDs" to show the rest. Right-clicking an ID row in the timeline below opens the same list. Once merged, they are treated as a single ID (in timeline rows, per-ID mosaic settings, and export), and any frames between them without boxes are interpolated automatically. You can merge IDs of the same class that don't appear at the same time (subjects that appear at the same time are different subjects). When no IDs can be merged, the list shows "No IDs can be merged"
Merging continuous BBoxes
You can also merge continuous BBoxes (∞) with each other, or a continuous BBox with a detected ID. If you right-click a continuous BBox and choose a detected ID, the detected ID is the one kept (that row in the list shows "The detected ID becomes the main one"). When two continuous BBoxes overlap in time, the one that starts first is cut off just before the other one starts (unmerging restores it). Exclusion masks can't be merged
Undoing and unmerging
Right after merging, one Ctrl+Z takes you back to before the merge. To undo a merge later, right-click the merged box and choose "Unmerge (N IDs)", or right-click the ID row in the timeline and choose "Unmerge (N IDs)" at the end of the list
Range-selecting and bending points (Shift+left-drag)
Select a polygon box, then hold down Shift and left-drag around points to select them together (they are grouped into a connected segment. If you enclose just one point, that point is selected. A short tap or Esc clears the selection). Drag a point inside the selected segment to bend it with both ends of the segment fixed, so the middle moves the most. If you enclose all the points, the shape moves without changing. If you drag a point at an end of the segment, only that point moves. While multiple points are selected, you can't delete points with Delete (select and delete them one at a time)
Mosaic exclusion notice
When any track is excluded, "N tracks excluded from mosaic" is always shown. "Apply mosaic to all again" includes them all again at once. Excluded areas don't get mosaic even when you export
Preview margin and outside the video
In the preview, there is a margin around the video on all sides (about 15% on each side, dark gray), and a thin line marks the edge of the video. You can move or enlarge a box so that it extends into the margin, so even when a person is leaving the frame, you can place an ellipse or other shape without squashing it. The part that extends beyond the video isn't exported, but inside the video, mosaic is applied in that shape right up to the edge. A new box must overlap the video, and dragging only in the margin doesn't draw one
Detection boxes cut off at the edge
A detection box cut off at the edge of the frame is automatically extended beyond the edge of the frame, based on the box size in the frames before and after it touches the edge. Mosaic is drawn only inside the frame, but its shape (such as an ellipse) is based on the extended box, so even when a face is leaving the frame, the mosaic shape isn't squashed at the edge. This applies to both the preview and the export. This automatic extension is available for videos detected with version 2.8.1 or later
Draw a box (left-drag)
Left-drag on an empty area of the video to draw a box in the shape selected in the toolbar's shape picker (rectangle / ellipse / polygon). For a polygon, click to place points, and close it by clicking the starting point, pressing Enter, or double-clicking. By default, a drawn box is a continuous BBox that continues into later frames. In the shape picker menu, you can change "Drawn BBox" to "This frame only", and "Drawn BBox type" to "Exclusion mask". Dragging only in the margin doesn't draw a box (draw it so it overlaps the video). To move the view while zoomed in, use Ctrl+left-drag (middle-button drag also works)
How manually added boxes appear
The chip of a manually added box shows "User", and its ID is a 3-character code, the same as for detected boxes (for example, #K7Q). In the timeline, it appears in the "User" row
Carrying over mosaic settings
When you add a box on top of a detected box, or near one (with a gap of no more than 5% of the shorter side of the frame), the mosaic settings in effect for that detected box (type, blur, opacity, block size) are copied to it. The block size is fixed so that it looks the same as that detected box. You can change the copied settings at any time on the "By ID" tab of Mosaic settings
Step frames while carrying over the shape (Shift+→)
Click a box to select it, then hold down Shift and press → (or scroll the wheel up). You advance one frame at a time with the position, size, and shape the box had when you started holding Shift, and that box is overwritten in each frame you advance to. The chip of the box being carried over shows "[carrying over]". Everything until you release Shift counts as one action, and one Ctrl+Z undoes it all. Frames where that box doesn't exist are skipped, and if not a single frame could be written, "This BBox isn't in the frames you moved to, so its shape couldn't be carried over." appears. Shift+← goes back one frame without carrying over the shape. The shape isn't carried over during playback with the play button, when you move 10 frames with PageDown, for single-frame manual boxes, or in segments of imported media
Locking carry-over (Shift twice)
Select a box and press Shift twice quickly to make carry-over "locked", so it continues even after you release Shift. The chip shows "[carry-over: locked]". While locked, → or wheel up without Shift also advances while carrying over the shape (PageDown and the play button don't carry it over). Press Shift twice quickly again, or press Esc, to unlock. If you select a different box while locked, that box's shape is carried over from the next time you advance. On systems where software such as a Japanese input method (IME) uses a single press of Shift, locking may not work

Selecting, adding, and erasing detection boxes work only when the playhead is in a segment of the original video (the detection source). Segments of imported media aren't subject to AI detection, so they have no boxes.
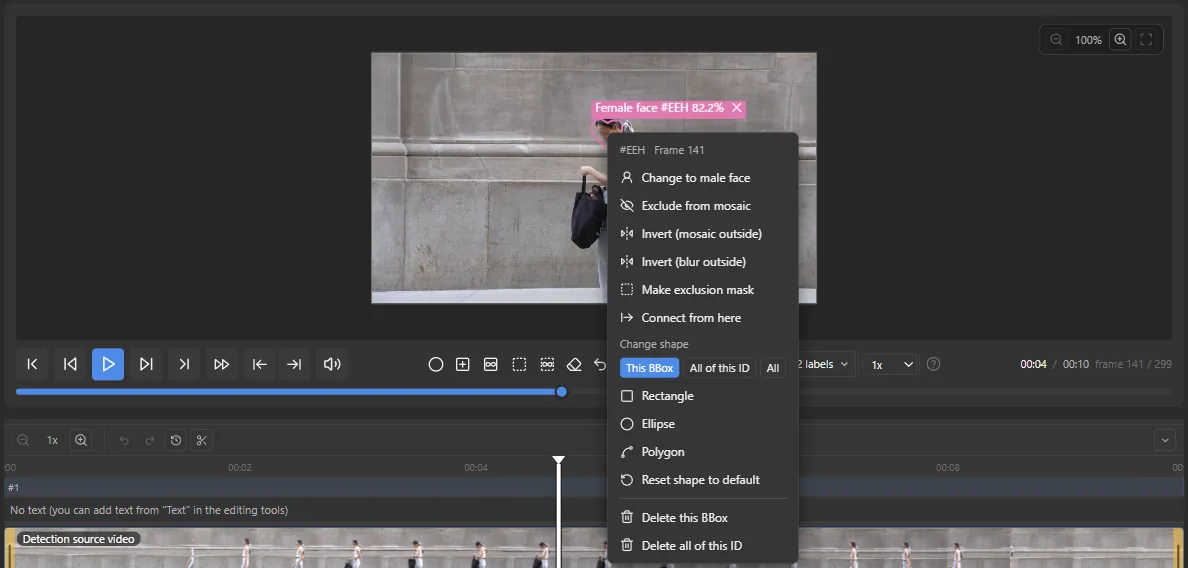
The menu shown when you right-click a detection box (change gender, exclude from mosaic, delete)
The box's right-click menu

Timeline

From top to bottom, the timeline shows the toolbar, the ruler, the scene (cut) strip, the text, clip, and audio lanes (Editing clips), and a row for each detection class. Each class row shows bands for the segments that have detections. Manually added boxes appear in the "User" row, and exclusion masks in the "Exclude" row. Use at the start of a row to expand it into a row for each tracking ID. Right-click an ID row to open the list of IDs that can be merged into that ID ("Merging IDs" above. For merged IDs, "Unmerge" appears at the end of the list). Right-clicking doesn't move the playhead to that position. Tracks excluded from mosaic are shown faded. The timeline is laid out in the time of the exported video, so when you trim or move a clip, the detection bands move with it.

Zoom the timeline up to 16x with Ctrl+wheel or the zoom buttons at the left end of the toolbar. For changing the height and collapsing the timeline, see Editing clips.
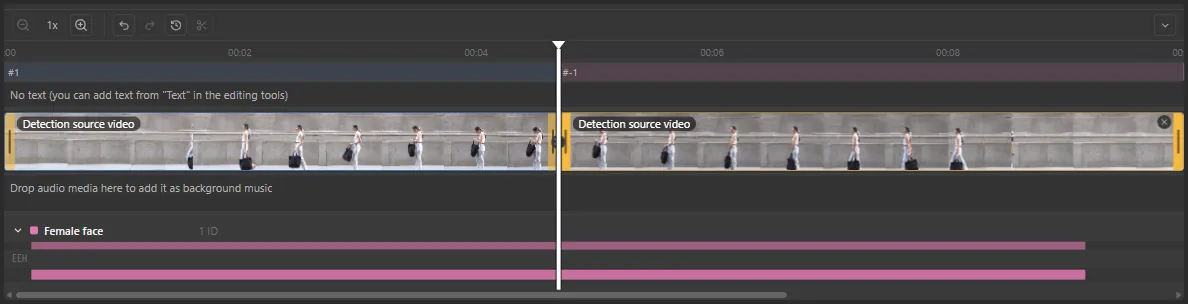
The timeline, with the scene strip and a class row expanded into a row for each tracking ID
Timeline (scene strip, and a class row expanded into ID rows)

EditingZoom and pan

To fit boxes precisely around small subjects, you can zoom the player's video up to 8x. While zoomed in, you can still move, resize, add, and delete boxes as usual.
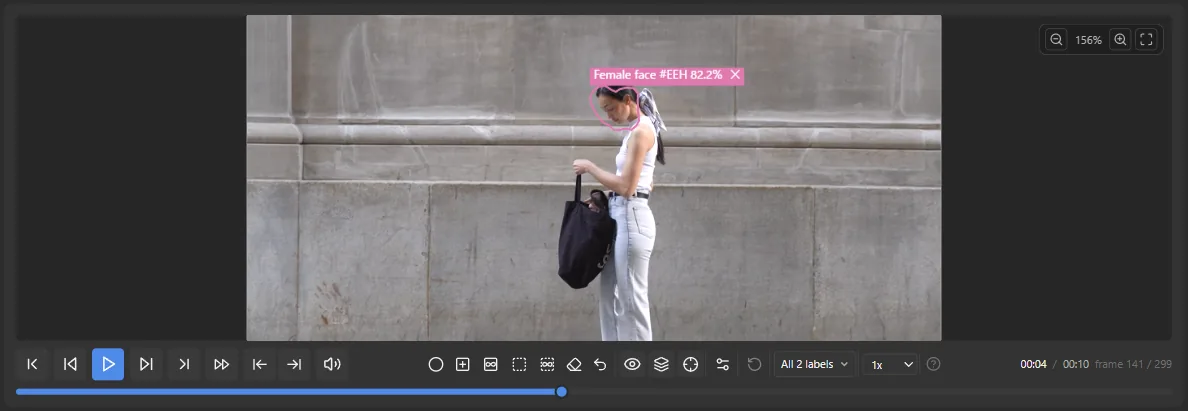
Zoom in / out
Ctrl+wheel (zooms around the cursor position), the + / - keys, or the buttons at the top right of the player. The current zoom level is shown between the buttons
Pan (move the view)
Ctrl+left-drag, or drag with the middle button (wheel). Doesn't work when you aren't zoomed in (100%). Left-dragging on an empty area draws a box
Reset
Press the 0 key or the "Reset zoom" button to return to 100% and center the view
The player zoomed in, with the zoom level and zoom buttons at the top right
Zoomed in. Useful for fine box adjustments

EditingAdding detection boxes (1f and ∞)

Where nothing was detected, you can add boxes manually with the "1f" (a square with a + and 1f) and "∞" (a square with ∞) buttons in the toolbar. An added box is placed in the center of the current frame as the "User" class (yellow), so drag it to adjust its position and size. Mosaic settings (including per-ID settings) apply to manual boxes as well.

1f (1)
Places a box in this frame only. The frames before and after aren't affected. Useful for patching a "Gap" (a few frames where detection drops out)
∞ continuous BBox (2)
The box continues in the same position in every frame from the one where you placed it onward. If you don't want it to continue to the end of the video, delete the box at the frame where you want it to end (the range up to just before the deleted frame becomes its confirmed range)
Moving a continuous BBox
Drag the ∞ box during playback to record the movement as a motion path, so the box follows the subject as it moves. To delete a recorded path, use "Clear motion path" in the right-click menu. To have a box follow the subject automatically, use tracking
Undo
If the last edit was merging IDs, deleting all, applying a shape to a range, or changing a class into exclusion masks, Ctrl+Z undoes only that (Working with detection boxes). Otherwise, right after you end an ∞ box by deleting it, it first undoes the confirmed end (shown as "Unfreeze" in the shortcut legend); if there is none, it reverts the edits in the current frame, the same as "Reset current frame"

Exclusion mask (areas without mosaic)

To keep mosaic off just part of the area it covers (for example, to show only the hands next to a face), place an exclusion mask. No mosaic is applied inside an exclusion mask, and that area is shown and exported as the original video. Exclusion masks don't follow the subject, so for a moving subject, drag the mask into position.

1f exclusion mask (3)
Places it in this frame only
∞ continuous exclusion mask (4)
Continues it into the frames after the one where you placed it (end it the same way as a continuous BBox: delete it at the frame where you want it to end)
Shape and drawing
Placed in the shape selected in the toolbar's shape picker (rectangle / ellipse / polygon). Set "Drawn BBox type" in the shape picker menu to "Exclusion mask" to draw exclusion masks with a left-drag
Display
The box and chip are teal and labeled "Exclude", and the mask appears in the "Exclude" row of the timeline. In the mosaic preview (M), you can see how the mosaic is cut out
Edge feather
The edge of an exclusion mask is blended in with the same edge feather setting as manual boxes. Size (box expansion) has no effect
Premiere Pro
Exclusion masks aren't passed to Premiere Pro integration

Changing existing boxes into exclusion masks

You can also change detected boxes and manually added boxes into exclusion masks later. Inside a box changed into an exclusion mask, other overlapping mosaics aren't applied either.
Changing one at a time
Right-click a box and select "Make exclusion mask". For a detected box, all frames of that ID (including merged IDs) become an exclusion mask. For a manually added box, that box becomes an exclusion mask. To change it back, right-click the exclusion mask and select "Change back to mosaic"
Changing a whole class at once
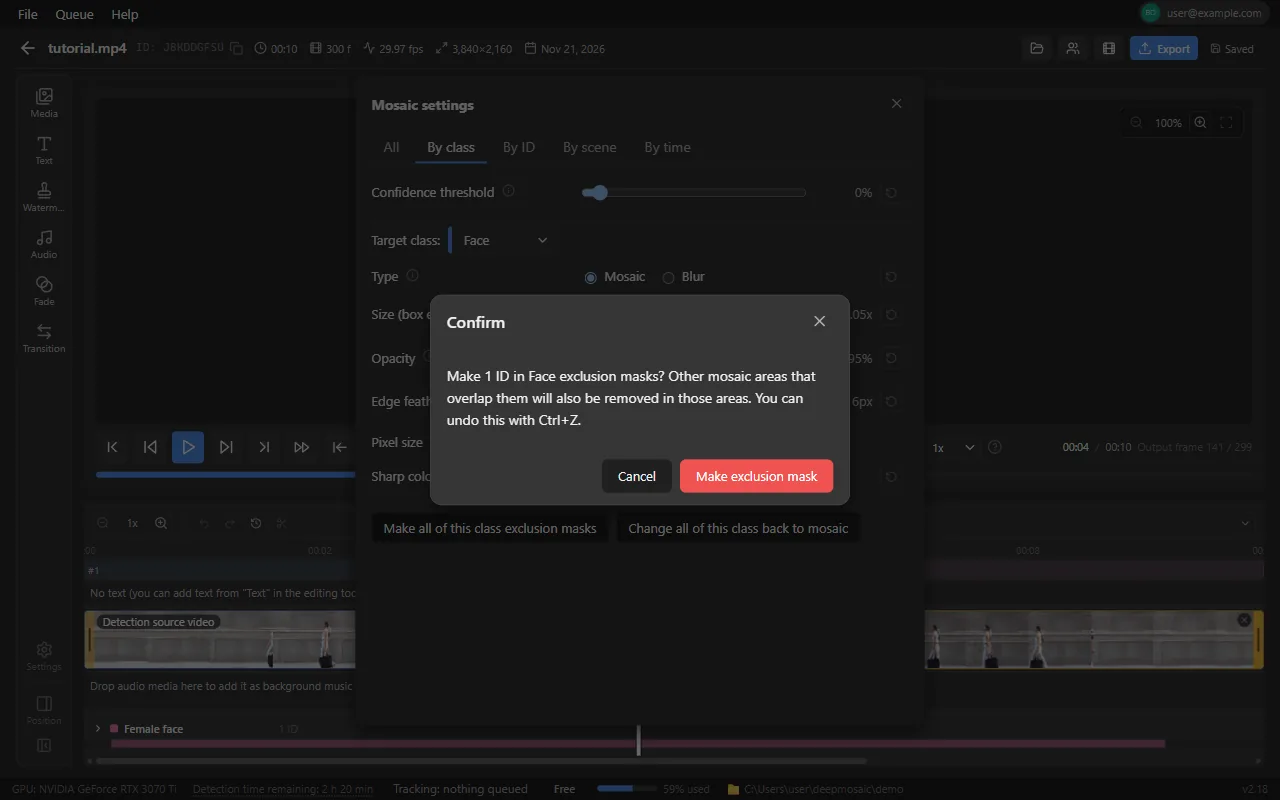
In the "By class" tab of Mosaic settings (G), choose a class and press "Make all of this class exclusion masks". A confirmation showing the number of IDs appears. It applies to the detected IDs of that class that exist at that time (for "Face", both male and female faces; manually added boxes and IDs added later aren't included). "Change all of this class back to mosaic" changes them back all at once. Either way, one Ctrl+Z undoes it
Display
A box changed into an exclusion mask is shown in teal as "Exclude", like other exclusion masks, and appears in the "Exclude" row of the timeline. IDs changed into exclusion masks can't be merged. If you merge IDs and then change the ID into an exclusion mask, the IDs separated by "Unmerge" go back to mosaic
Premiere Pro and earlier versions
Changes into exclusion masks aren't passed to Premiere Pro integration. If you open and save the project in a version of Deepmosaic earlier than 2.18, detected boxes changed into exclusion masks go back to mosaic (they go back to being hidden, so no area is left uncovered)
After pressing "Make all of this class exclusion masks" on the By class tab of the mosaic settings panel, a confirmation showing the number of target IDs appears
"Make all of this class exclusion masks" on the By class tab and the confirmation with the number of IDs

Adding, moving, and deleting boxes are all saved automatically and reflected in the export. Only the detection results and the edge feather value are passed to Premiere Pro integration. Box edits on this screen (moving, changing shapes, deleting, exclusion masks, and so on) aren't passed.

EditingTracking and keyframes

"Tracking" automatically fits an ∞ continuous BBox you placed by hand to the subject's movement as the video plays. Turn it on or off with the button in the control row. "Keyframes" use the frames you corrected by hand as reference points for the movement, and automatically connect the frames between one keyframe and the next.

Tracking

  1. Place a box. Place or draw an ∞ continuous BBox (2) and fit it to the subject (Adding detection boxes)
  2. Turn on tracking mode. Press the tracking button ( ) in the control row, or press X
  3. Move forward. Play the video, press →, or scroll the wheel up, and the box moves to follow the subject
Tracking mode (X)
While it's on, moving forward (playback / → / wheel up) tracks the subject. Moving back, such as with ←, doesn't track. Press it again to turn it off
Boxes that are tracked
All ∞ continuous BBoxes visible in the current frame are tracked. You don't need to select them. Multiple boxes can be tracked at the same time, with no limit on the number. The more boxes there are, the slower tracking becomes, and playback waits for tracking accordingly. 1f boxes and exclusion masks aren't tracked ("Exclusion masks can't be tracked.")
Playback speed
While tracking, the video plays at 1x speed or slower. If tracking can't keep up, playback pauses until it catches up
When it stops
When the subject is lost, leaves the frame, or the scene changes, tracking stops and the reason appears (for example, "Stopped tracking because the target was lost here."). In that case, the ∞ box ends at the last frame that could be tracked and doesn't continue past it. When tracking reaches the end of the video, "Tracked to the end of the video." appears
Undo (Ctrl+Z)
The result of one tracking run, even when multiple boxes were tracked at the same time, can be undone all at once with one Ctrl+Z, back to before tracking started (the end of each box is restored too)
Boxes already tracked
A box that has been tracked once isn't tracked again when you play the video again. If you correct a box by hand with tracking mode on, it is tracked again from the corrected frame onward (up to just before the next frame you corrected by hand). To track again from the beginning, delete the box and place it again
Tracking type
"High-accuracy tracking" is selected automatically on PCs with a GPU, and "Standard tracking" on other PCs. Standard tracking is used while detection is running. After tracking starts, hover over the tracking button to see which tracking is in use, such as "In use: High-accuracy tracking (GPU)"
Newer detection engine required
If "Tracking needs a newer detection engine." appears, apply the update

Keyframes

When you correct an ∞ continuous BBox
For an ∞ box that hasn't been tracked, the frame you corrected by hand becomes a "keyframe", and the frames between it and the previous keyframe are connected smoothly and automatically. If you correct a tracked ∞ box with tracking mode off, only the corrected frame changes
Keyframe (F)
Makes the selected box's current position a keyframe without moving it
When you correct an AI box
Only the corrected frame changes

Connecting

Use boxes in separate frames as points to create one ∞ continuous BBox that moves between them following the subject's movement. Besides the start and the end, you can place any number of points along the way (waypoints).
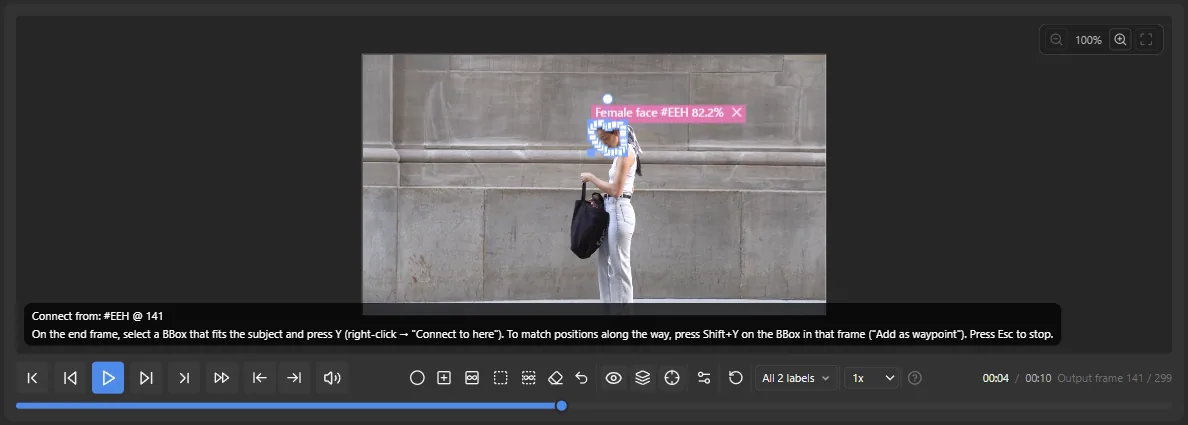
  1. Place the start point. Select a box at the starting frame and press Y (or select "Connect from here" in the box's right-click menu). The bottom left of the player shows something like "Connect from: #K7Q @ 3" with a guide to the next step
  2. Place waypoints if needed. Move to a frame along the way, select a box that fits the subject, and press Shift+Y (or select "Add as waypoint" in the right-click menu). You can place as many as you like. Placing one again on the same frame replaces it ("Replaced the point on the same frame.")
  3. Connect at the end point. Select a box at the ending frame and press Y (or select "Connect to here" in the right-click menu). The points are connected right away with smooth interpolation, and a message such as "Connected the BBoxes (#K7Q → #K7Q, 31 frames)" appears. When you placed waypoints, their number is also shown
  4. Tracking runs in order. The connected section goes into the "Tracking queue", and the boxes between the points are corrected to follow the subject's movement ("Tracking queue" below). You don't have to wait for it to finish; you can go on to the next connection or other edits
After selecting a box and pressing Y, a guide for the next step appears at the lower left of the player
The guide while connecting. Press Shift+Y for a waypoint, and Y on the last frame
Boxes you can connect
The boxes used as points can be AI boxes or manually added boxes. You can connect boxes in different frames within the same scene (the same applies to waypoints)
When the subject can't be followed
When tracking loses the subject, the part that could be followed is applied, and the rest stays smoothly interpolated (the row in the tracking queue shows something like "Lost the target at f120"). When the start point is an exclusion mask, or when you connect boxes in adjacent frames, the connection is made with interpolation only and doesn't go into the tracking queue. When tracking can't be used, the connection is also made with interpolation only, and "Couldn't follow the subject, so the BBoxes were connected with smooth interpolation." appears
Using a continuous BBox as a point
When the box at the start point or a waypoint is an ∞ continuous BBox, it changes to a box on that frame only when you use it as a point (if the box was placed on that frame, it becomes a single-frame box; if it continues from an earlier frame, it ends just before this frame and a single-frame box is created on this frame). When the box at the end point is an ∞ continuous BBox, that box ends just before the point (it's removed if it was placed on that frame) and is replaced by the connected box
The original boxes
The original AI box isn't removed, and in the frames in between it overlaps the connected box. Single-frame boxes used as points are removed. The connected box ends at the frame of the end point
Correcting the middle
A box connected by tracking is treated as an already tracked box. If you correct a frame in the middle with tracking mode (X) on, it is tracked again from there up to just before the next point. With it off, only the corrected frame changes. For a box connected entirely with smooth interpolation, if you correct it at a frame in the middle while paused, that frame becomes a keyframe and the frames before and after it are reconnected smoothly ("Keyframes" above)
Undo (Ctrl+Z)
Right after connecting, one Ctrl+Z takes you back to before connecting (if you used a continuous BBox as a point, it goes back to the original continuous BBox. The same applies after tracking in the tracking queue finishes, as long as you haven't made other edits). After you correct the middle, Ctrl+Z doesn't take you back to before connecting, so to start over, delete the box with "Delete all of this ID" in its right-click menu
Stop (Esc)
To stop after placing points, press Esc. If boxes at the points were changed to single-frame boxes, they stay that way (pressing Ctrl+Z right after Esc restores all of them to the original continuous BBoxes; this isn't possible if you make another edit in between)
Correcting the section before tracking
If you correct a box in the section by hand while it's waiting in the tracking queue or being tracked, that connection is removed from the queue and the boxes stay interpolated ("Tracking was canceled because the box in this segment was edited by hand. The interpolated box is kept.")
When boxes can't be connected
In these cases the boxes aren't connected and the reason appears: boxes in the same frame ("Can't connect: it's the same frame."), boxes in different scenes ("Can't connect: BBoxes in different scenes can't be connected."), an exclusion mask in between ("Can't connect: there's an exclusion mask in between."), and a BBox paired with an exclusion mask ("Can't connect: a BBox and an exclusion mask are different types.")

Tracking queue

Tracking for connected sections goes into the "Tracking queue" and runs one job at a time, in order. On PCs with a GPU, contour refinement (like mosaic refinement, it fits the box to the shape of the object) also runs after tracking. When a job finishes, the interpolated boxes between the points are replaced with the result of tracking (and refinement). Boxes on the frames of the points you placed by hand don't change.
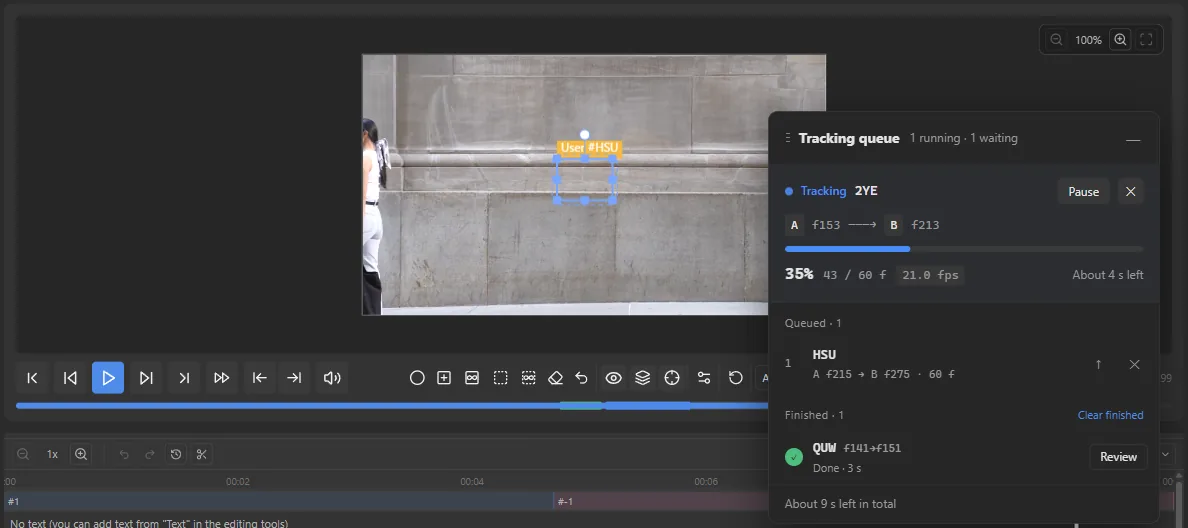
The Tracking queue panel, listing one running job (Tracking, the frames of points A and B, and its progress), one queued job, and one finished job, with the queued sections shown as bands above the seek bar
The Tracking queue panel (running, queued, and finished)
Panel and indicators
When there are connected sections, a small indicator such as "Tracking 45% · 2 waiting" (with a progress bar) appears above the player. Press it to open the "Tracking queue" panel, and press "—" on the panel to go back to the small indicator. You can drag the panel and the small indicator, and their position and open state carry over the next time you open the edit page. The status bar at the bottom of the screen also shows the progress, such as "● Tracking 45% (3 jobs)", and pressing it opens or closes the panel (it shows "Tracking: nothing queued" when there's nothing, and "● Tracking error" when, for example, a section lost the target)
Reading the panel
From the top: the running job (state "Tracking", "Refining outline", or "Paused", the ID, the frames of points A and B, the progress %, the speed, and the estimated time left), the "Queued · N" list, and the "Finished · N" list. The bottom of the panel shows the estimated time left for everything, such as "About 2 min 10 s left in total", and "All jobs processed" when everything is done
Pause / cancel
Press "Pause" on the running row to stop it, and "Resume" to continue from where it stopped. If you stop the job with ✕ ("Cancel"), the boxes stay interpolated
Reorder / remove
↑ ("Move up") on a queued row swaps it with the one before it. If you remove it with ✕ ("Remove from queue"), the boxes in that section stay interpolated
Review / retry
Press "Review" on a finished row to move to the start of that section and select the resulting box. A row where the target was lost is shown in red, such as "Lost the target at f120". The part followed before the target was lost is applied, and the rest stays interpolated. "Retry" puts it back in the queue. When tracking stops partway, "Tracking could not be completed" appears. "Clear finished" removes the finished rows from the list all at once
Other operations
Tracking mode (X) and re-tracking after you correct a box by hand take priority. Meanwhile, the queue pauses and resumes automatically when they finish. While detection is running, contour refinement isn't done and only the tracking result is applied ("Detection is running, so only the tracking result was applied without refining the outline.")
PCs without refinement
On PCs without a GPU, PCs whose GPU has less than 4 GB of memory, or when the AI model for mosaic refinement hasn't been downloaded, contour refinement isn't done and the job finishes with tracking only
Leaving the edit page
The tracking queue works only while the edit page is open. If you leave the edit page, export, or send to Premiere Pro while jobs are unfinished, a confirmation "Tracking is not finished" appears. If you continue, the unfinished sections stay interpolated
Bands on the seek bar
The sections in the queue are shown as bands above the seek bar (progress for the running job, green when finished). You can hide them with "Show tracking segments on the seek bar" in "Settings" in the sidebar

Fixing a range of frames at once

When you correct an AI box by hand, only that frame changes. To fix a range of several seconds to several minutes at once, use the following actions depending on the situation.

The subject moves
Use the boxes at the start and the end (and along the way) as points and connect them by tracking (Y / Shift+Y) ("Connecting" above). To fix them by hand, pause with tracking mode off, place an ∞ continuous BBox (2) at the start of the range and fit it to the subject, then correct its position and size at frames in the middle and at the end. The frames between the corrected frames are connected smoothly and automatically ("Keyframes" above). When the movement is complex, let tracking (X) follow the subject and correct only the frames where the box drifts ("Tracking" above)
The subject barely moves
Select the corrected box, press Shift twice quickly, and advance with →. The same position, size, and shape are written to the frames ahead (Locking carry-over). Press Esc to unlock
Enlarging or shrinking all boxes in a range
In the "By time" tab of Mosaic settings (G), press "Add range", set the start and end to the range, and change "Size (box expansion)". It applies to all boxes in the range (including manually added boxes). To change them by scene, choose that scene in "Target scene:" in the "By scene" tab (press Ctrl+K at the start and the end of the range to split it. Scenes). To change only a specific subject, use the "By ID" tab (it applies to all frames of that ID)

Keep the following in mind.

  • Manually added boxes overlap AI boxes, and the AI boxes remain. In ranges where an AI box is too large or off, erase it continuously with the eraser (play while holding E+right-drag), or use "Exclude from mosaic" in the box's right-click menu to exclude that whole ID from mosaic (Working with detection boxes)
  • Interpolation between keyframes works only when you correct a box while paused with tracking mode off. It doesn't happen while tracking mode is on or when you drag during playback (which records a motion path)
  • An ∞ continuous BBox keeps appearing in the same position in the frames ahead until you delete it (it doesn't stop when the scene changes). Select the box at the frame where you want it to end and press Delete, or select "Delete this BBox" in the right-click menu, and it's removed from that frame onward
  • Connecting works only between boxes within the same scene
  • Manually added boxes (∞ continuous BBoxes and connected boxes) keep the size from when they were created as a "By ID" setting. Values you set after that in "All", "By scene", "By time", and so on also apply to manually added boxes (the setting changed last takes priority. Mosaic settings panel)
  • To check the area the mosaic covers, switch the preview to the mosaic preview (M)

EditingScenes (cuts)

During detection, cuts in the video (changes of scene) are detected automatically and shown as scene strips at the top of the timeline. A scene is the unit within which the block size is kept consistent when "Automatic pixel size" is on, and also the unit for changing Mosaic settings per scene.

Go to a scene
Click a strip to jump to the first frame of that scene. Each strip shows a number (#1, #2, ...), and you can hover over it to see its range
Split (Ctrl+K)
Use the button in the timeline toolbar (to the right of the zoom buttons), or Ctrl+K, to split the scene in two at the current frame. Use this for cuts the automatic detection missed, or where you want to change settings within the same cut
Adjusting boundaries
Drag the border between strips to move the end of the scene before it and the start of the scene after it at the same time
Delete
Use the X (Delete this scene) that appears when you hover over a strip to merge the scene with the adjacent one

Scene changes are saved as edit data, and the detection results themselves don't change. "Reset all edits" returns the scenes to their automatically detected state. Splitting a scene doesn't cut the exported video. To cut the video itself into pieces, split a clip (Ctrl+Shift+K, Editing clips).

EditingEdit toolbar

The control row below the player contains, from the left, the playback controls (Go to start / Back 1 frame / Play / Forward 1 frame / Go to end / Play blank frames only / Missing frame jump / Mute), the edit toolbar, and the time. The edit toolbar is divided by vertical lines into these groups: Shape picker / Add BBox / Add exclusion mask / Eraser / Reset current frame | Toggle overlay / Switch preview / Tracking | Mosaic settings | Reset all edits | Labels | Playback speed | Keyboard shortcuts. The Tracking button shows only an icon. When there isn't enough width, the toolbar and the time wrap onto a second row. Hover over each button to see its shortcut key.

Play blank frames only (B)
To the right of "Go to end" in the playback controls. Automatically skips frames that contain detection boxes and plays only the frames without a BBox, one after another. Useful for checking for anything missed
Missing frame jump
The two buttons to the right of "Play blank frames only" jump back or forward to frames with no detections (shortcuts: [ / ]). The target classes are the ones selected under "Filter" in the lower section of the "Labels" menu in the toolbar
Switch preview (M)
To the right of Toggle overlay. Switches between the BBox view and the mosaic preview. The mosaic view shows, on the spot, a result close to what will be exported
Shape picker
At the start of the toolbar. Choose the shape (rectangle / ellipse / polygon) of the boxes you add or draw (W for ellipse, O for polygon; press again for rectangle). In the menu, use "Drawn BBox" to choose whether drawn boxes continue to "This and later frames" or stay on "This frame only", and use "Drawn BBox type" to choose "Mosaic" or "Exclusion mask". Values switched here apply only to the current editing session. Choose the defaults used at startup in "Settings" in the sidebar (Sidebar and drawer)
Add BBox (1f / ∞)
Adds a box in the shape selected in the shape picker at the center of the current frame. "1f" (a square with a + and 1f) adds it to this frame only, and "∞" (a square with ∞) shows it continuously in all later frames. When the screen is narrow, only icons are shown. After adding a box, drag to adjust it (Adding detection boxes). Shortcuts: 1 / 2
Add exclusion mask (1f / ∞)
The dotted-square buttons to the right of Add BBox. Places an exclusion mask (an area without mosaic) in the shape selected in the shape picker at the center of the current frame. "1f" places it in this frame only, and "∞" (a dotted square with ∞) continues it in later frames (Exclusion mask). Shortcuts: 3 / 4
Eraser
Settings for the E+right-drag eraser (how to erase: Delete touched BBoxes / Delete only touched parts; shape: Circle / Rounded rectangle; size: 8-120px). Pressing the button doesn't turn on the eraser. You always erase with E+right-drag
Mosaic settings (G)
Opens the mosaic settings panel (next section)
Tracking (X)
To the right of Switch preview. Turns tracking mode on or off. While it's on, moving forward with playback / → / wheel up makes ∞ continuous BBoxes follow the subject (Tracking and keyframes). It is off when you open the edit page (you can have it on by default in "Settings" in the sidebar)
Reset current frame
Returns the edits in the current frame (adding, moving, and deleting boxes) to the state of the detection results. Shortcut: Ctrl+Z (depending on the last edit, that is undone first; see Undo)
Reset all edits
Discards all edits, including box edits, mosaic settings, scenes, and person merges (asks for confirmation first; can't be undone)
Labels (C)
The button shows a summary of the selection (for example, "All 2 labels" or "Face · Male face"). The upper section of the menu, "Show (also applies to export)", has check boxes for body areas / face. Labels you uncheck appear in neither the preview nor the export (for example, to export only body areas). The lower section, "Filter (view and missing-frame jump only)", lets you choose from all classes / body areas / male face / female face to narrow down the boxes shown in the preview and the timeline and the targets of the missing frame jump (it doesn't affect export). In projects that have boxes for mosaic already in your footage, "Mosaic" also appears in both the upper and lower sections. "Mosaic" in the upper section is checked after detection, and export reapplies mosaic over that area. If you uncheck it, that area appears in neither the preview nor the export, and it stays unchecked even after you reopen the project
Playback speed
Choose from 0.25x / 0.5x / 1x / 1.5x / 2x / 4x
Keyboard shortcuts
Hover over it to show the keyboard shortcut legend
Edit toolbar
Edit toolbar

EditingMosaic settings panel

You can set how the mosaic looks in 5 scopes (tabs). When several settings apply to the same box in the same frame, the setting changed last takes priority ("Setting priority" below). Drag the panel's header to move it anywhere, and drag its bottom-right corner to resize it (you can also select the corner and adjust it with the arrow keys, or double-click it to restore the default size). You can keep editing with the panel open. When you change a value, the change appears immediately in the mosaic preview (M).

Scope tabs
All (global defaults) / By class (body areas, face, and so on. In projects that have boxes for existing mosaic, "Mosaic" also appears) / By ID (individual tracked subjects) / By scene (per cut) / By time (a time range. "By time" below). On the By ID, By scene, and By time tabs, choose the target from the drop-down list. A scope with an override shows "Overridden", and you can remove each override individually with "Clear". The "By class" tab also has "Make all of this class exclusion masks" and "Change all of this class back to mosaic" (Changing existing boxes into exclusion masks)
Confidence threshold
Only detections at or above the specified confidence are shown and get mosaic (0-100%; a global setting that doesn't depend on the tab)
Type
Mosaic (blocks) / Blur (Gaussian blur). Default: Mosaic
Size (box expansion)
Enlarges or shrinks the detection box from its center to adjust the mosaic area (0.50x to 2.00x). Default: 1.05x. Make it larger if you want to leave some margin
Opacity
How strongly the mosaic/blur is blended in (0-100%). At the default of 100%, the subject is fully covered. The lower the value, the less it hides, so normally leave it at 100%
Edge feather
Feathers the edges of the mosaic area to blend them with the background (0-64px). Default: 6px. It means the same as "Mask Feather" for masks in Premiere Pro, feathering half inward and half outward from the outline (the value is the combined inner and outer width). When you select a box in the player, the outer range the feather reaches is shown as a dotted line. The edges of exclusion masks are blended in with the same value
Blur strength
Shown only when the type is "Blur". The higher the number (2-64), the stronger the blur. Until you move it, it shows "Auto (n)" and follows the edge feather width (the same look as before). After you move it, changing the edge feather no longer changes the blur strength. Use the reset button ("Back to Auto") to go back to "Auto". The value is kept even if you change the type back to "Mosaic". It isn't passed to Premiere Pro integration
Pixel size
The "Set pixel size" button opens the settings screen. The current setting is shown below the button (for example, Fixed: 53 blocks across, By size range: 42-96 blocks across, or Proportional by split count /16). Block size is expressed as the number of blocks across the width of the frame (the more blocks, the finer), so the mosaic looks the same even when video resolutions differ. Shown only when the type is "Mosaic". On the "By ID", "By scene", and "By time" tabs, you can press it after choosing a target. Press "Apply" to apply the setting to the open tab (All / By class / By ID / By scene / By time). "Cancel" changes nothing. The initial value for newly detected videos is set in detection options (the default is Fixed)
Reading the settings screen
The preview and the graph are on the left. Drag the ellipse box in the preview to move it, or use its bottom-right handle to resize it, and mosaic is applied inside the box with the actual blocks. For the preview image, choose a person or a test pattern, or replace it with your own image. The graph shows the relationship between the target size (horizontal axis, as a proportion of the frame width) and the number of blocks (vertical axis, finer toward the top), and you can change it by dragging the lines and handles. The result at the top right shows the number of blocks for the current box (for example, 53 blocks across) and what determined it (range, split count, lower limit, upper limit, and so on). The minimum mosaic under the self-regulation standard (long side / 100 when the long side is 400px or more, minimum 4px) always takes precedence, so you can't choose a number of blocks finer than that
Fixed
The setting used when "Automatic pixel size" is off. Uses the same block size for all frames and all targets. Specify it with "Blocks across the width" (the default is 53 blocks across. Fewer blocks are coarser, and more blocks are finer)
By size range
Choose this with "Automatic pixel size" on. Sets the number of blocks across the width for each range of target size (the representative box size for each combination of cut and ID, expressed as a proportion of the frame width). You can have 1 to 6 ranges, and you can add, delete, or reset them to the default. Within the same cut and the same ID, the block size stays constant and doesn't flicker from frame to frame
Proportional by split count
Choose this with "Automatic pixel size" on. Divides the target size by "Fineness (split count across the target)" (8-64, default 16) and uses the result as the length of one side of a block. The larger the target appears, the larger the blocks, and the higher the value, the finer the mosaic. "Coarsest block" (N or more blocks across) sets a limit on how coarse it can get (you can also choose no limit). Within the same cut and the same ID, the block size stays constant
Earlier projects
Earlier settings are converted to the new settings when you open the project. Automatic (target-based) and fixed (resolution-based) settings look the same as before. Manual (split count) settings are converted to "Proportional by split count", which splits based on the target size rather than the box width, so the block size may change even with the same split count (coarser for tall targets and finer for wide targets). When a setting is converted, the settings screen shows "Converted your previous manual setting (split count N)"
Sharp colors
Takes each block's color from a single sample point instead of the area average (equivalent to Sharp Colors in Premiere Pro; off by default)
Invert (apply outside)
Shown only when you select a detected subject or an added box on the "By ID" tab (not available for exclusion masks or on the "All", "By class", "By scene", and "By time" tabs; off by default). When it's on, the inside of the box stays as the original video, and mosaic / blur (using that box's type, block, and blur settings) is applied outside the box (the background). It affects both the mosaic preview (M) and the export. When several inverted boxes are in the same frame, areas inside any of them are kept. It isn't included in "Make these settings the default", and it isn't carried over when settings are copied automatically to a box you add (pieces split off with the eraser inherit all the settings of the original box). It is the same setting as "Invert (mosaic outside)" and "Invert (blur outside)" in the box's right-click menu (Working with detection boxes). Projects with inverted boxes can't be sent to Premiere Pro (Premiere Pro integration)

Reset each item to its default value with the button at its right end. Press "Make these settings the default" on the "All" tab to make those settings the initial settings for the next video you detect (the settings of this video don't change).

By time

On the "By time" tab, you can change how the mosaic looks for each time range of the video.
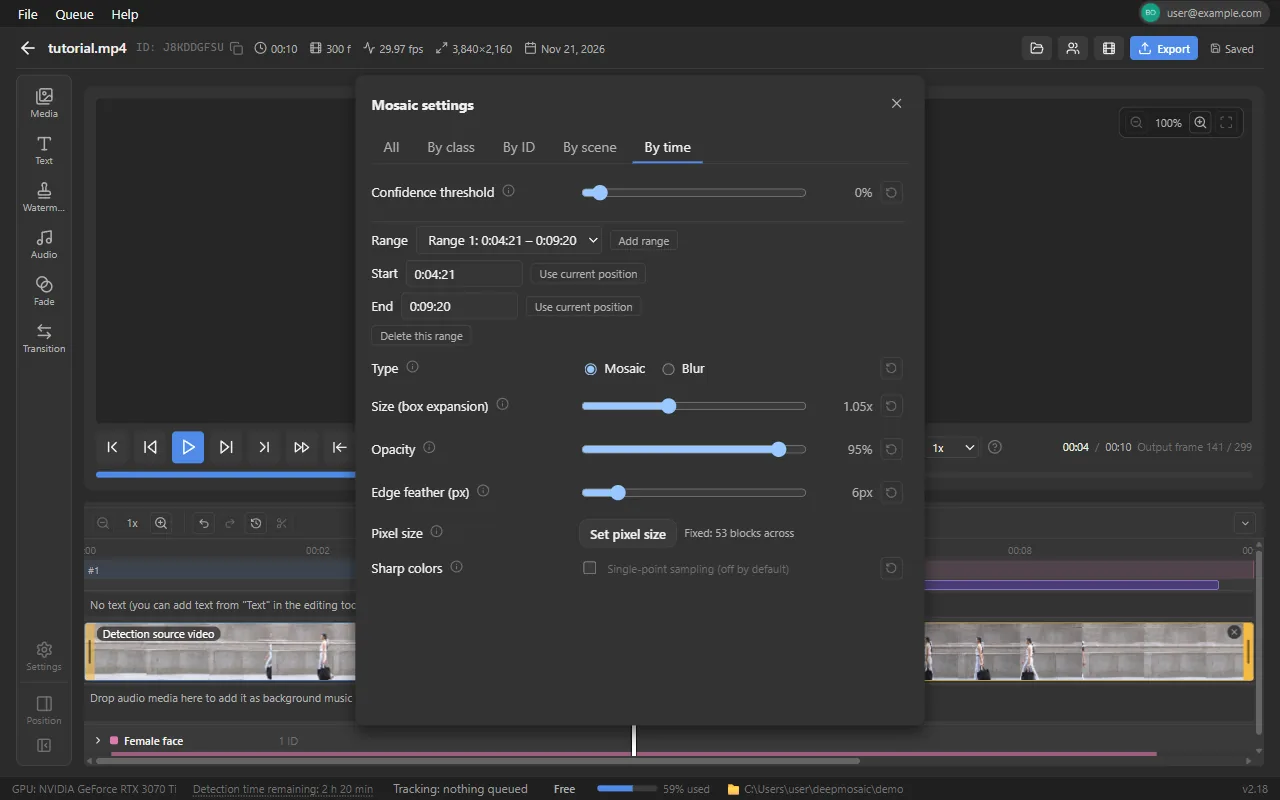
  1. Move the playhead to the start of the range and press "Add range". A 5-second range starting at the playhead is created and selected (it has the same settings as "All")
  2. Set the "Start" and "End". Type them in the min:sec:frame format (e.g. 1:05:12), or move the playhead and press "Use current position"
  3. Change the type, size, opacity, and so on, the same way as on the other tabs
Selecting and deleting ranges
Choose a range in "Range". "Delete this range" deletes it. If the start is after the end, "Start must be before end" appears
Bands on the timeline
Ranges set by time are shown as bands below the scene bands on the timeline. Click a band to open the "By time" tab with that range selected. The bands of ranges that don't take effect (for example, after "All" was changed later. "Setting priority" below) are shown faded
Clip edits
Ranges are kept in the time of the original video, so even if you split, trim, or move clips, they apply to the same part of the original video (when a clip uses the same part twice, they apply in both places). You can't set a range that covers only imported media or gaps ("This range has no part of the original video (ranges over only media or gaps can't be set)")
Which boxes
It applies to both detected boxes and manually added boxes in the range (except IDs with "Invert (apply outside)" turned on)
The By time tab of the mosaic settings panel, with a range created with "Add range" selected and the Start and End fields and "Use current position" shown
The By time tab. Select a range and set its start and end

Setting priority

When settings from "All", "By class", "By ID", "By scene", and "By time" overlap on the same box in the same frame, the setting changed last takes priority, and all items of that setting are used as they are (items aren't mixed).
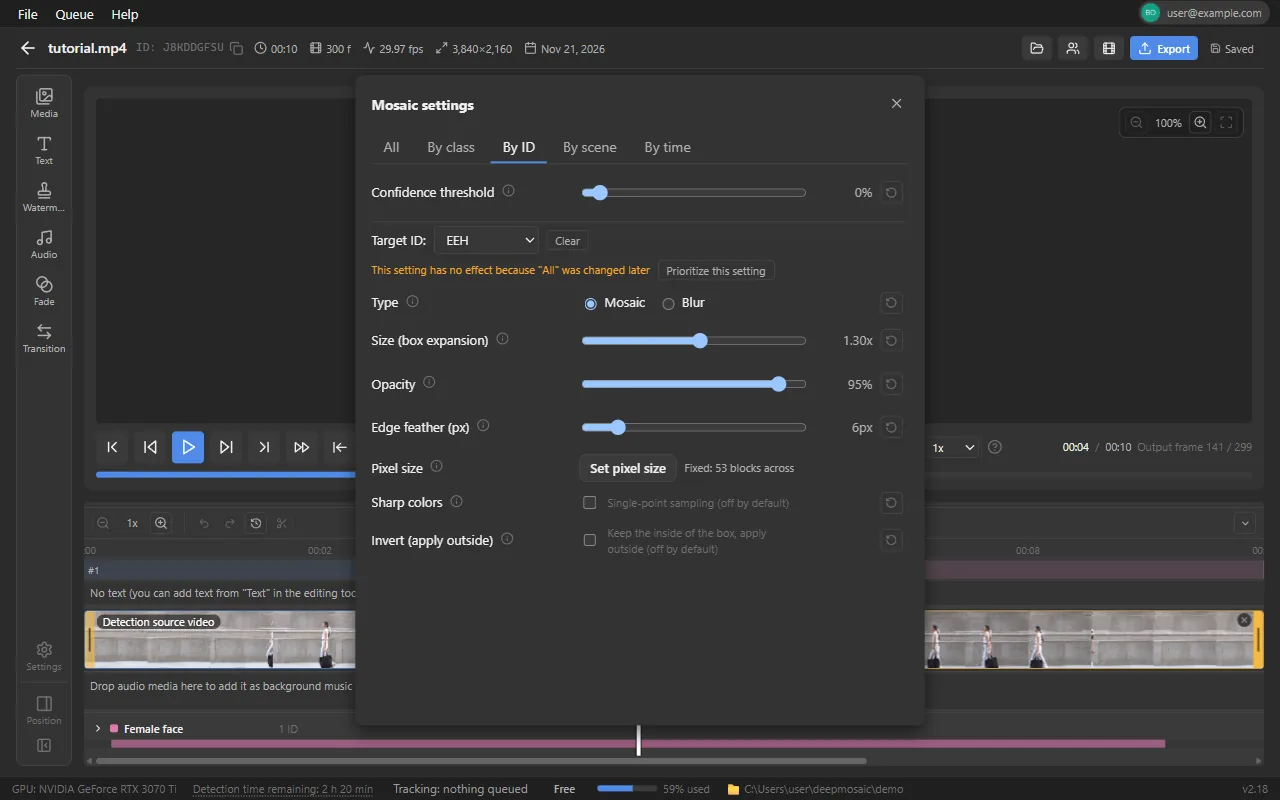
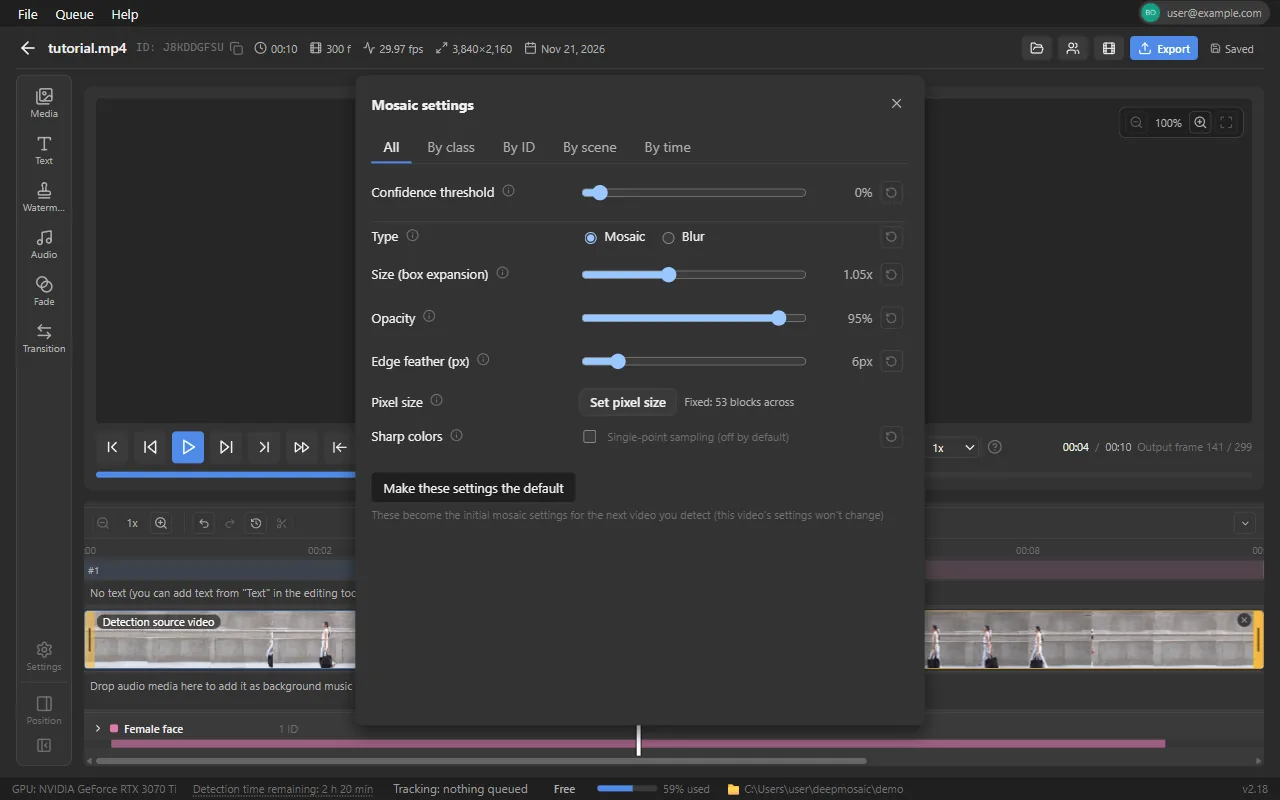
  • A setting counts as "changed" when you actually change a value in the panel (including resetting it to the default with ) and when you add or change a range on the By time tab. Choosing the same value again doesn't change the order
  • If you change "All" later, the By class, By ID, By scene, and By time settings made before it no longer take effect, and all items take the values of "All". Even if you change the value back, the order isn't restored
  • When you open a setting that doesn't take effect on its tab, a message such as "This setting has no effect because "All" was changed later" appears. Press "Prioritize this setting" to make that setting the one changed last without changing its values, so it takes effect again
  • When a change makes other settings stop taking effect, a notification such as "2 other settings no longer take effect after this change" appears. Press "Undo" in the notification to go back to the values and order before that change (only the most recent change. If you made another edit in between, "Couldn't undo (another edit was made after it)" appears)
  • "By ID" settings added automatically when you add or paste a box or connect boxes (Carrying over mosaic settings) don't count as "changed". Right after the box is created, it looks the same as before, and settings changed after that take priority
  • For IDs with "Invert (apply outside)" turned on, the settings of that ID are used regardless of the order. The per-ID settings of boxes for existing mosaic (including the block settings added by detection) are also used regardless of the order. Mosaic exclusion, exclusion masks, and the confidence threshold also apply regardless of the order
  • Projects created before 2.18 look the same as before when you open them (settings without a recorded order take priority in the previous order: By ID, By class, By scene, All)
  • If you open a project in a version of Deepmosaic earlier than 2.18, the By time settings and the order are ignored, and the previous order is used (if you save it in that version, the By time settings and the order are lost)
  • By time settings aren't passed to Premiere Pro integration
The By ID tab of the mosaic settings panel, showing "This setting has no effect because "All" was changed later" and "Prioritize this setting"
A By ID setting that has no effect because "All" was changed later, with "Prioritize this setting"
The mosaic settings panel, where you specify the type, block size, and opacity of the mosaic
Mosaic settings panel (All)
The By ID tab of the mosaic settings panel, with a target ID selected and shown as Overridden
The By ID tab. When you change settings for the selected target only, it shows "Overridden"
The By scene tab of the mosaic settings panel
The By scene tab. You can change how the mosaic looks for each cut

EditingPerson gallery

Open "Person gallery" (P) in the header to see the detected faces grouped by person (detections with low face likelihood are not included in any person and go to "Others"). You can turn mosaic on or off and correct the gender for each person, and if the same person was detected as separate people, you can merge them into one. You can drag the panel to move it.

Person card
Representative image, gender badge, number of tracks, time on screen, and time of first appearance. Click a card to jump to the frame where the person first appears
Correcting the gender
Click the gender badge and choose "Set as male face", "Set as female face", or "Revert to detection results". This changes which class-specific mosaic setting (male face / female face) applies
Mosaic on / off
"Turn mosaic off" excludes all of that person's tracks from mosaic (for example, to keep mosaic off the faces of people other than the performers). "Turn mosaic back on" restores them
Merging people
Drag and drop a card onto another card (including the "Others" card) to merge them as the same person. Merged cards show "Unmerge". Tracking IDs merged on the timeline or from the right-click menu also appear as one person in the person gallery
Others
Face tracks that couldn't be grouped into a person are collapsed into "Others: N tracks (Brief appearance a, Small face b, Low face likelihood c, and Undetermined d)". Press it to list them by reason, and use "Show more" to show the next 60 at a time. Here too, you can turn mosaic on or off one track at a time, and drag and drop a track onto another card to merge it
Regroup people
If the same person isn't grouped together, for example in a long video, use "Regroup people" in the panel to group the faces in the video again. This can take a few minutes, and the progress message "Regrouping people…" is shown while it runs (you can't close the panel until it finishes). From the second run on, the video isn't read again, so it finishes sooner. If many faces aren't grouped into people, the message "In long videos, some faces may not be grouped into people." appears. The button appears only for projects that a supported detection engine (2.7.2 or later) can handle (it isn't available in the Web app)

For projects detected with an older version, "This video was detected with an older version. To use the people list, run detection again." appears. In that case, load the video again and run detection.
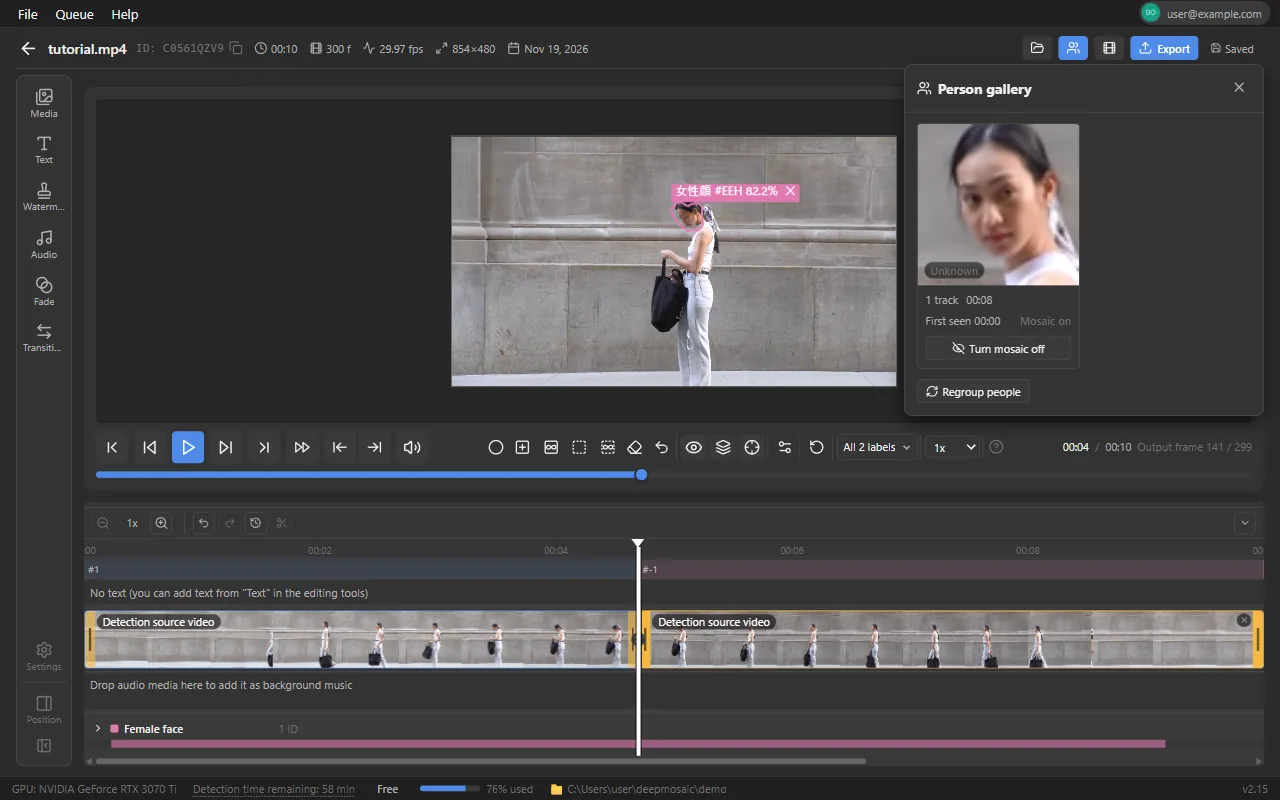
The person gallery panel. Detected faces are lined up as cards, one per person
Person gallery

EditingKeyboard shortcuts

This is a list of the shortcuts you can use on the edit page. You can also hover over at the right end of the toolbar to show the same list. Shortcuts don't work while you're typing text.
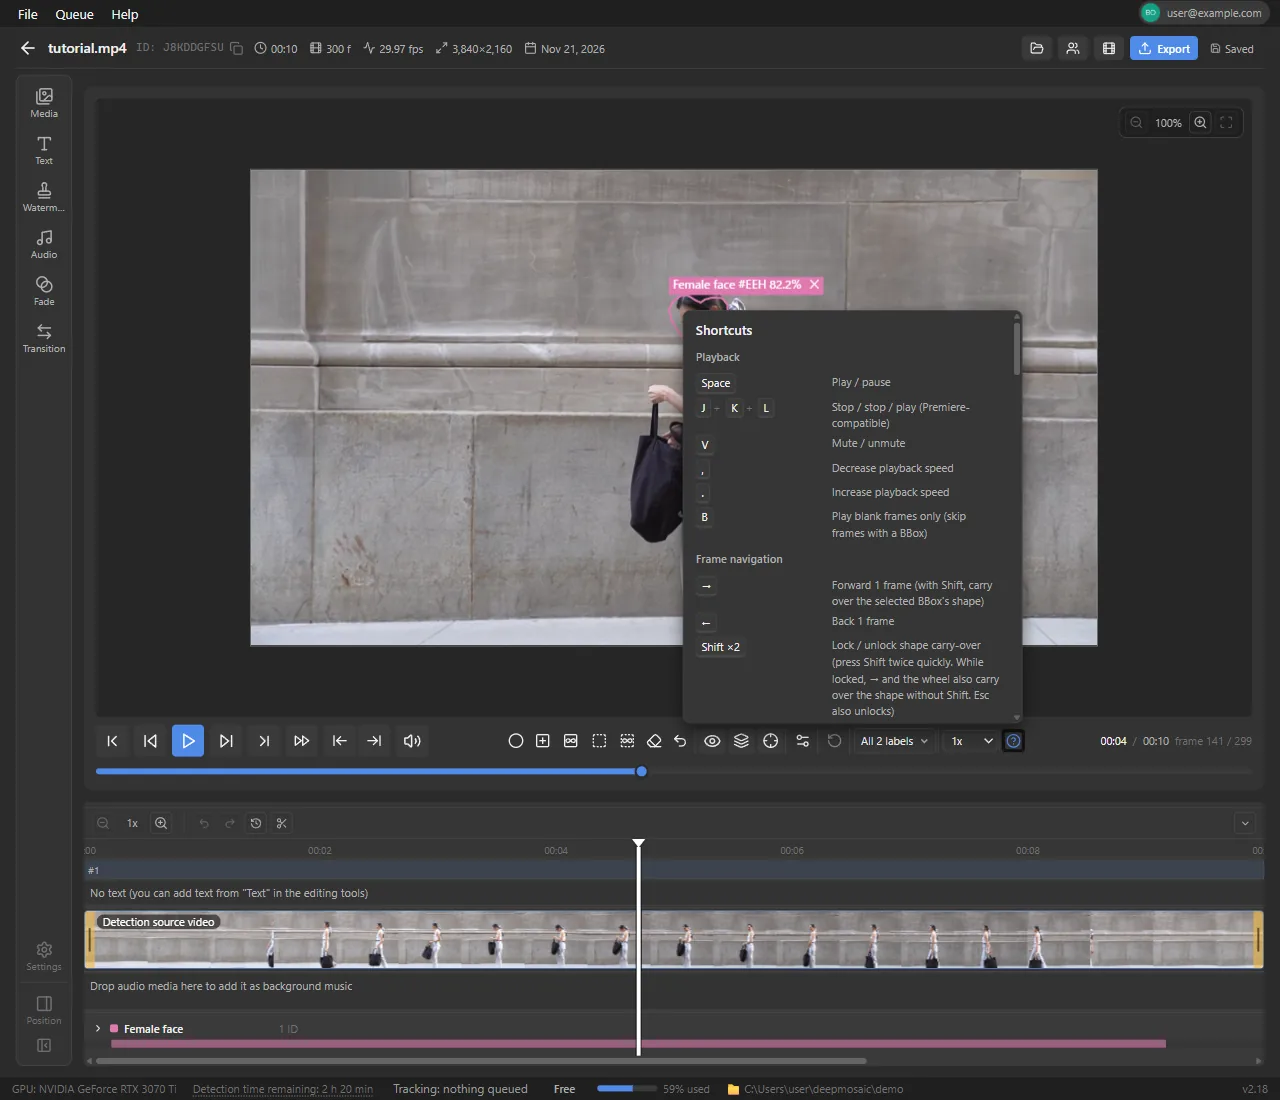
  • Rows in the "Timeline" category work while the timeline is shown (not while it's collapsed). Undo is separate from Ctrl+Z for detection boxes: timeline edits use Ctrl+Shift+Z / Ctrl+Shift+Y
  • Delete acts on a different target depending on where you last worked. If you last touched the player (video), it deletes the selected detection box; if you last touched the timeline, it deletes the selected clip, text, or audio track. Ctrl+C / Ctrl+V (copy / paste) work the same way: in the player they act on detection boxes, and on the timeline they act on clips, text, and audio tracks (selecting text in the sidebar also counts as touching the timeline)
  • Press Shift twice quickly to lock shape carry-over; press it twice again or press Esc to unlock. This may not work in environments where an input method (IME), such as Japanese input, uses a single press of Shift
The edit page with the shortcut legend shown
Shortcut legend
CategoryKeyAction
PlaybackSpacePlay / pause
J / K / LStop / Stop / Play (compatible with Premiere Pro)
VMute / unmute
,Decrease playback speed
.Increase playback speed
BPlay blank frames only (skips frames that have a BBox)
Frame navigation→Forward 1 frame (if you hold Shift while a BBox is selected, it moves forward 1 frame and carries over the shape of that box. While carry-over is locked, the shape carries over even without Shift)
←Back 1 frame
Shift twiceLock / unlock shape carry-over (press Shift twice quickly. While locked, → and the wheel also carry over the shape without Shift. Esc also unlocks)
PageDownForward 10 frames
PageUpBack 10 frames
HomeGo to start
EndGo to end
[Previous missing frame
]Next missing frame
Zoom and view+ / =Zoom in on frame
-Zoom out on frame
0Reset zoom
HShow / hide detection overlay
MSwitch BBox / mosaic preview
COpen / close the "Labels" menu in the toolbar (labels to show and filter)
BBox editing1Add a BBox to this frame only
2Add a continuous BBox to the following frames
3Add an exclusion mask to this frame only
4Add a continuous exclusion mask to the following frames
WSet the shape of BBoxes you add / draw to ellipse (press again to switch back to rectangle)
OSet the shape of BBoxes you add / draw to polygon (press again to switch back to rectangle)
DeleteDelete the selected BBox (when you last worked in the player)
Ctrl+CCopy the selected BBox (when you last worked in the player)
Ctrl+VPaste the copied BBox into the current frame (when you last worked in the player)
YSet the selected BBox as the connection source / connect. Select a BBox in another frame and press it again to create a continuous BBox that connects the points by following the subject's movement (when you last worked in the player. "Connect from here" and "Connect to here" in the right-click menu do the same. A single Ctrl+Z undoes it)
Shift+YAdd the selected BBox as a waypoint (while a connection source is set. When you last worked in the player. "Add as waypoint" in the right-click menu does the same)
EscClear the connection source (stop without connecting after placing points)
Ctrl+ZUnfreeze continuous BBox → reset current frame
QRotate selected BBox by 15°
Shift+QRotate selected BBox by -15° (counterclockwise)
FMake the current position of the selected BBox a keyframe (Tracking and keyframes)
XTurn tracking mode on / off (while it's on, the ∞ continuous BBox follows the target during playback, with →, and when you scroll the wheel up. See Tracking)
ToolsGOpen mosaic settings panel
Ctrl+KSplit at the playhead (splits the clip and the scene at the same time. Same as the scissors in the toolbar; a single Ctrl+Shift+Z undoes both)
TimelineCtrl+Shift+KSplit at the playhead (when the timeline has focus. Same as Ctrl+K)
BackspaceDelete the selected clip / text / audio track
Ctrl+Shift+ZUndo timeline edit
Ctrl+Shift+YRedo timeline edit
Ctrl+←Move the selected element 1 frame earlier
Ctrl+→Move the selected element 1 frame later
Ctrl+DDuplicate selected element
Ctrl+CCopy the selected element (when you last worked on the timeline)
Ctrl+VPaste the copied element (text and audio at the playhead, clips after the selected clip. When you last worked on the timeline)
DeleteDelete the selected element (when you last worked on the timeline)
PagePOpen / close person gallery
AOpen / close media (sidebar)
TOpen / close the text / watermark / audio / fade / transition drawer (the item you opened last)
Ctrl+Shift+TCollapse / expand timeline
Ctrl+Shift+BMinimize / expand sidebar
Ctrl+EnterOpen export dialog
Ctrl+Shift+OOpen project folder
Ctrl+Shift+PImport into Premiere Pro
MouseWheelStep forward / back a frame (10 frames with Shift. While a box is selected, scrolling up with Shift held moves forward 1 frame and carries over the shape, like Shift+→, and scrolling down moves back 1 frame. While carry-over is locked, scrolling up carries over the shape even without Shift)
Ctrl+wheelZoom the frame in or out around the cursor position
Ctrl+left-dragPan the frame (works only while zoomed in. Dragging with the middle button also works)
Left-dragLeft-drag on an empty area to draw a BBox in the shape chosen in the shape picker (rectangle / ellipse / polygon). For polygons, click to place points, and close the shape with the start point / Enter / double-click. A short tap clears the selection
Double-clickDelete the BBox
DragDrag the rotation handle of the selected BBox to rotate it (in 15-degree steps with Shift)
DragDrag a polygon point to reshape it
Double-clickDouble-clicking a polygon edge also adds a point (1 point per double-click)
Click+DeleteClick a point to select it, then press Delete to delete it (a polygon can't have fewer than 3 points)
DragDrag a handle of the selected polygon to reshape the curve (Alt moves one side only)
Alt+dragAlt+drag a polygon point to pull out handles (turns a corner into a curve)
Alt+clickAlt+click a polygon point to turn it back into a corner
Ctrl+clickCtrl+click a polygon point to delete it (the polygon won't go below 3 points)
ClickClick an edge of the selected polygon to add a point
Shift+left-dragDrag around points of the selected polygon to select them together (they're grouped into one connected segment. If it's 1 point, that single point is selected; tap to clear)
DragDrag inside the points you selected together to bend the segment while both of its ends stay fixed (points nearer the middle move more)
Right-clickTrack menu for the detection box (switch gender / exclude from mosaic / invert / exclusion mask ("Make exclusion mask" / "Change back to mosaic") / merge IDs / connect ("Connect from here" / "Add as waypoint" / "Connect to here") / change shape / delete). On an ID row of the timeline, the list for merging IDs. On a bar of the timeline, a menu to duplicate, copy, paste, and delete
E+right-dragDelete continuously (eraser). With the eraser button in the toolbar, you can choose "Delete touched BBoxes / Delete only touched parts", "Circle / Rounded rectangle", and "Size". It keeps working if you play or step frames while holding it down

Timeline editingSidebar and drawer

Open the timeline editing features from the sidebar that runs vertically along the edge of the edit page. Press an item to open a drawer (a pull-out settings panel) next to it, and press the same item again to close it. You can keep working in the player and the timeline while the drawer is open.

Media (A)
Import video, audio, and image media and add it to the timeline (Media)
Text
Burn text into the video (Text)
Watermark
Overlay an image such as a logo on the entire video (Watermark)
Audio
Adjust the original video's volume and audio tracks such as background music (Audio and background music)
Fade
Set the fade length in seconds for the start and end of the whole exported video, and for the start and end of the selected clip (Fade)
Transition
Set the type and length of the switching effect added at a join between clips. The sidebar label is also "Transition" (Transition)
T key
Opens or closes the drawer of the item you opened last, from Text through Transition ("Watermark" the first time)
Settings
The gear at the bottom of the sidebar opens "Settings", where you choose the default values for editing: the persistence of BBoxes you draw (this and later frames / this frame only), their shape (rectangle / ellipse / polygon) and type (mosaic / exclusion mask), whether the HUD (boxes and chips) is shown, whether the box chips are shown ("Show BBox labels (name, ID, probability)"; the boxes stay visible when it's off), the eraser's erase mode, shape, and size, whether tracking mode is on when you open the edit page, and whether the sections in the tracking queue are shown on the seek bar ("Show tracking segments on the seek bar"). "Settings" opens without darkening the screen, and you can drag its header to move it, so you can change settings while looking at the preview (it appears in the center each time you open it). Changed values are saved immediately and become the defaults when you start the app (values you switch in the toolbar while editing are not saved). "Reset to default" restores the factory values. The gear isn't shown while the sidebar is minimized
Position
The button at the end of the sidebar switches whether the sidebar and drawer are on the left or the right side of the screen
Drawer width
Drag the edge of the drawer on the player side to change its width between 240 and 520px. You can also select the edge and press the ← / → keys to adjust it in 16px steps. Double-click to return to the default 300px

The drawer width and its left or right position carry over the next time you open the edit page.
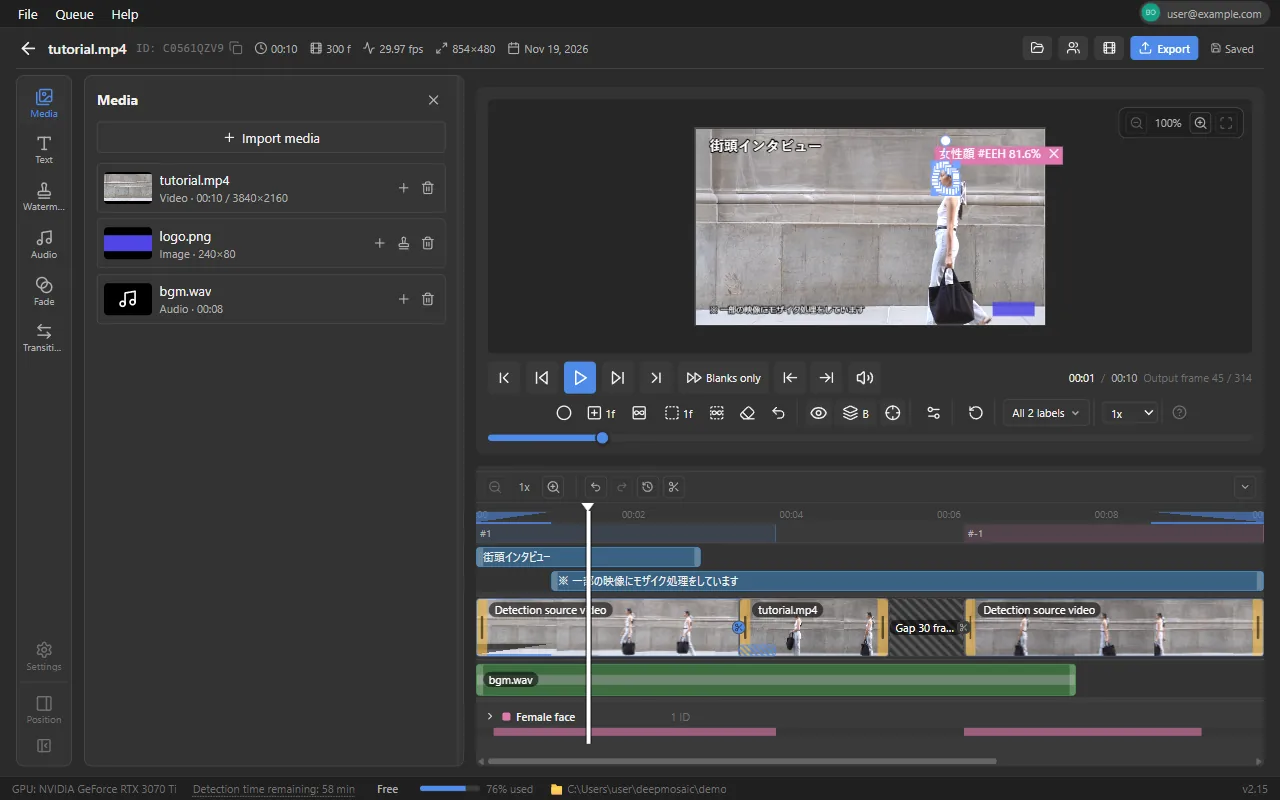
The edit page with the drawer opened by pressing "Media" in the sidebar. Imported media are listed
Sidebar and drawer (with Media open)

Timeline editingEditing clips

The "Clip lane" of the timeline shows the sequence of the exported video as bars (clips). At first there is a single clip of the original video (the detection source). You can trim, split, and delete to cut unwanted parts, or add imported media before or after it. The text lane is above the clip lane and the audio lane is below it, and all lanes are laid out on the exported video's time.

Your edits show up in the preview as is and are included when you export. Mosaic is applied to the sections from the original video.
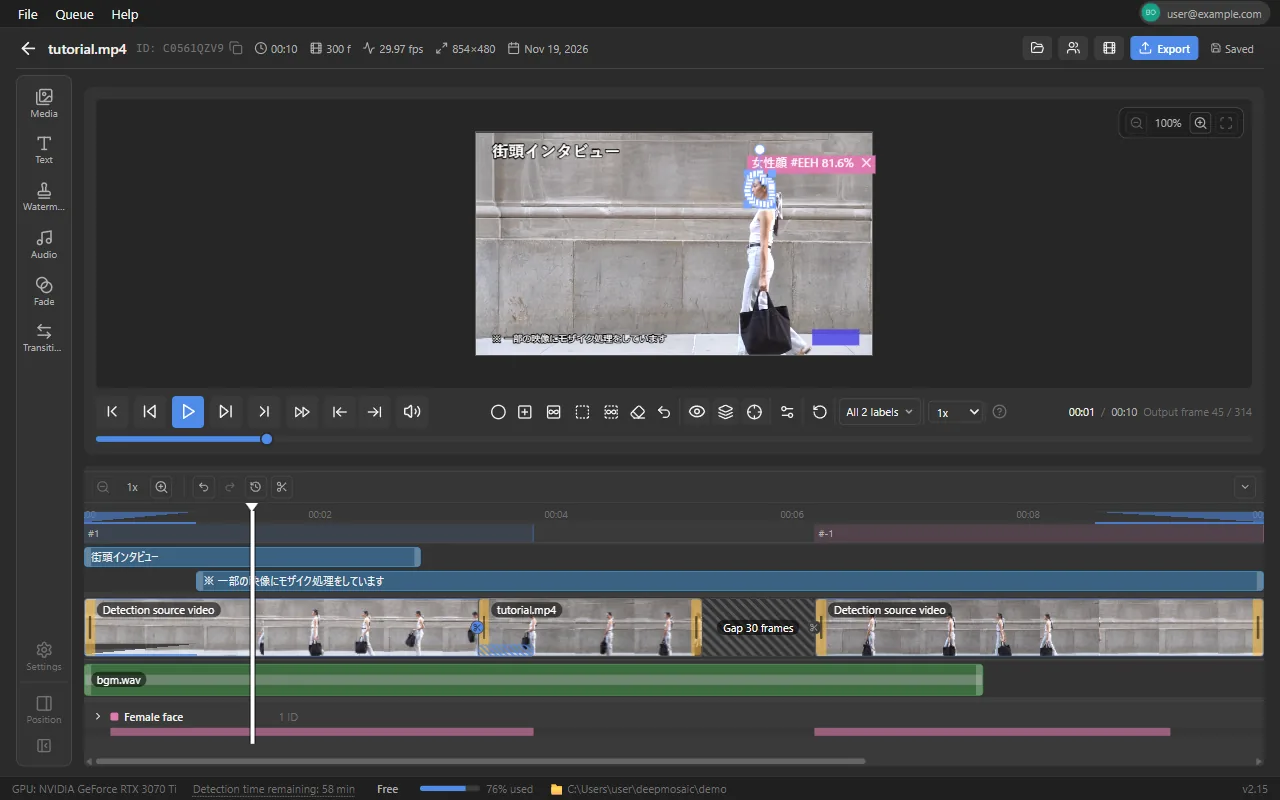
Select
Click a bar to select it. A delete button (X) appears at the top right of the bar
Trim
Drag the left or right edge of a bar to trim the start or end of the clip (minimum 1 frame). The edge snaps when it gets close to a scene boundary or the playhead. Imported videos can be extended up to the length of the media, and image clips to any length
Split (Ctrl+K / Ctrl+Shift+K)
Use the button to the right of the timeline zoom buttons, or Ctrl+K (Ctrl+Shift+K when the timeline has focus), to split the clip in two at the playhead and split the scene at the same time. The clip bar immediately becomes two, a cut mark (diagonal lines and scissors) appears at the join, and the scene strip gets a new number. The second half is selected, so you can go on to trim or delete it. A single "Undo" restores both the clip and the scene
Delete
Select a clip and press the delete button (X) on the bar, press the Backspace / Delete key, or choose "Delete" from the right-click menu. Later clips move forward to close the gap (ripple delete)
Reorder and move
Grab a bar and drag it left or right to reorder it according to where you drop it. It snaps to the edges of other clips, scene boundaries, and the playhead. You can also move it past the current end. Use Ctrl+← / Ctrl+→ to move the selected clip 1 frame at a time
Gap
If you place a clip away from the previous clip, the space between them becomes a gap (black screen, no sound), and a bar with diagonal lines shows "Gap N frames". The exported video also has a black screen with no sound there. To close a gap, drag the clip to the edge of the previous clip (it snaps to the edge)
Join
A badge (scissors) appears at each join between clips. Press the badge to open a small menu where you choose "Fade" or "Transition". When you choose one, the corresponding tab in the sidebar (Fade / Transition) opens with that join in focus. Set the length in seconds and the type there
Filmstrip
Video clip bars show thumbnails of their content (filmstrip). Image clips show the image itself. Until the thumbnails finish loading, the bars are shown in a plain color
The clip lane of the timeline. The original video is split, with a media clip and a gap inserted, and the text lane above and the audio lane below
Clip lane (trim, split, gap) and the text and audio lanes

Right-click menu and clipboard

Right-click a clip, text, or audio track bar to show a menu with "Duplicate", "Copy", "Paste", and "Delete". If you right-click an empty area of a lane, only "Paste" appears. The menu items and the shortcuts do the same thing.
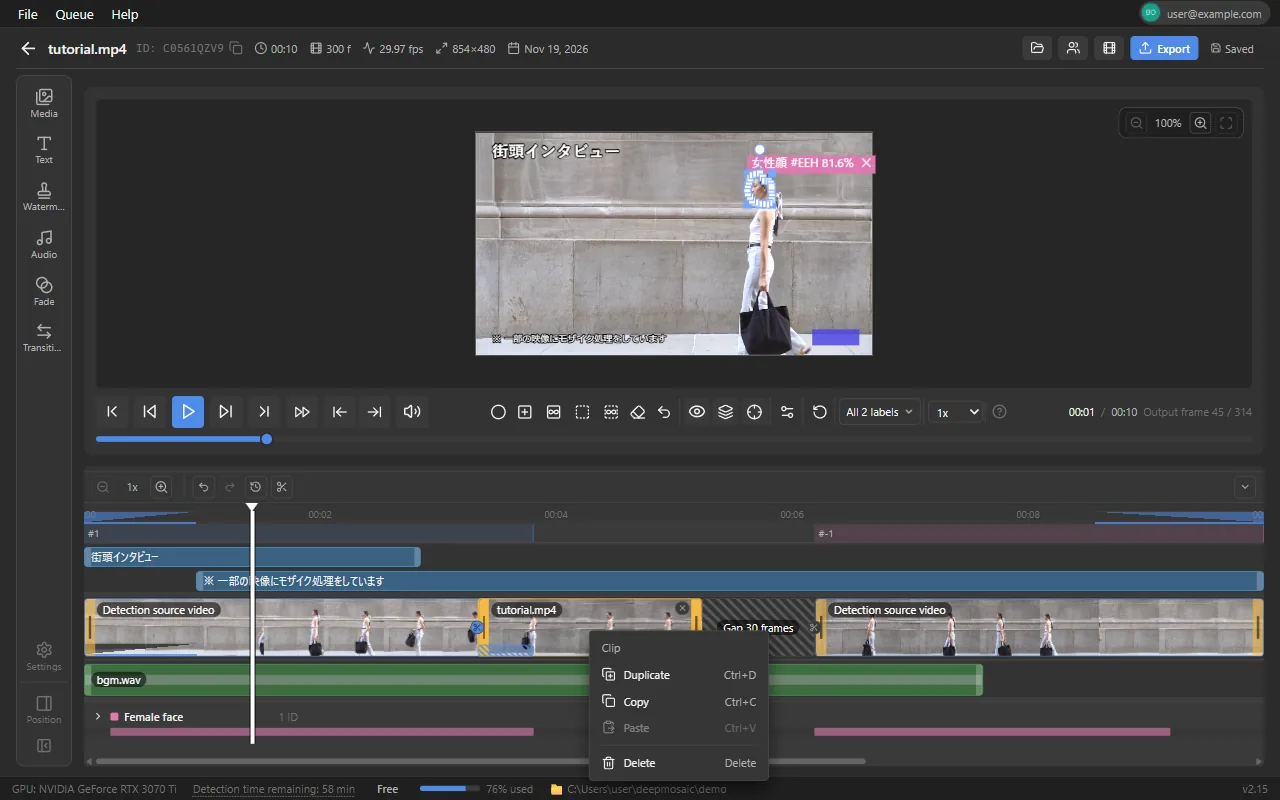
Duplicate (Ctrl+D)
Duplicates a clip right after it, text right after its bar, and an audio track at the same position
Copy / Paste (Ctrl+C / Ctrl+V)
Pastes the copied element. Text and audio tracks go at the playhead, and clips go right after the selected clip (or, if no clip is selected, the clip at the playhead). The clipboard holds only the one element you copied last, and it is separate from your computer's clipboard (it works only within the edit page)
Delete (Delete)
Deletes the selected element. If you last worked in the player, Delete deletes a detection box instead (Shortcuts)
The menu shown by right-clicking a clip on the timeline (Duplicate, Copy, Paste, Delete)
Timeline right-click menu

Undo and history

Timeline edits (clips, text, audio, watermark, fade, transition, and adding media) are recorded in a history separate from detection box edits. Use "Undo" (Ctrl+Shift+Z) / "Redo" (Ctrl+Shift+Y) to the right of the timeline zoom buttons to go one step at a time, or choose an entry in the list from the history button to undo everything back to that operation at once. The list shows operation names such as "Split", "Trim", "Move", and "Add text" with their times, newest first, and keeps up to 100 entries. The history is cleared when you reopen the video.

Timeline height and collapsing

Changing the height
Drag the top edge of the timeline to change its height between 220 and 720px (at least 200px always remains for the player). You can also select the top edge and press the ↑ / ↓ keys to adjust it in 16px steps. Double-click to return to the default 400px
Collapsing (Ctrl+Shift+T)
The button at the right end of the toolbar collapses the timeline to just the toolbar row, so the player can use more of the screen. Press it again to expand the timeline

The height and the collapsed state carry over the next time you open the edit page.

Timeline editingMedia (importing assets)

In the media panel, which you open with "Media" (A) in the sidebar, import the video, audio, and image media you want to use on the timeline. Imported media is copied into the project folder, so you can keep using it even if you move the original file (it's also included in the zip when you export the project).

Importing
Use "Import media" to choose the type (video / audio / image) and select a file, or drag and drop files from File Explorer onto the edit page
Supported formats and limits
Video: the same formats as in Loading videos (up to 2GB per file) / Audio: MP3, WAV, AAC, M4A, FLAC, OGG, Opus (up to 200MB) / Image: PNG, JPEG, WebP, BMP (up to 50MB)
Adding to the timeline
"Add to timeline" on a media row places a video at the end as a clip, and audio at the playhead as an audio track. You can also drag media onto a lane to place it wherever you like (videos and images on the clip lane, audio on the audio lane)
Images
"Add to timeline" places an image as a 5-second image clip, and you can drag the edge of the bar to stretch or shrink it to any length. Choose "Set as watermark" to use the image as a logo over the entire video (Watermark)
Video audio
In sections where an imported video is placed as a clip, the export doesn't include that video's audio, and those sections are silent (audio tracks such as background music still play). To use the audio of an imported video, drop the same media onto the audio lane as well
Deleting media
The delete button on a row deletes the media from the project. The file itself is also deleted, so you can't undo this (timeline undo doesn't restore it either). Media used on the timeline can't be deleted

Imported media isn't covered by AI detection. Mosaic isn't applied to media sections, and you can't add detection boxes or use the eraser there. For footage that needs mosaic, first load it as a video, run detection, export it, and then import the result.

Timeline editingText

Use "Text" in the sidebar to burn text into the video. You can add as many text items as you like and set the display range, position, and format of each. The display range is specified with frame numbers of the exported video.

Adding
"Add text" adds a text item reading "Text" at the bottom center, shown throughout the video. Select it from the list to edit it
Display range
Enter the start and end frame numbers. "Set to playhead" enters the playhead position. Select the "Show until the end" check box to show the text until the end of the video
Position
Drag the text in the preview to move it freely to any position. To set it numerically, use "Position X / Y (%)" (the position from the top left). Choosing a "Position preset" (9 positions from top left to bottom right) aligns the text with a 2% margin from the edge
Size
Specify the text height as a percentage of the video height (2 to 50%, default 6%)
Font and bold
There are 5 fonts: Gothic (default) / Yu Gothic / Mincho / MS Gothic / BIZ UDGothic. You can also make the text "Bold". If a font isn't installed on your computer, the text is burned in with a font of the same family, or with Gothic if none is available. Fonts without a bold style (such as MS Gothic) are rendered at normal weight
Color, outline, and opacity
Text color (default: white), outline width (0 to 25% of the text height, default 8%) and color (default: black), and opacity (default 100%)

Text lane

Above the clip lane of the timeline, a bar showing the display range appears for each text item, one row per item (text lane). Drag a bar to move it together with its display range, or drag either end to change the start or end. Selecting a bar also selects the same text in the text panel. Right-click to duplicate, copy, paste, or delete.
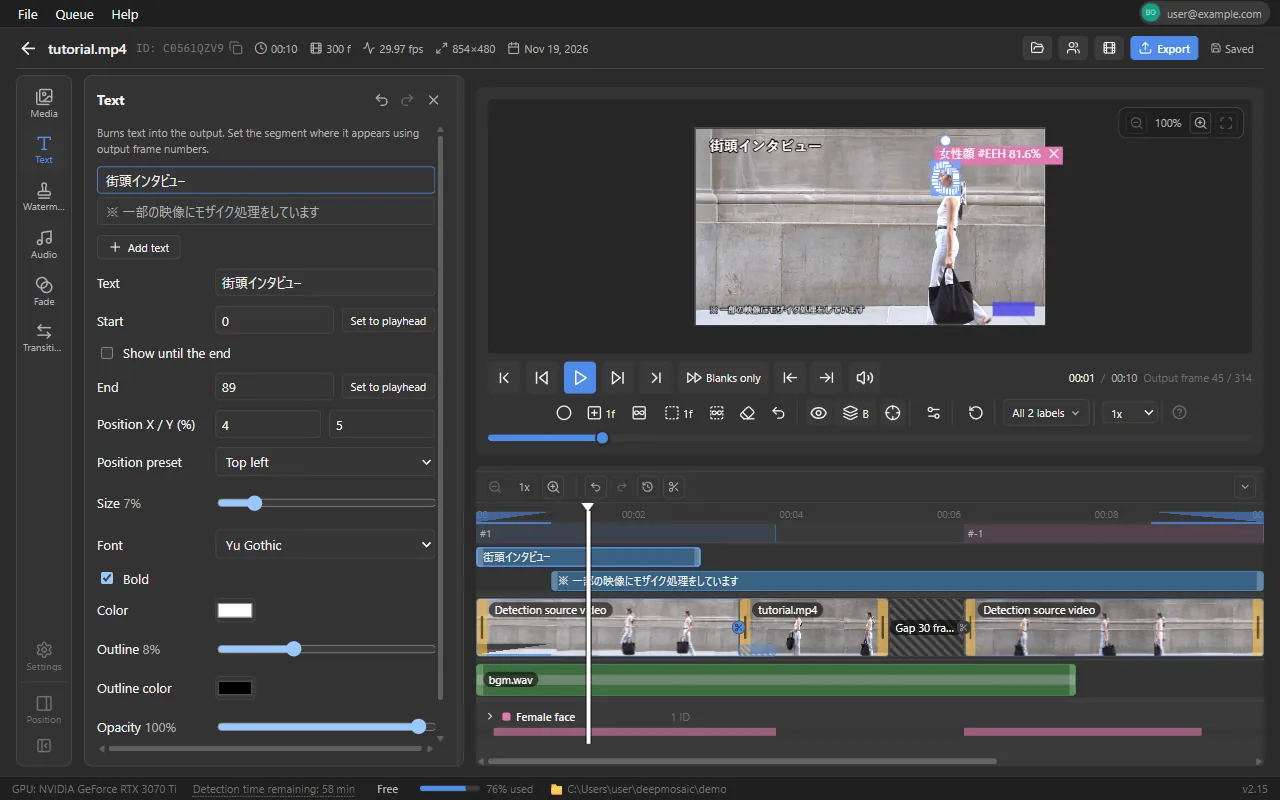
The text, font, and position set in the text panel, with the text over the preview and bars in the text lane
Text panel and text lane

Timeline editingWatermark

Use "Watermark" in the sidebar to overlay one image, such as a logo, on the entire exported video. Import the image in the media panel first (you can also set it with "Set as watermark" on an image in the media panel).

Image
Choose one of the imported images. "None" removes the watermark
Position
Choose from 9 positions from top left to bottom right (default: bottom right)
Size
Specify the image width as a percentage of the video width (1 to 100%, default 15%). The aspect ratio is kept
Opacity
0 to 100% (default 80%)
Horizontal margin / Vertical margin
Specify the distance from the edge of the video as a percentage of the video width / height (0 to 50%, default 2%)

To add a text watermark, use text shown over the entire video.
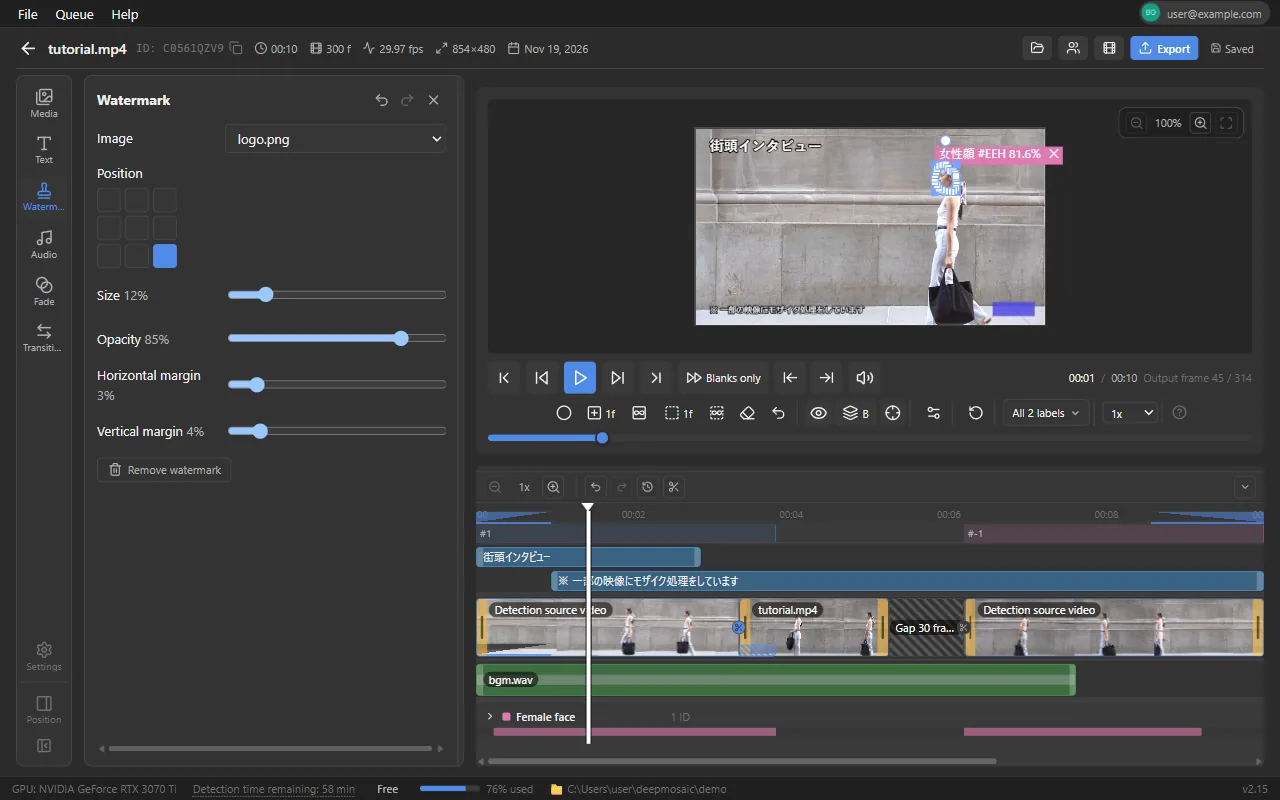
The image, position, and size set in the watermark panel, with a logo overlaid in a corner of the preview
Watermark panel

Timeline editingAudio and background music

Use "Audio" in the sidebar to adjust the audio of the original video and audio tracks such as background music. On export, the audio of the original video and all audio tracks are layered (mixed) into the output.

Audio of the detected video
Volume of the original video (-40 to +12dB) and mute
Adding audio tracks
Use "Add to timeline" on audio media in the media panel (the track is placed at the playhead), or drag audio media onto the audio lane. If you place video media on the audio lane, you can use just the audio of that video
Volume / Mute
-40 to +12dB for each track. Mute temporarily silences just that track
Fade in / Fade out
Fades the start and end of each track over 0 to 20 seconds

Audio lane and waveform

Below the clip lane of the timeline, a bar appears for each audio track, one row per track (audio lane). The bar shows the waveform of the background music, so you can line things up while seeing where the music builds up or goes silent. Drag a bar to move it, or drag either end to trim the part that is used (the start and end of the song). Background music keeps playing across gaps between clips. For audio whose length is unknown, "length unknown" is shown instead of a bar.
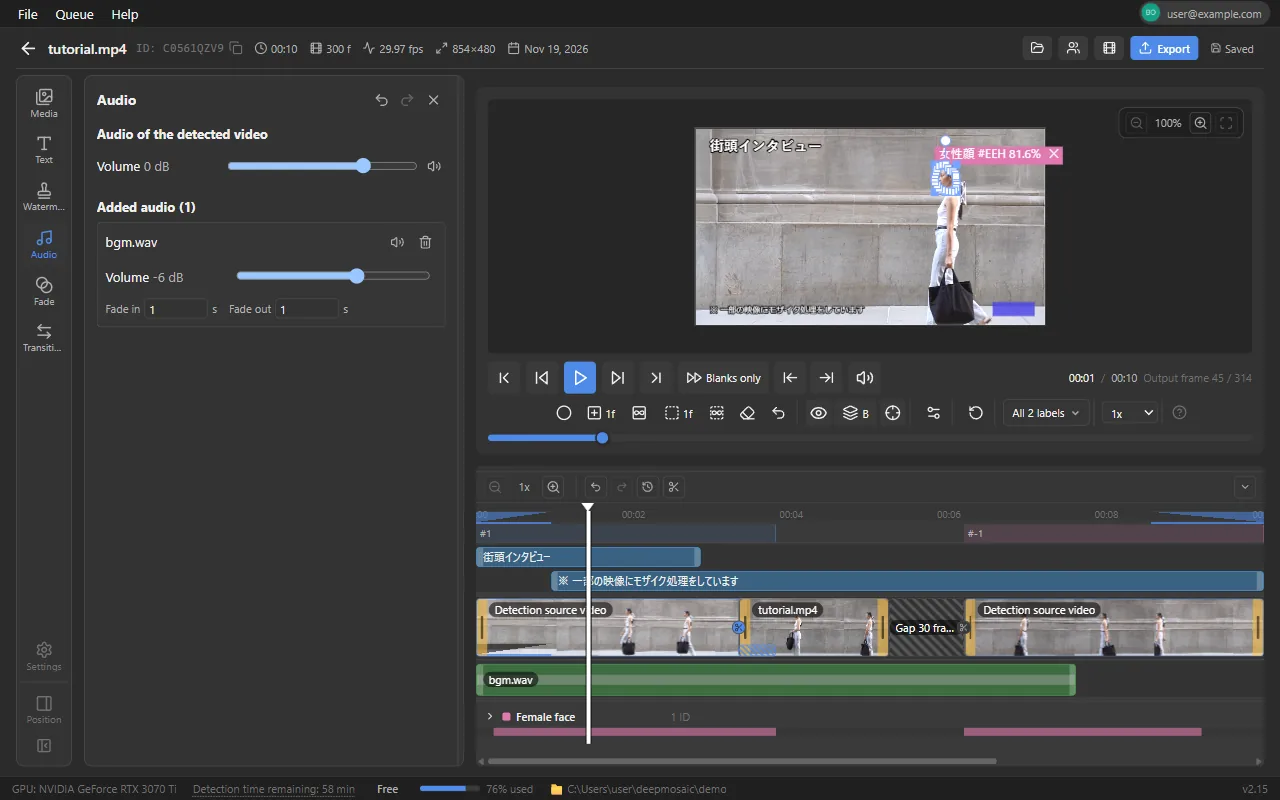
The volume and fade of background music set in the audio panel, with a waveform drawn on a bar in the audio lane
Audio panel and audio lane waveform

Timeline editingFade

Fade the exported video in from black and out to black. There are two kinds: "Overall fade", applied to the start and end of the whole video, and "Clip fade", applied to the start and end of each clip. For the overall fade, enter the seconds in "Fade" in the sidebar. For clip fades, enter them in the section for the selected join, which opens when you choose "Fade" from the scissors at a join, or in the "Selected clip" section, which appears when you select a clip. You enter the seconds only in the sidebar (not on the timeline).

Choosing from the scissors
Press the badge (scissors) at a join between clips (or select it and press Enter / Space) to open a menu with 2 items, "Fade" and "Transition". Use ↑ / ↓ to move between the items, and press Esc or click outside the menu to close it. Choosing "Fade" opens "Fade" in the sidebar with that join in focus ("Transition" is covered in Transition)
Overall fade
In "Fade" in the sidebar, enter the fade-in and fade-out seconds for the whole video. Once you enter them, a ramp (triangle mark) of that length appears at the ends of the ruler
Clip fade
In the section for the selected join, enter the fade out of the clip before the join and the fade in of the clip after it. For the start of the first clip or the end of the last clip in the video, select the clip and enter the value in the "Selected clip" section. Once entered, a ramp appears at the bottom edge of the bar. Only the video of that clip fades (for clips of the original video, the audio fades too), and the watermark and text don't darken
Adjusting the seconds
Specify the length in seconds (0 to 20 seconds; 0 seconds means no fade). The actual number of frames that fade is shown next to the seconds. Clicking a ramp (or selecting it and pressing Enter) also opens "Fade" in the sidebar, and if you open it from a clip's ramp, that clip is selected. "Clear" removes both fades of the selected clip or join
Where fades can't be added
You can't add a clip fade to a clip end on the side of a join that has a transition. The input field in the sidebar is disabled, and the reason is shown. Remove the transition to set the fade
Go to start / Go to end
The buttons in "Fade" in the sidebar move the playhead to the start / end of the video. The overall fade applies only at both ends, so use these to check how it looks in the preview

Fades appear in the preview just as they do on export. Frames where the overall fade and a clip fade overlap get both. Set fades for each audio track in Audio and background music, and the switching at joins between clips in Transition.
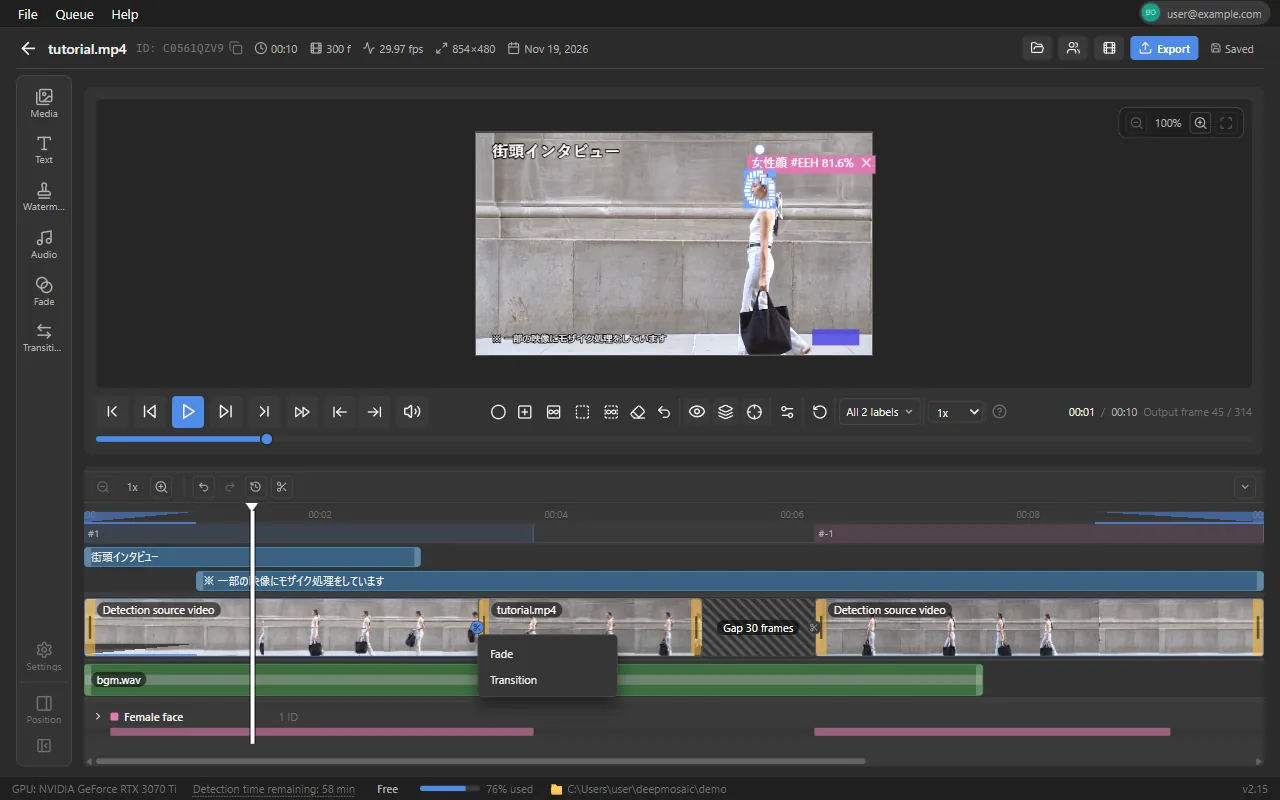
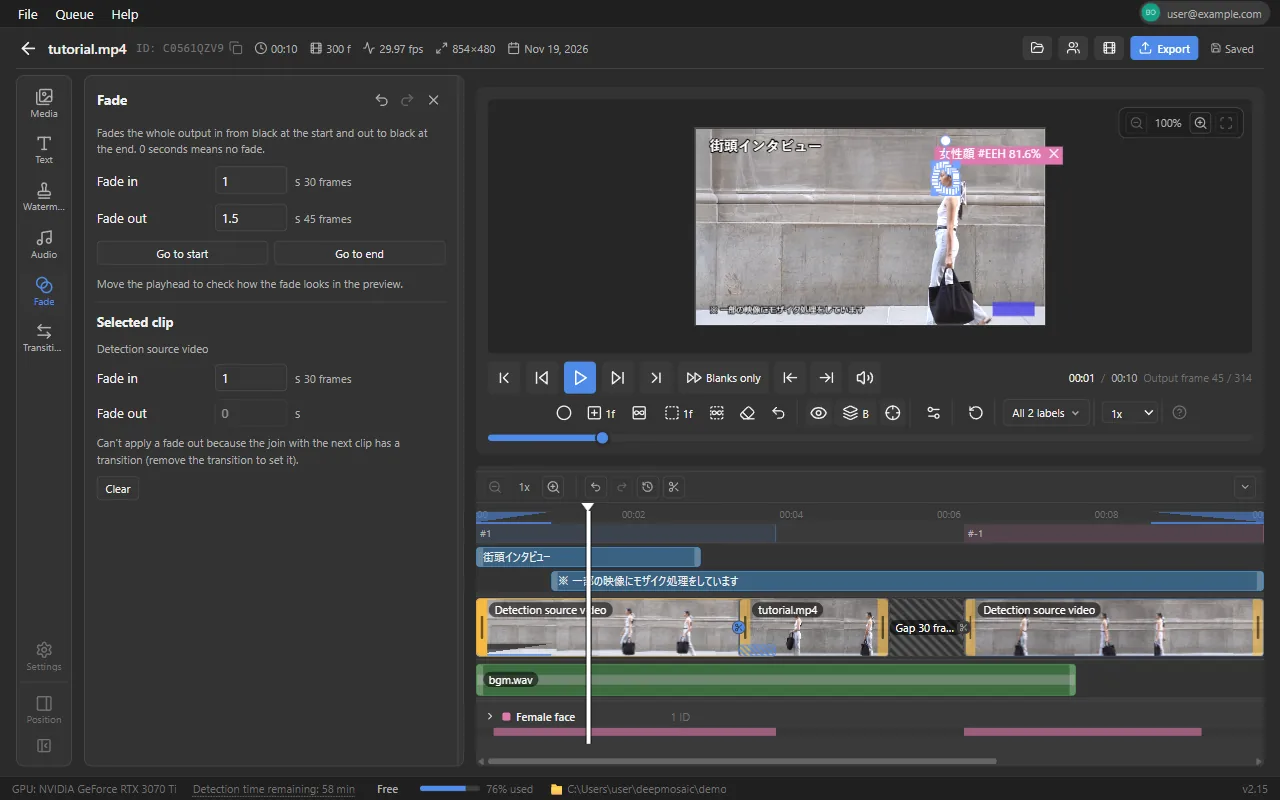
The scissors badge at the first join on the timeline has been pressed, and a menu with 2 items, "Fade" and "Transition", is open just below it. A transition bar with diagonal lines appears at the join
Menu opened from the scissors at a join (Fade / Transition)
"Fade" in the sidebar, opened by clicking the ramp of the first clip. An overall fade in of 1 second, an overall fade out of 1.5 seconds, and a fade in of 1 second for the selected clip are entered. Because the next join has a transition, the clip fade-out field can't be used and the reason is shown. Ramps appear at both ends of the ruler and at the bottom left of the first clip
Fade settings in the sidebar (overall and selected clip)

Timeline editingTransition

Add a switching effect (transition) at the join between adjacent clips. Press the scissors at a join and choose "Transition" to open "Transition" in the sidebar (the drawer heading is also "Transition") with that join in focus, then choose the type and length. You enter the type and length only in the sidebar (not on the timeline). When there is only one clip, there is no join, so you can't add one. You can't add a clip fade to a clip end on the side of a join that has a transition.
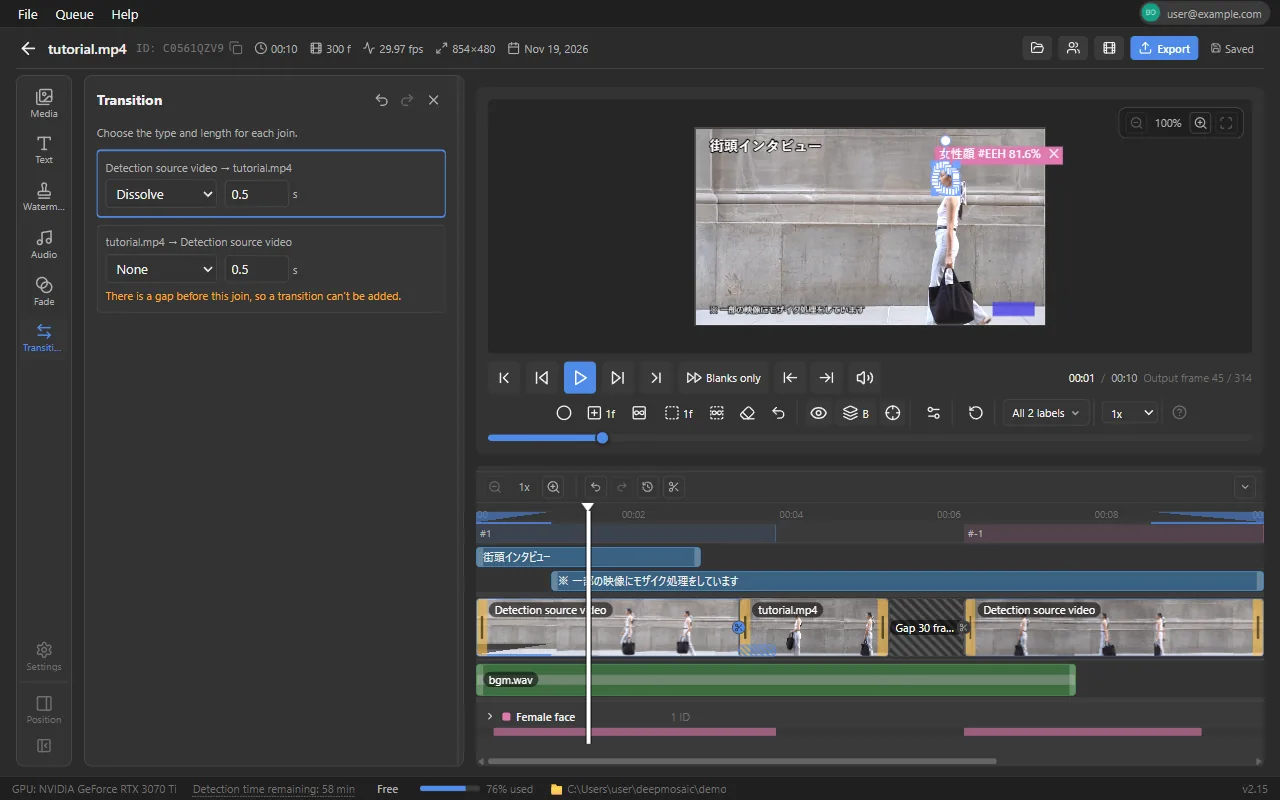
Type
8 types: Fade / Dissolve / Wipe (left, right) / Slide (left, right) / Fade to black / Fade to white
Adding a transition
Press the badge (scissors) at a join on the timeline and choose "Transition" from the menu. The row for that join is selected in the sidebar's list of joins (each row shows the previous clip and the next clip). Choose a type ("None" removes it) and set the length from 0.1 to 5 seconds. Once added, a bar with diagonal lines appears at the join, with the same length as the overlap of the clips before and after it. Because the clips before and after overlap by that length, the whole video becomes that much shorter
Bar and badge
Clicking the bar with diagonal lines (or selecting it and pressing Enter) opens "Transition" in the sidebar directly, without the menu. Hover over the badge to see the current type and seconds
Joins with a gap
You can't add a transition at a join with a gap (black screen) in between. The reason is shown in that join's row in the sidebar (gaps aren't closed automatically). If you create a gap there after setting a transition, the transition stops taking effect, and it works again when you close the gap
Clip fade
At a join that has clip fades, the row shows the note "If you add a transition, the fades at this join are ignored on export." The fades aren't removed automatically
Preview
During the overlap, the clips before and after are combined and shown with the same kind of switching as on export. On the later clip's side, the preview doesn't show mosaic (it is applied on export)
"Transition" in the sidebar, opened by clicking the bar with diagonal lines at a join. Fields for choosing the type and seconds are listed for each join: the first join is Dissolve 0.5 seconds and the second is None. Scissors badges and bars with diagonal lines appear at the joins on the timeline
Transition settings opened by clicking a join bar

Export and integrationExport

Use the "Export" button in the edit page header (Ctrl+Enter) to set up the export. Press "Start" to add the job to the queue, and follow its progress in a dedicated window. Any unsaved edits are saved automatically when the export starts.
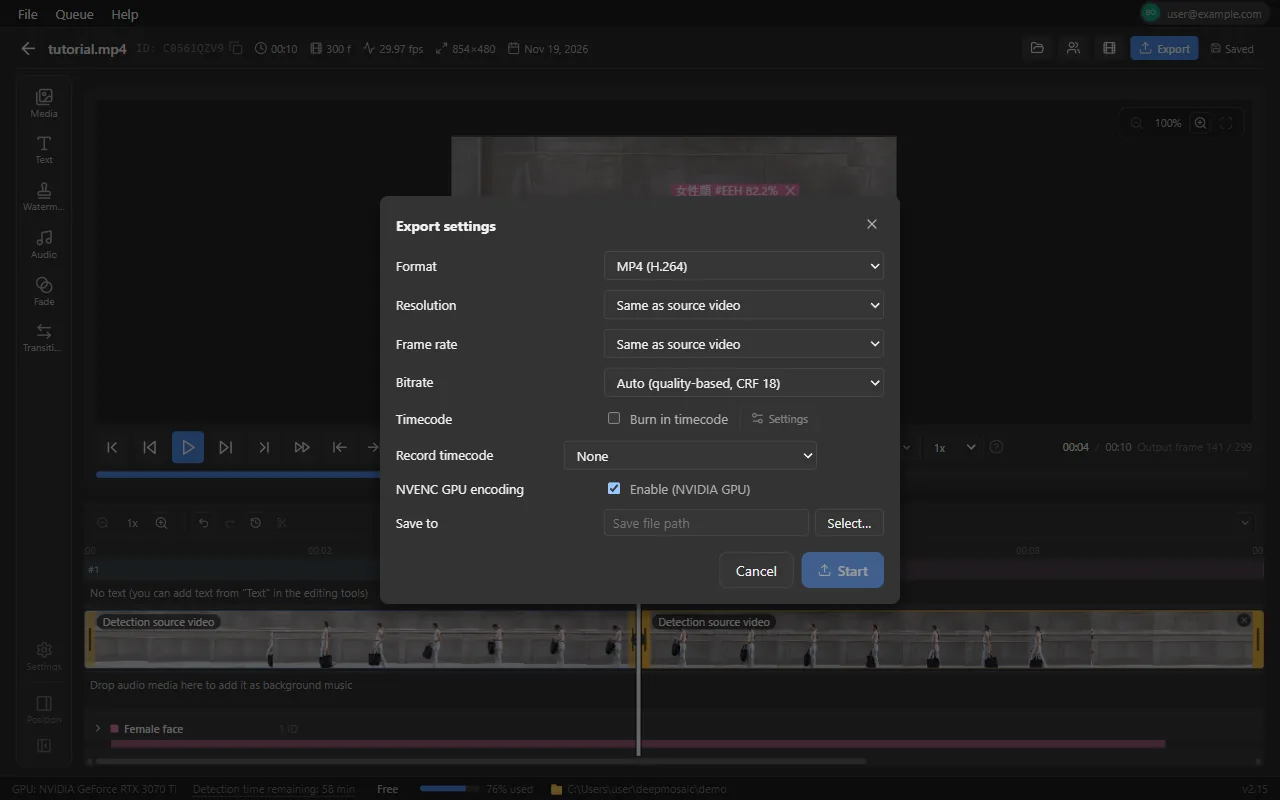
Format
MP4 (H.264) / MP4 (H.265 / HEVC) / MOV (ProRes 422) / MOV (ProRes 422 HQ) / WebM (VP9) / WebM (AV1) / MKV (H.264) / MKV (H.265) / AVI (H.264; for compatibility with editing software, always exported on the CPU as H.264 without B-frames) / MOV (DV) / MOV (DNxHR SQ) / MOV (DNxHR HQ) / MOV (DNxHR HQX 10bit) / MOV (CineForm)
Resolution
Same as source video / 4K DCI (4096x2160) / 4K UHD (3840x2160) / QHD (2560x1440) / Full HD (1920x1080) / HD (1280x720) / SD (854x480) / SD NTSC (720x480) / SD PAL (720x576) (for DV)
Frame rate
Same as source video / 23.976 (film) / 24 / 25 (PAL) / 29.97 (NTSC) / 30 / 50 / 59.94 / 60 fps
Bitrate
Auto (quality-based, CRF 18) / 50 / 20 / 10 / 5 / 2 Mbps. For DV / DNxHR / CineForm, the bitrate is determined by the format and can't be selected
Timecode
"Burn in timecode" burns the timecode into the video. Use "Settings" to change the text size, position, color, and display format (Timecode settings)
NVENC GPU encoding
Hardware encoding on an NVIDIA GPU. With a driver older than 570, a warning appears and the video is exported on the CPU (libx264). It isn't used for formats the GPU doesn't support, such as ProRes / VP9 / AV1
Save location
By default, the file name is the same as the source video (with the extension of the selected format). To prevent accidental overwrites, you're asked to confirm the folder every time
Previous settings
The format, resolution, frame rate, bitrate, timecode, GPU, and save folder you used last time become the defaults for the next export
Warning
If there is nothing to apply mosaic to (no detections, everything excluded, and so on), "Mosaic will not apply to any area." appears. Check for missed detections before you export
Record timecode
Choose "None" (default), "Carry over the source video timecode", or "Custom value" to record timecode information in the exported file (it isn't drawn on the video). This is a separate setting from "Burn in timecode", which burns the timecode into the video, and you can use both together. Enter a custom value in the format HH:MM:SS:FF. Drop-frame uses the format HH:MM:SS;FF and is available only at 29.97 / 59.94 fps. If the value doesn't match the format, you're notified before the export starts. "Carry over the source video timecode" is available only when the frame rate is "Same as source video". If the source video has no timecode, the timecode starts at 00:00:00:00. If the timeline starts partway through the source video, the timecode starts from the source timecode at that point. In MKV, the timecode is kept only as a tag, and some editing software doesn't read it, so MOV is recommended. This setting applies only to the current export and doesn't become the default for the next one
Export settings dialog

The mosaic block size is adjusted automatically so that it doesn't fall below the self-regulation standard (the long side divided by 100, minimum 4px) for the export resolution. Even when you export 4K media at Full HD, the output video meets this standard.

Areas covered by an exclusion mask get no mosaic and are exported as the original video, and their edges blend in with the edge feather. For a detection box that runs off the edge of the frame, mosaic is applied to the part inside the frame, based on the shape extended beyond the edge of the frame during detection (the shape isn't squashed at the edge).

"MOV (ProRes 422)" exports in ProRes 422. Its image quality (bitrate) is lower than "MOV (ProRes 422 HQ)", so the files are smaller (roughly 2/3 the size). In earlier versions, choosing "MOV (ProRes 422)" still exported in 422 HQ. If you need the same quality as before, choose "MOV (ProRes 422 HQ)".

"MOV (DV)" can export only 720×480 (29.97 fps) and 720×576 (25 fps). "MOV (DNxHR …)" and "MOV (CineForm)" can export only videos whose width and height are even numbers, and "MOV (CineForm)" also requires a width that is a multiple of 16 and a height of 32 or more (otherwise, the reason is shown when you start). All of these formats use a MOV container, and the files are dozens of times larger than H.264, so keep an eye on the free space at the save location.

Export and integrationTimecode settings

To open these settings, turn on "Burn in timecode" in the export settings and press "Settings" next to it. Burned-in timecode helps reviewers refer to positions in the video when you export a review copy (for example, to share with others for checking).

Text size (px)
Any number. Default: 64px (actual pixels at the export resolution)
Position
Top left / Top center / Top right / Center / Bottom left / Bottom center / Bottom right. Default: Bottom right
Color
White / Black / Yellow / Green. Default: White
Draw an outline
Adds an outline around the text so it stays readable on bright backgrounds (on by default)
Display format
HH:MM:SS:frames (default) / HH:MM:SS / HH:MM:SS.milliseconds / Frame number

When the setting is on, the timecode also appears with the same look in the edit page preview and in the progress window preview.
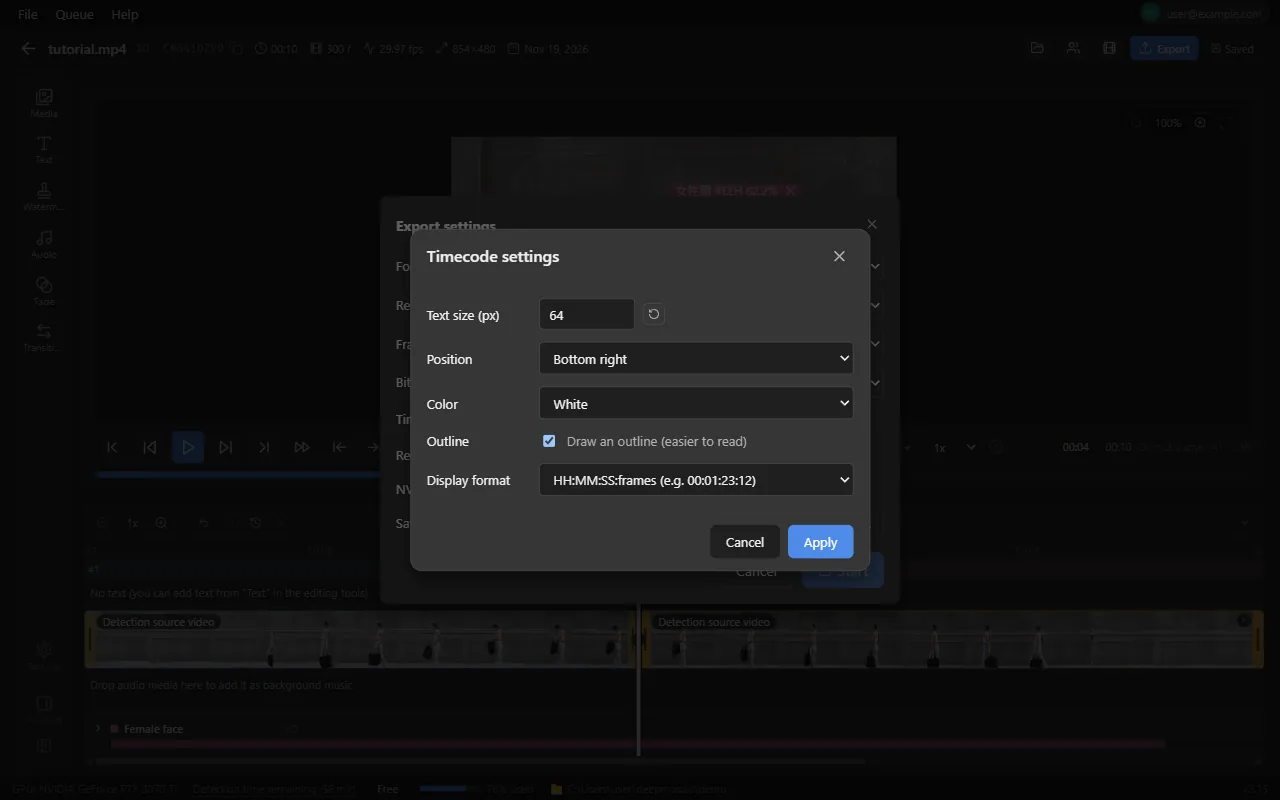
Timecode settings dialog opened over the export settings
Timecode settings

Export and integrationExport progress window

When you start an export, a progress window opens as a separate window for each job. The job continues even if you close it, and you can reopen it at any time with "Open progress in a separate window" in the queue.
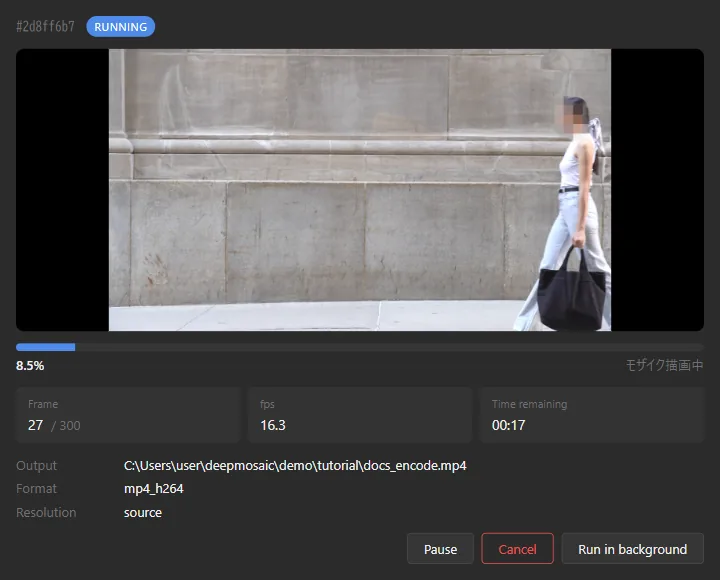
Preview
Shows the frame being exported at regular intervals (with the timecode when timecode burn-in is on). Right after the start, "Extracting the first frame…" appears, and while the job is waiting its turn, "Waiting in queue" appears
Progress
The percentage complete, "Frame N / M", "Speed (fps)", and "Time remaining". When the export finishes, "Complete ✓" appears; when it's stopped, "Canceled"; and when it fails, "Failed" with the error details
Output info
The output path, format, and resolution
Pause / Resume
Pauses the export. Useful when you want to lighten the load on your PC while you do other work
Cancel
Stops the export (it can't be resumed). The partially written file is deleted
Close
Only closes the window. The job continues
Export progress window, showing a preview of the frame being processed, the percentage complete, speed, and time remaining
Progress window

Export and integrationExporting and importing projects

You can package a project (detection results and edit data) into a single zip file and hand it over to another PC or another person. This lets you split the work, for example by running detection on your own PC and asking someone else to review and correct the results.

Export

Choose "Export project" from the video card menu on the home screen, and specify where to save the file. The zip contains the source video (if it's still in the project folder), detection results, edit data, scenes, thumbnails, representative face images, and the media you added in timeline editing (video, audio, and images). If the source video can't be found, a message tells you so, and everything except the video is exported.

Import

Choose "File ▸ Import project" from the menu and select the zip. The imported project is extracted into the current project folder and added to the home screen.

If a project with the same project ID is already on your PC, "Matching project found" appears, and you choose one of the following.

Import edits
Keeps your existing project as is and replaces only the edit data with the contents of the zip. Any timeline media in the zip that you don't already have is added before the replacement (your existing media isn't deleted). The edit data from before the replacement is backed up automatically. Use this to apply the changes when someone you asked to do the work sends the project back
Add as new project
Assigns a new ID and adds it as a separate project. Your existing project doesn't change

While the project is being imported, the progress (extracting, then registering) is shown. On the PC that imported the exported project, you can edit it, export it, and send it to Premiere Pro right away.

Export and integrationPremiere Pro integration

From the video card menu or the button in the edit page header (Ctrl+Shift+P), you can automatically import the detected mosaic information into an Adobe Premiere Pro project. Before sending, the app automatically checks Premiere Pro itself, the plug-in, and whether Premiere Pro is running, and if anything isn't ready, it guides you through the setup steps. This feature is available only in the Windows app.

Requirements

  • Adobe Premiere Pro 25.3 or later is installed
  • You're signed in to the Creative Cloud desktop app (required to install the plug-in automatically)

First-time setup

  1. Press "Import into Premiere Pro". If the plug-in isn't installed yet, "Download and install" appears. Press it to download and install the Premiere Pro plug-in (UXP) for Deepmosaic
  2. "The plug-in has been installed." appears. If Premiere Pro was already running, restart it and then run the import again
  3. If Premiere Pro isn't running, "Premiere Pro must be started to send the detection results." appears. Press "Start and send"

If the Creative Cloud component can't be found, "The Creative Cloud component needed for automatic installation was not found" appears. Install or update the Creative Cloud desktop app, or install the plug-in manually from "Open plug-in folder".

Sending and results

When you send, the "Premiere Pro integration" widget appears at the bottom right of the screen and moves from "Processing in Premiere Pro…" to "Import into Premiere Pro complete". Premiere Pro then does the following to the sequence in the open project.

  • The original clip is duplicated onto the video track above, and Premiere Pro's standard "Mosaic" effect is applied along with a "Crop" effect keyframed to match the detection boxes (1 clip per detected object)
  • The boxes from the detection results, the block size set by the pixel size, and the overall edge feather value are carried over. Changes made on the edit page (adding, moving, deleting, or reshaping boxes, mosaic exclusions, and exclusion masks, including existing boxes changed into exclusion masks) and "Blur strength" and "By time" in the mosaic settings are not carried over, but they are applied when you export
  • When many objects overlap at the same time, more tracks are added (up to 15 tracks)

If any box in a project has "Invert (apply outside)" turned on in the mosaic settings, the project isn't sent (Premiere Pro can't reproduce inversion, so the outside would be output without being hidden). In that case, "Sending was stopped because N settings use Invert (apply outside). Premiere Pro can't reproduce inversion, so the outside would be exported without being covered. Turn off Invert, or export from this app." appears. Turn off inversion, or export with this app.

After the import, you can adjust the position and block size with normal Premiere Pro editing. If there's no response for a while after sending, "Timed out" appears. Check that the plug-in panel is open in Premiere Pro, then try again.
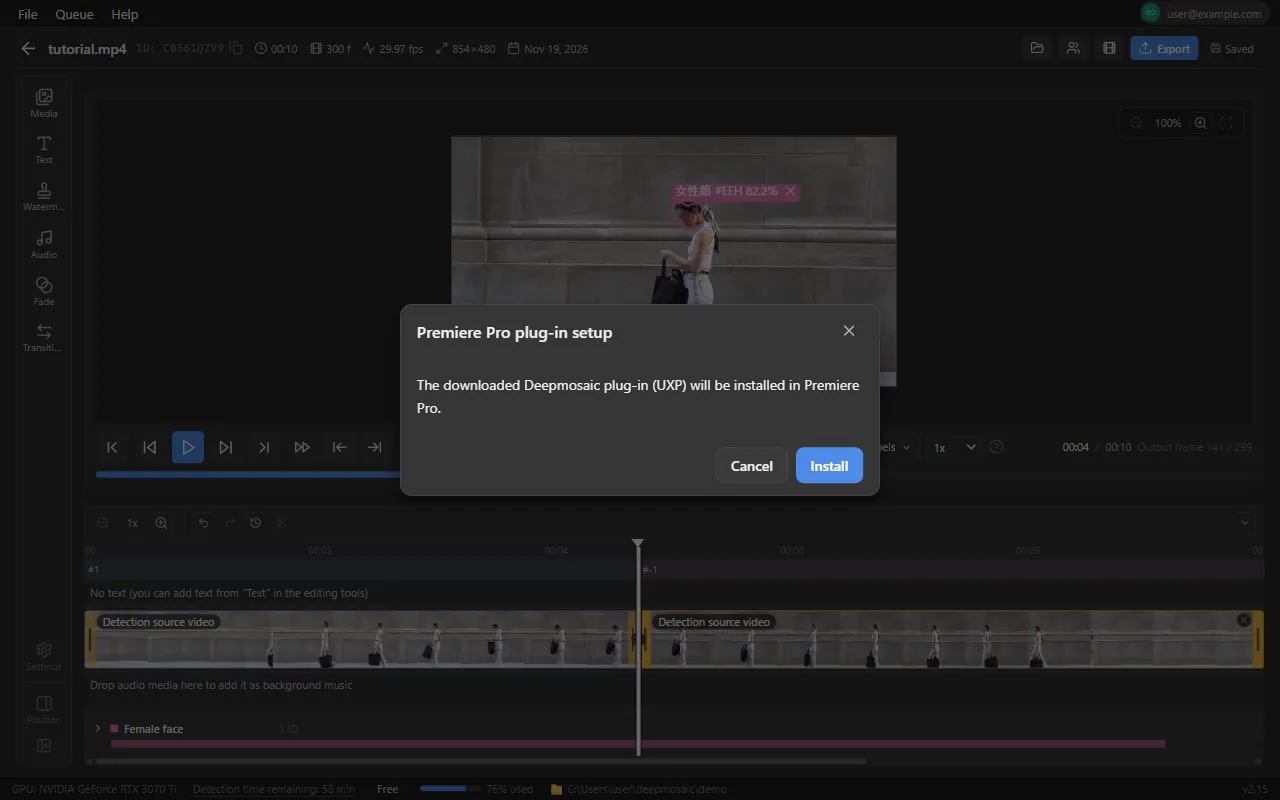
Guidance dialog shown when you press Import into Premiere Pro
Premiere Pro integration guidance. The next step shown depends on what is ready

Export and integrationChecking for missed detections

AI detection isn't perfect. Before you export, check and correct the results with the following tools. Responsibility for the final check and for how the content is expressed rests with the creator.

  • Jump to missing frames: Press [ and ] to move back and forth between frames where detection drops out. Use this to track down a "Gap" (detections exist before and after but are missing in between). To narrow down the classes while checking (for example, body areas only), use "Filter" in the "Labels" menu on the toolbar
  • Play blank frames only (B): Plays only the frames with no detections, one after another, so you can find places where something is visible but has no box
  • Mosaic preview (M): Review the whole video in a view close to the exported result. You can also hide the overlay (H) to see only the original video
  • Overview on the timeline: Detected segments are shown as bands by class and by tracking ID. If a band for the same ID is broken, that is where tracking was interrupted
  • Person gallery (P): Review face detections grouped by person, and decide for each person whether mosaic is needed
  • Confidence threshold: Temporarily hide low-confidence detections to sort things out, then lower the threshold to pick them up again
  • Safety margin: Use "Size (box expansion)" to scale detection boxes between 0.5x and 2x, so you can leave a margin instead of cutting it close
  • Add and delete manually: Where nothing was detected, add a box with 1 (1 frame) / 2 (all following frames). Delete false detections with a right-click or with the eraser (E+right-drag). To leave parts without mosaic, use an exclusion mask with 3 / 4

The cases AI struggles with (extreme backlighting, heavy motion blur, partial occlusion, compositions that are rare in the training data, and animation / 3DCG) are listed on the home page. If your media falls into any of these cases, review it more carefully.

MaintenanceUpdates

In the Microsoft Store edition, new versions are delivered by Microsoft Store and installed automatically. AI models are downloaded and replaced automatically at startup when new ones are available. The following describes the installer edition (until December 31, 2026; see Switching).

The installer edition automatically checks for a new version when it starts. If an update is available, a dialog appears, and you choose either "Update now" or "Later".

When it checks automatically
Right after launch, then every hour, and when you return to the window. While detection or export is running, the dialog waits until it finishes
Update now
Downloads and applies the new version, and the app restarts automatically. If a process is running, update after it finishes
Later
No further automatic checks are made during this session. The app checks again the next time it starts
Detection engine
Included in the app and updated together with it
AI models
If newer ones are available at launch, they are downloaded and replaced automatically (the same mechanism as the initial setup)

Checking manually

Select "File ▸ Check for updates" in the menu to see "Current", "Latest", and "Status" for three items: the app, the engine, and models and assets. When "Updates are available" is shown, you can apply them with "Update now" (the app) or "Update models and assets". "Check again" checks once more. If the app can't connect to the network, "Check your network connection, then try again." appears.
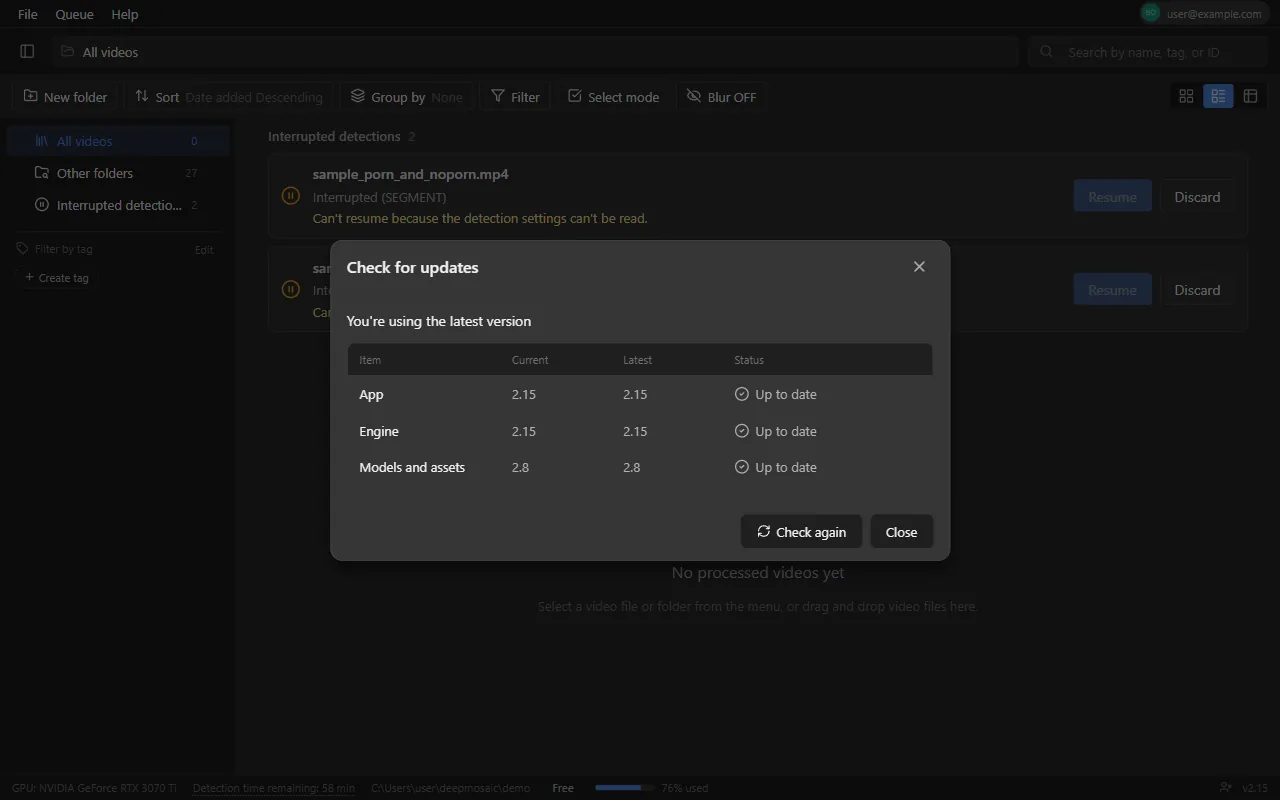
The Check for updates dialog, showing the current and latest versions of the app, engine, and models and assets
Check for updates

MaintenanceWhere data is stored

Deepmosaic does not send your videos or their detection results to a server. Everything is saved in the following locations on your PC.

Project folder
Default: C:\Users\<user name>\deepmosaic. Each video has its own subfolder containing a database that holds the detection results and edit data (project.db), thumbnails, representative face images, and more. Loaded videos themselves are not copied; they are referenced from their original location. Media added in timeline editing (video, audio, and images) is copied to the assets subfolder and is also included when you export the project (Project folder)
%USERPROFILE%\.deepmosaic
Settings (config.json), the catalog of the home list, folders, and tags (catalog.db), encrypted sign-in information, the device ID, and logs (logs\app.log; logs for each detection are in logs\runs). When you contact us, we may ask you to attach the logs
%LOCALAPPDATA%\deepmosaic
AI models, the GPU runtime (PCs with an NVIDIA GPU only), and more (about 10GB in total). Managed automatically by the initial setup and the check at launch. The detection engine and video processing tools are included in the app
Exported videos
The save location you specified when exporting. The app does not manage them

If you put the project folder inside a cloud-synced folder (such as OneDrive), autosave during editing can conflict with syncing and result in "Save failed". We recommend a local folder.

project.db and catalog.db are databases managed by the app. While the app is running, do not open them with other tools or modify their contents (doing so can corrupt your data). Make backups or copies after you quit the app, and if there are files whose names start with project.db (-wal / -shm), copy them as well.

MaintenanceUninstall

  1. Open Windows "Settings" > "Apps" > "Installed apps"
  2. Find "Deepmosaic" in the list and select "Uninstall" (administrator privileges are not required)

You can uninstall the Microsoft Store edition in the same way. There is no check box on the confirmation screen, and your settings, sign-in information, and project folders are left on your PC (Differences between the Microsoft Store edition and the installer edition).

When you uninstall the installer edition, the AI models and other data (%LOCALAPPDATA%\deepmosaic, about 10GB) are deleted automatically (if you reinstall, they are downloaded again during the initial setup; from version 2.18, the installer edition doesn't delete them on a PC where the Microsoft Store edition is installed).If you select the "アプリのデータとプロジェクトフォルダを削除する (中の書き出し動画も削除されます)" (Delete app data and project folders; exported videos inside are also deleted. This item appears in Japanese) check box on the uninstall confirmation screen, your settings and sign-in information (%USERPROFILE%\.deepmosaic) and the project folders that Deepmosaic created (detection results and edit data, including any exported videos saved inside those folders) are also deleted. If you leave it unselected, these remain. Original videos and exported videos outside the project folders are not deleted. Nothing is deleted when you update.

To delete the account itself, see Deleting your account.

MaintenanceHow usage time is measured

  • What is measured: The running time of each video whose detection has completed is added to a cumulative total. The remaining time appears in the footer ("Detection time remaining" on the Free plan, "Remaining this month" on paid plans)
  • When time is counted: Time is added when detection completes. Export is not counted. Even if you narrow the detection range, the length of the whole video is counted
  • How limits apply: There are no overage charges. If you use up the included hours of a paid plan, your allowance is restored on the next renewal date. If you need more than that, please ask us about Enterprise, our plan for businesses (custom quote; pricing page)
  • Free period: You can use the Free plan for 7 days from the day you first launch a new version. It ends when you reach the total limit or the number of days, whichever comes first
  • What is not counted: Running detection again on the sample project is not counted. Detecting the same video again is not counted twice
  • When little time remains: Once you have used 80% of the free allowance, "You have used N% of your free available detection time (… left)." appears once each time you launch the app. When it is used up, a dialog appears when you start detection, prompting you to change your plan (or to sign in, if you are not signed in)
  • What is sent: For measuring usage time, the only data sent is usage (seconds of video), file hash values, and the hash value of the device identifier (the device identifier is used to manage the free allowance, and it cannot be used to identify a device or an individual; while you are signed in, it is linked to your account). In addition, to investigate problems and improve the app, we send records of screen navigation and operations (recorded with fixed names; they do not include text you type), records of how the app runs such as processing times and errors, and error diagnostic reports when an error occurs (file names and paths are not sent). File names, video, and the coordinates of detection results are not sent. For details, see the data transmission disclosure and the Privacy Policy(Japanese) (Sections 12 and 13)

MaintenanceSystem requirements

  • OS: Microsoft Windows 10, 11 (64-bit)
  • Memory: 8GB or more (16GB recommended)
  • GPU: NVIDIA GeForce RTX 3000 series or later (CUDA-capable) + the latest driver. GPUs below the RTX 3000 series have not been tested. The app also runs on the CPU on PCs without a GPU, but processing is much slower, and mosaic refinement (mosaic that follows the shape of the object) is not available. On a PC whose GPU has less than 4 GB of memory, detection uses the lightweight model, and mosaic refinement is not available. Export with NVENC requires driver 570 or later
  • Storage: About 10GB for AI models and other data during the initial setup
  • Internet connection: Required to download the models during the initial setup and for license authentication

Measured processing speeds by GPU, the list of supported formats, and the status of a macOS version are on the system requirements page. For the requirements of the browser version, see Supported browsers and requirements for the Web app.

MaintenanceTroubleshooting

Setup

  • If downloads keep repeating at startup: Check your connection, then restart the app. Only corrupted data is downloaded again automatically.
  • If "Integrity check failed" keeps appearing: Try "Download again", and if that doesn't help, contact us. If "Self-test failed" or "Missing runtime dependency" appears: Contact us from "Open support form", including the message that was shown (see the list of errors in Initial setup).
  • If "GPU acceleration" at the bottom right of the screen shows "Failed to get the files. Press "Retry", or they will be fetched again the next time the app starts": Check your connection and press "Retry", or restart the app (it fetches the files again automatically the next time it starts). Until the download finishes, you can run detection on the CPU, but it is slower.
  • If "Windows security is temporarily blocking the detection engine from starting" appears: Windows features such as Smart App Control may hold a newly downloaded detection engine for a few minutes until its safety check is complete. The initial setup screen retries automatically every few minutes, so wait without closing it (you can also press "Retry now" to try again). If it still continues after a while, check the status in Windows Security app > App & browser control > Smart App Control settings (you can open the Windows Security app by searching for it from the Start menu), and if that doesn't help, contact us. When an update brings a new detection engine, the app keeps running on the current detection engine until the check is complete, and switches automatically as soon as it is.

Sign-in and plans

  • If the app stays on "Opening the sign-in page…" even though you authenticated in the browser: Close it with "Cancel", then press "Sign in" again.
  • If the confirmation code email doesn't arrive: Check your spam folder. It can take a few minutes to arrive, so wait a little, then resend the code on the sign-in page.
  • If you previously signed in with a password: From "Sign in", enter the confirmation code using the same email address, and you can sign in to the same account as before (Sign-in and license).
  • If "You cannot sign in right now. Try again later." appears: The authentication service is temporarily unreachable. Wait a while, then press "Sign in" again. If it continues, contact us through the contact form.
  • If "Your account is currently signed in on another device" appears: You can use one device at a time. Press "Continue" to switch to this device (Sign-in and license).
  • If an offline banner appears at the top of the screen: Local features keep working as usual. Only when "Sign in again." appears, sign in again from the profile menu.
  • If a plan change isn't reflected in the app: The app checks for changes when you bring its window back to the front (if at least 1 minute has passed since the last check), when you open the detection options, and every 5 minutes while the window is visible, and reflects a change within a few seconds (while detection is running, it is reflected after detection finishes). If it still doesn't change, restart the app.
  • If the remaining time doesn't go down or up: Usage time is added when detection completes. The larger free allowance from signing in takes effect the next time you launch the app after signing in.

Loading and detection

  • If existing mosaic isn't found: Make sure you ran detection with "Mosaic" turned on in the detection options, then check the following in order: whether the blocks are too small (especially in 4K media), whether it is blur or a blacked-out area (only block-style mosaic is supported), whether it is semi-transparent overlaid mosaic or blocks in the same color as the background, and whether you ran detection on a PC without a GPU (the results can differ slightly). For ranges that weren't found, draw additional boxes on the edit page (Finding existing mosaic and reapplying it).
  • If detection is extremely slow: Check that the GPU is recognized (the GPU indicator in the footer) and that your NVIDIA driver is up to date. Without a GPU, the app runs in CPU mode and is slower.
  • If no preview appears on the detection options screen: If "Could not get the video information" is shown, the file may be corrupted or in an unsupported format. If "The video processing files needed for the preview were not found" is shown, restart the app and let it finish downloading the required files.
  • If "Could not create the project folder in the save location for detection results" appears (on the detection options screen, "Can't create the project folder in the save location for detection results" is shown): The problem is not the video's location: the app can't write to the save location for detection results (the project folder). Choose the save location again ("File ▸ Select a project folder" in the menu, or "Choose the project folder again" on the detection options screen), or press "Use the default location". If folder protection in your security software is blocking writes, allow Deepmosaic, and also check the folder's access permissions. If the save location is on an external drive or a network folder, check the connection (Project folder).
  • If "No videos that can be processed were found" appears even though you chose a folder: Videos in subfolders aren't included. Choose the folder that directly contains the videos.
  • If you can't press "Start": The model files are being checked. Wait a while, or press "Retry" if an error is shown. If you have reached your limit, you need to change your plan (or sign in, if you aren't signed in). You also can't press it if your remaining available detection time is shorter than the full length of the video; the reason is shown above "Start" (the full length is counted even if you narrow the range; see Detection options).
  • If a video you ran detection on doesn't appear on the home screen: "All videos" shows only videos in the current project folder that were created with the account you are signed in with. Videos saved in another project folder can be found from the "Other folders" row in the sidebar (Project folder).
  • If "Sign in to use the high-accuracy model" appears: Once you sign in, PCs with a GPU can use the high-accuracy model from the next detection (until then, detection uses the lightweight model). If "Preparing the high-accuracy model" appears, detection uses the lightweight model until the download finishes.
  • If an interrupted detection can't be resumed: Check the reason shown on the card. It can't be resumed if, for example, the original video was moved or changed, or the project has been edited. In that case, "Discard" it, then load the video again (AI detection).

Editing

  • If "No detail data" appears: The project folder has been moved or deleted. Move it back to its original location, or remove the project from the list with "Delete project" and load the video again.
  • If "Save failed" appears: The app can't write to the project folder. Check the free disk space, the folder permissions, and conflicts with cloud sync (Where data is stored).
  • If the gender of a face is detected the wrong way around: You can correct it from the box's right-click menu or in the Person gallery.
  • If an ∞ box you placed manually disappears partway through: An ∞ box ends just before the frame where it was deleted. Add it again with 2 at the position where you want it to continue.
  • If "This project caused a problem the last time the app was launched" appears on the home screen: Press "Check". If no problem is found, you can open the project as usual. If a problem is found, try restoring it from the last saved state with "Repair".
  • If "N projects failed to convert" appears: Press "Retry". If it keeps happening, contact us.

Export

  • If "GPU encoding requires NVIDIA driver 570 or later" appears: Until you update the driver, the video is output using the CPU (it takes longer, but the result is the same).
  • If an export ends in "Failed": Check the free space and permissions of the save location, and whether the output file is open in another app. The error details appear below "Failed" in the progress window.
  • If "Mosaic will not apply to any area." appears: There are no detections, or all tracks have been excluded from mosaic. Check this on the edit page.
  • If you closed the progress window: You can reopen it with "Open progress in a separate window" under "Queue" in the menu bar.

Premiere Pro integration

  • If "Adobe Premiere Pro was not found on this PC." appears: Install Premiere Pro 25.3 or later.
  • If "The Creative Cloud component needed for automatic installation was not found" appears: Install or update the Creative Cloud desktop app and sign in to it, or install the plug-in manually from "Open plug-in folder".
  • If sending ends in "Timed out": Try again with the Deepmosaic panel open in Premiere Pro. Right after you install the plug-in, you need to restart Premiere Pro.

If this doesn't solve the problem, contact us through Contact us in the app or the contact form. Attaching the version shown in the footer and %USERPROFILE%\.deepmosaic\logs\app.log (for detection problems, also the file updated around the time of that detection in %USERPROFILE%\.deepmosaic\logs\runs, where the log of each detection is kept) helps us investigate faster.

MaintenanceAbout the Web app (browser version)

There is also a Web app that requires no installation and that you can use with the same account from a browser such as Chrome or Edge. Detection, editing, and export are all processed inside the browser, and your video is not sent to a server. The detection targets and the features of the edit page are the same as in the Desktop app, but there are some differences, such as these: export formats are limited to MP4 (H.264) / WebM (VP9 / AV1), it handles videos up to about 1.9GB and in practice only mp4 / mov, and it has no Premiere Pro integration, project import, resuming of interrupted detections, or regrouping of people.

How to use it, the supported browsers, and a list of differences from the Desktop app are covered in Web app guide. You can open the Web app at app.deepmosaic.co.jp.

MaintenanceBundled third-party software and licenses

The Desktop app includes the following third-party software. In the app, you can see the same list and the full text of each license from "Help ▸ Licenses" in the menu bar. The list shows only the software names; press a row to open its details, such as the version, license, provider, and where to get the source.

FFmpeg 8.1.3 (ffmpeg.exe / ffprobe.exe and 7 DLLs)

  • License: GNU General Public License version 3 (GPL v3). The full text is at https://www.gnu.org/licenses/gpl-3.0.html
  • Version and build: n8.1.3-27-g8dca1586f4. Built by BtbN/FFmpeg-Builds (release autobuild-2026-10-31-12-59, win64-gpl-shared-8.1). It is a shared build configured with --enable-gpl --enable-version3, consisting of ffmpeg.exe / ffprobe.exe and the FFmpeg DLLs that they load at run time (avcodec-62.dll, avdevice-62.dll, avfilter-11.dll, avformat-62.dll, avutil-60.dll, swresample-6.dll, and swscale-9.dll). Libraries including libx264, libx265, and libxvid (all GPL v2 or later) are statically linked into these DLLs. The list of linked libraries and their licenses can be found in "Help ▸ Licenses" in the app (ffmpeg-NOTICE.txt).
  • Where to get the source code (Corresponding Source under Section 6 of GPL v3): https://deepmosaic-r2-proxy.deepmosaic.workers.dev/third-party/ffmpeg/autobuild-2026-10-31-12-59/README-win64-gpl-shared-8.1.txt. We provide, free of charge, the source code of FFmpeg itself and of all libraries statically linked into its DLLs (av*.dll / sw*.dll), together with the build instructions (for as long as we distribute this FFmpeg and for at least 3 years after the last distribution). If you can't obtain it, contact us.
  • It is bundled as a separate program used to load and export videos, and it is not linked into the Deepmosaic app itself.

ONNX Runtime 1.26

Microsoft Visual C++ Redistributable

  • Provider: Microsoft Corporation. The runtime DLLs required to run the app (vcruntime140 / msvcp140 and others) are bundled as redistributable code as defined in the Microsoft Visual Studio license terms.

Third-party software downloaded on first launch (PCs with an NVIDIA GPU only)

The following components are not included in the app. They are downloaded automatically from our distribution source the first time, and only on PCs with an NVIDIA GPU (about 1.7 GB to download, about 2.4 GB after extraction). They are not downloaded on PCs without an NVIDIA GPU. Until the download finishes, the app runs on the CPU, with the same features.

NVIDIA CUDA / cuDNN and others (GPU acceleration components)

  • Provider: NVIDIA Corporation. On PCs with an NVIDIA GPU, NVIDIA Corporation software (CUDA / cuDNN and others) is downloaded from our distribution source in accordance with its license terms and saved on this PC. The downloaded software is used only for processing on the GPU.

ONNX Runtime CUDA execution provider

  • Provider: Microsoft Corporation. License: MIT License (the same as the bundled ONNX Runtime). Source: https://github.com/microsoft/onnxruntime
  • Downloaded together with the NVIDIA components above so that inference with the detection models can run on an NVIDIA GPU.

OrganizationOrganization management (Enterprise)

On the Enterprise plan, multiple accounts in your organization share one contract. Invite and remove members, check the organization code, and check usage for the whole organization from "Organization management" in the app. We send invoices by email (to change the number of accounts or cancel, contact us through the Enterprise inquiry form).

"Organization" in the profile menu appears only for accounts that have joined an Enterprise organization. In the profile menu (top right), "Organization" appears in the same place where "Plan subscription and management" appears on the Free plan and paid plans. For pricing and included hours, see the pricing page (minimum number of accounts: 1).

Select "Organization" to open the "Organization management" dialog, with a list of items on the left. Admins see 4 items: Permissions / Billing / Invoices / Usage, and members see 2: Permissions / Usage. The content of the selected item appears on the right. The top left shows "Joined as Admin" or "Joined as Member". If "Organization management isn't available yet" appears, wait a while and open it again.

Permissions (admins and members)

Organization members have one of two permissions: "Admin" or "Member".

Admin
Can invite members, resend invitation emails, and revoke invites; remove members and change their permissions; view the contract status; and check the organization code
Member
Can view the member list and the organization's usage. Can't invite (including resending invitation emails) or perform any billing operations
Billing account holder
The admin who applied for the contract. Shown as "Billing contact" in the list, and can't be removed or changed to a member. When there is only one admin, that admin can't be removed or changed either

The member list shows each member's name (or email address), permission, and last sign-in date (if the last sign-in can't be retrieved, the date they joined is shown instead). Above the list, "N / M seats in use" and the number of accounts still available are shown. Change permissions and remove members from each row of the list.

Inviting members

Only admins can invite members and resend invitation emails. With the Member permission, "Permissions" doesn't show the invite section, and a message saying so appears instead. To invite someone new, ask your organization's admin.

  1. The admin enters the email address of the person to invite and selects the permission (Admin / Member) in "Permissions", then sends the invite
  2. The person receives an invitation email. When they sign in with the email address that received the invitation email (first-time users can also start right away from "Sign in" on the sign-in screen), they are automatically joined to the organization and can start using the app. To use a different email address, use "Joining with an organization code" below
  3. Invites that haven't been accepted yet remain in the "Pending invites" list with their expiration date ("Valid until X"). Select "Resend" to send the invitation email again, or "Revoke" to invalidate it
Each invite also uses one account
Accounts are counted as "joined members + pending invites". You can't invite anyone when no accounts are available, so revoke invites you don't need, or contact us through the Enterprise inquiry form to add accounts
Resend interval
You can't resend repeatedly at short intervals. Wait about 1 minute, then try again
Invite expiration
Invites past their expiration date remain in the list as expired. Press "Resend" to extend the expiration and invite the same email address again
If the email doesn't arrive
Check your spam folder. If the address is correct, ask your admin to select "Resend". If it still doesn't arrive, you can use "Joining with an organization code" below

Joining with an organization code

Instead of an invitation email, you can also join with an "Organization code" shared across the organization. Use this when many people need to join, or when you want to distribute the code within your company and have each person register on their own. We send the organization code in the welcome email when your contract becomes active (see "How to sign up (quote and payment)" below).

  1. The admin checks the organization code in "Billing" (it's shown in groups of 4 characters, like ABCD-1234-EFGH, and can be copied with the button next to it). Only admins can see the organization code
  2. The person joining selects "Have an organization code? (business)" on the sign-in screen, enters the code in the "Organization code" field, and then selects "Sign in". After authentication in the browser finishes, they return to the app joined to the organization

The only way to join is the "Organization code" field on the sign-in screen. You can't join from the menu after signing in. If you're already signed in, sign out first, then enter the code in the "Organization code" field on the sign-in screen and sign in again.

Even if the organization code is wrong or there aren't enough accounts, the sign-in itself succeeds; you just aren't added to the organization. If "Organization" doesn't appear in the profile menu, check the code and the number of available accounts with your admin, then sign in again using the steps above. Anyone who knows the organization code can join. Don't share it with anyone who isn't involved. An account can belong to only one organization. If you already belong to another organization, "You already belong to another organization." appears and you can't join.

Joining from the link in the welcome email

Starting with 2.13, you can open the app from the link in the welcome email and join. You don't need to type the organization code.

  1. Open the link in the welcome email, and the "Open Deepmosaic" page appears in your browser. Select "Open in app" (if you haven't installed the app yet, get it from Microsoft Store first)
  2. The app starts (or comes to the front if it's already running), and the sign-in screen opens as "Organization sign-in" with the organization code already entered
  3. Select "Sign in" and sign in to join the organization

Admins don't enter an organization code. When you open the link for admins, no organization code is entered, so just sign in with the email address that received the welcome email. If the app doesn't open, copy the organization code from the page, select "Have an organization code? (business)" on the app's sign-in screen, and paste it into the "Organization code" field.

What the Enterprise plan includes

Price
Custom quote (We will guide you individually based on your scale of use and how you operate)
Included hours
Number of accounts × 20 hours, shared as a pool
Billing
An invoice is issued for each month of use
Payment method
Invoice (bank transfer)
API use and system integration
If you would like to use it via an API or integrate it into your company's systems and services, please contact us here as well.

Talk to us about getting started

How to sign up (quote and payment)

Enterprise is a contract based on a quote (minimum number of accounts: 1). You can't apply directly from within the app.

  1. Contact us through the Enterprise inquiry form. We'll ask about the number of accounts you plan to use and your requirements
  2. We send you a quote. It lists the company name, number of accounts, price per account, detection time per account (or unlimited), maintenance fee, what the monthly fee covers, contract type, and payment due date. Along with it, we send our terms and conditions of the transaction and a purchase order form
  3. If the quote is acceptable, place your order with the purchase order form. After confirming your order, we send you an order acknowledgment
  4. For each month of use, we send an invoice for that month (one month's worth, with no proration). Pay by bank transfer (you pay the transfer fees; the payment due date is stated in the quote and on the invoice)
  5. Your contract becomes active as soon as we confirm your payment. At the same time, we send the "組織のご利用を開始できます" (You can start using your organization) welcome email with your organization code to the email address you registered when requesting the quote
  6. Install the app and sign in with the email address that received the welcome email, and you automatically join as the organization's admin (admins don't enter an organization code). Other members can join by selecting "Have an organization code? (business)" on the sign-in screen, entering the organization code from the welcome email in the "Organization code" field, and signing in (see "Joining with an organization code" and "Joining from the link in the welcome email" above)
  7. Invite members from "Organization management" (see "Inviting members" above)

You can check the contract status (status, payment method, next renewal), the number of accounts and the detection time per account, and the organization code in "Organization management" > "Billing" in the app. Only admins can open "Billing" and "Invoices".

Payment method
Bank transfer against an invoice issued by us (you pay the transfer fees). The bank account to transfer to is stated on the invoice
Billing cycle
We issue one month's invoice for each month of use (no proration). Payment is due within the number of days stated in the quote (standard: 30 days from the date of issue). Your usage period is extended only for the months whose payment we have confirmed. There is no minimum term and no initial fee
Changing the number of accounts
To increase or decrease the number of accounts, contact us through the Enterprise inquiry form. We'll prepare a quote for the new number of accounts and apply it to invoices from the following month onward (see below for the lower limit when reducing)
Lower limit when reducing
You can't go below the number in use or below 1 account ("in use" is the number of accounts members are using. To go below that, remove members first)
Cancellation
To discuss cancellation or payment methods, contact us through the Enterprise inquiry form (or our contact form). There is no cancellation penalty
If payment can't be confirmed
If payment remains unconfirmed, Enterprise features stop for the whole organization (this applies to all members, not just admins). They resume as soon as we confirm your payment

Organizations that previously subscribed by credit card can change the number of accounts and use the payment portal (change the payment method, view receipts, cancel) from "Billing", and check past charges from "Invoices".

Invoices (past charges)

For contracts paid by bank transfer, we send invoices as PDFs by email. They don't appear in "Invoices" in the app ("No invoices yet." appears there). The following applies to organizations that previously subscribed by credit card.

"Organization management" > "Invoices" lists all past charges, newest first. Only admins can open "Invoices".

After payment, it may take a little while for the status to change to "Paid". Select "Refresh" to get the latest status. Bank transfers are reflected after the payment is confirmed.

Columns
Billing date, invoice number, period (the period covered as stated on the invoice), amount, and status. If the amount paid differs from the amount billed, the amount paid is also shown
Status
Shown as one of "Draft", "Unpaid", "Paid", "Void", or "Uncollectible"
Older invoices
Press "Load more" at the end of the list to load earlier invoices, 10 at a time
View / PDF
Select "View" on a row to open the invoice in your browser, or "PDF" to save it as a file

Usage (pool and breakdown)

Enterprise included hours are not allotted to each member individually; they are a pool shared by the whole organization.

  • Pool size: The number of accounts multiplied by the detection time per account. The detection time per account is set in the quote for each contract (standard: 20 hours / month). Contracts with unlimited detection time are also available. Admins can check "Detection time per seat: N hours / month (shared across the organization)" or "Detection time: unlimited" in "Billing"
  • Breakdown by member: A list shows how much each person has used. Because the pool is shared, when one person uses a lot, the time remaining for the other members goes down too
  • Reset date: The start and end dates of the current period are shown. After the end date, the next period starts and usage returns to 0. Unused time does not carry over to the next period
  • How it's counted: The running time of each video whose detection has completed is added. For details, see How usage time is measured
  • Display: "Usage" shows the usage time for the current period, the limit, and the time remaining (under 1 hour, down to minutes and seconds). On unlimited contracts, "N used (unlimited)" appears. Before the contract procedure is completed, "This period's allowance has not started yet (before contract)" appears

Both admins and members can check usage.